
Tie dye socks are such a fun project to make.
They come together quickly and easily, resulting in custom, colorful socks that are completely unique to you. There are so many ways to create epic looks with tie dye socks.
Today I’m sharing a complete guide to tie dyeing socks, including all the tips and tricks you’ll want to know to make your project go smoothly.
Links in this post may be affiliate links, which means I may earn a commission if you make a purchase from any of them, at no additional cost to you. You can find out more information by reading my full disclaimer.
Why Tie Dye Socks?
Tie dyeing is such a popular project lately. It seems like you can find tie dye patterns in just about everything.
Socks are a great item to tie dye for many reasons.
First of all, they’re small, and can be prepped for dyeing very quickly. It only takes a few seconds to fold a sock properly for tie dyeing.
Appropriate socks for tie dyeing are easy to find and inexpensive. Most tie dye projects work best with fabrics that are mostly cotton, and socks fit this bill perfectly. Plus they don’t cost a lot!
Tie dyed socks are super customizable. You can literally make them any color of the rainbow.
Tie dyeing socks also doesn’t use up a lot of materials. It only takes a little bit of dye to get good color on a sock. It’s the perfect project for using up dye that’s left over from other tie dye endeavors.
Tie dye socks are also a great project for tie dye parties. You can make a lot of them in a short amount of time, which is really fun.
They’re also a great project for beginners to try their hand at tie dyeing.
What You’ll Need
Tie dye socks don’t require a lot of materials to get started. Just a few simple items and you’ll be on your way to the coolest socks ever.
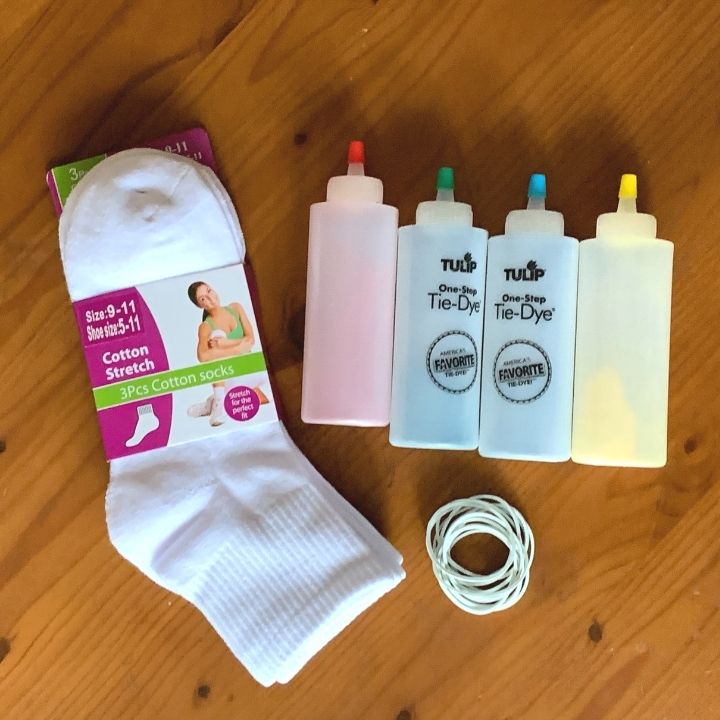

Supplies:
As I mentioned above, you’ll want to use cotton socks for tie dyeing. While 100% cotton will take the dye better than any other material, a blend of materials is ok as long as the vast majority is cotton.
I am a major fan of Tulip Tie Dye kits. They come with just about everything you need to complete a tie dye project, like rubber bands and disposable gloves.
I usually like to recycle old shopping bags for my tie dye projects, but for this one I recommend using sandwich baggies. They’re the perfect size to hold the socks and they’re quite inexpensive.
As you’ll see later in the tutorial, using a cookie rack during your tie dye process can make the tie dye process go a lot smoother. I’ll explain exactly how later in the post. While it’s not completely essential to have one when making tie dye socks, I highly recommend it.
Prepping Your Socks For Tie Dye
Before tie dyeing your socks, there are just a few things you need to do to to prepare so that you’re tie dye project will go smoothly.
Find The Right Work Space
The first thing you need to do is find an appropriate work space. As the name implies, tie dye projects utilize dye, which can damage lots of things if not handled carefully.
No one wants spots of their floor or counter tips splotched with dye that won’t come off. You’ll need to find a space that is easily cleaned up to complete your project.
Lots of people to tie dye projects outside, over grass, utilizing containers and a water hose for some steps.
I’ve used my stainless steel sink occasionally, which is very easy to clean up.
For this particular project, I used the bottom of a shower insert in one of my bathrooms. The space is easily cleaned up and, of course, has quick access to water.
I would NOT have used this space it it had been a tile shower, for fear of staining the grout lines. The space with a shower insert didn’t have that risk.
Clean Those Socks
This step sounds simple, but it can make the difference in success or failure of any tie dye project.
Even if the socks you’re working with are brand new, you’ll want to was them.
New garments often have residue from the manufacturing or packaging processes. They also can have a lot of invisible dust on them depending on how long they’ve been stored before sale.
Washing your items before starting the tie dye process helps to rid them of any of these icky residues that may inhibit the dye process.
You’ll want to wash your socks, preferably without using heavily fragranced detergent, and leave them damp before moving on to the next step.
Working with slightly damp socks will help the fabric accept the dye more easily.
Tie Dye Socks Folding Techniques
Once you’ve washed your socks, it’s time to get to the fun.
The method that you use to fold your socks will determine what your final design will look like.
It’s super fun to experiment with different folding techniques and see what the final result looks like.
Some worked best with multiple colors, while others looked great with just one.
Of course, you’ll want to work in pairs so that each set of socks will match.
For this project, I tried six different tie dye folding techniques to see how they’d turn out.
Plain, No Folding
I left one pair completely plain, and didn’t fold it at all to see how it would turn out when we just applied dye to it. If this were a scientific experiment, these socks would be my “control” pair.
The Crumple Technique
For our second pair, we tried the crumple tie dye technique.
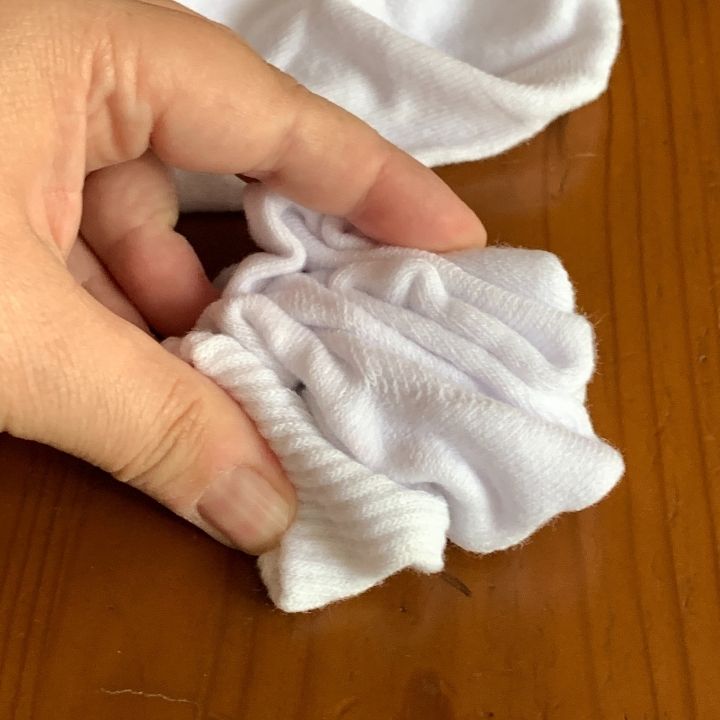
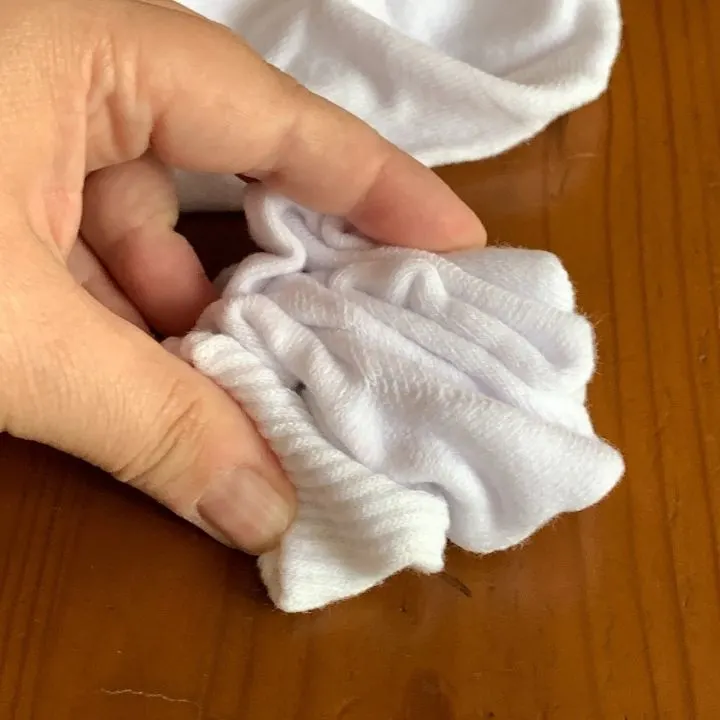
I scrunched up the socks into a puck-like shape and secured them with rubber bands.
On this pair, I was looking for random pattern of dye on the socks.
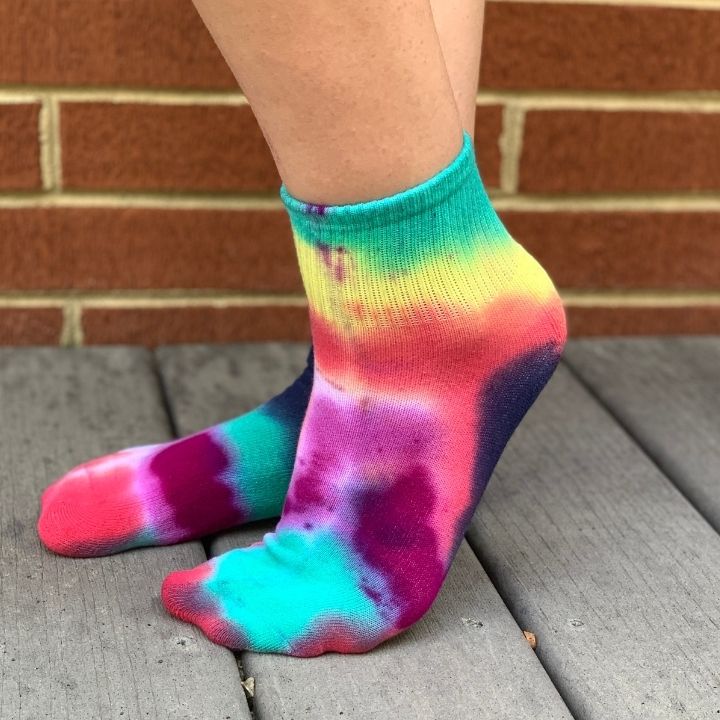
Vertical Bunching
I wanted to achieve a striped look to one pair, so I tried this method.
I simply bunched the socks vertically, and secured each one with rubber bands spaced evenly across the sock.
The end result before dying looked very similar to shirts I’ve prepared for a tie dye bullseye technique.
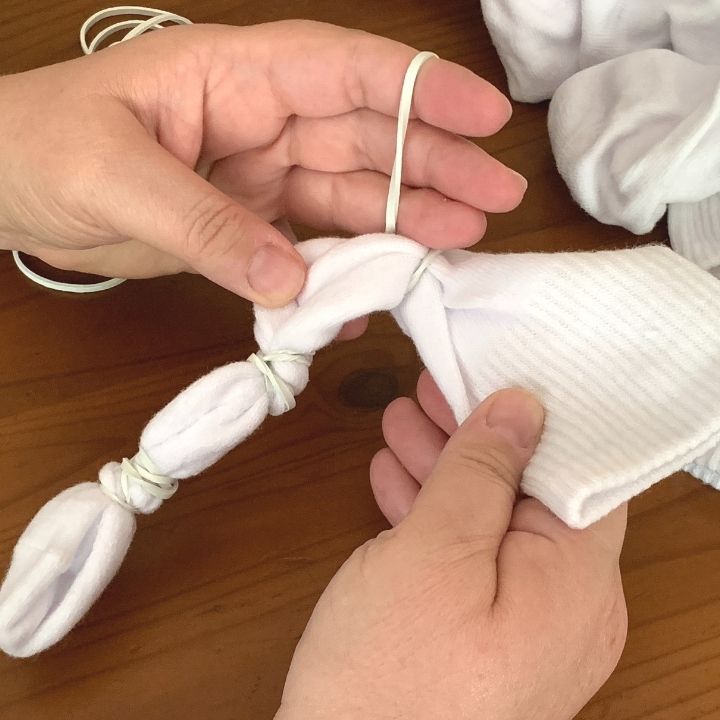
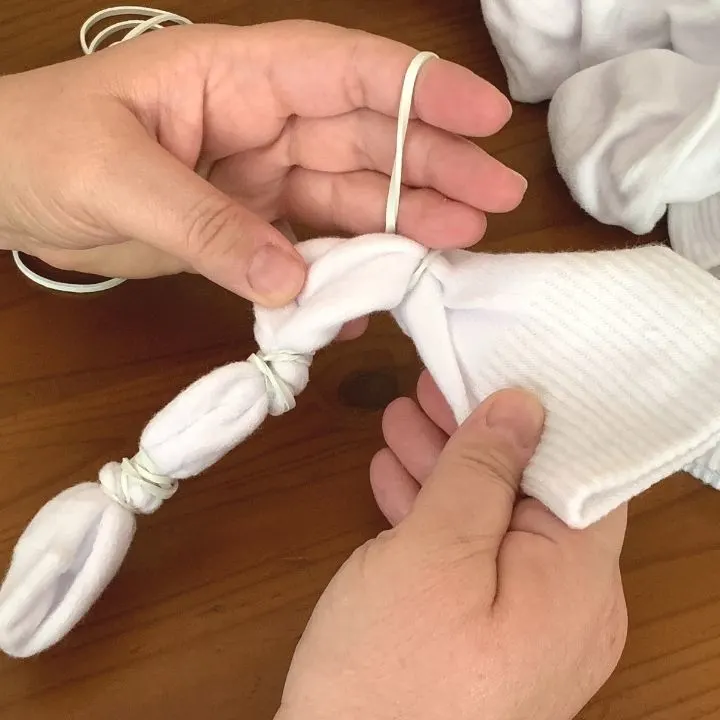
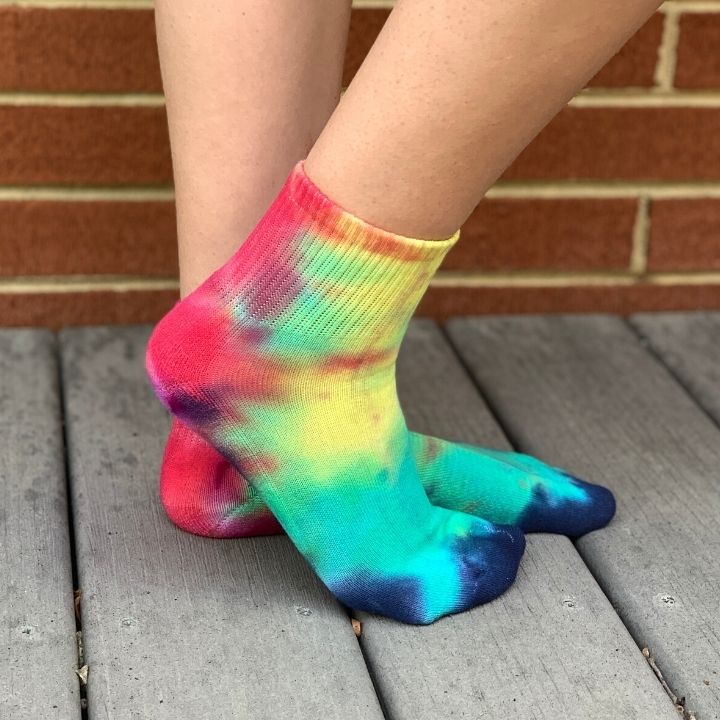
“Twist and Twirl”
My husband came up with this one, and his technique reminded me a bit of the prep work I’ve done for a spiral tie dye project.
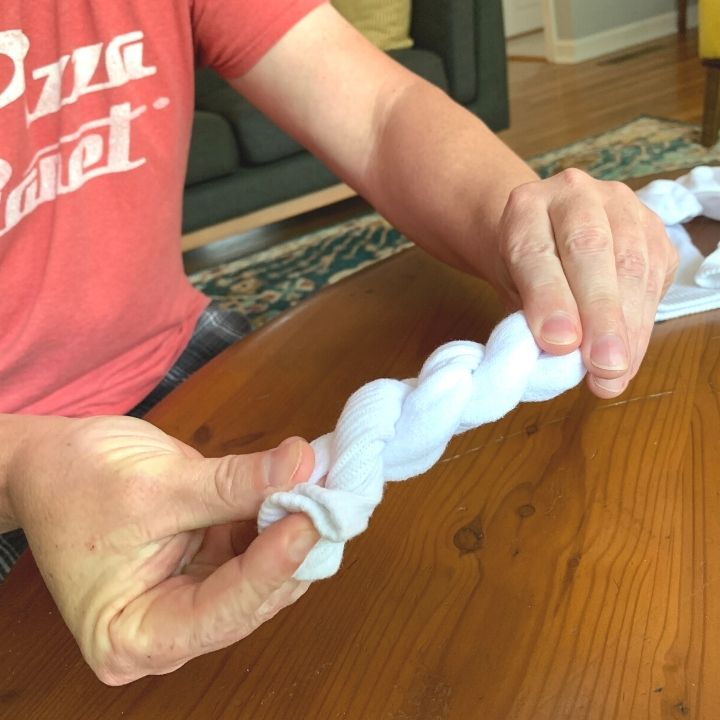
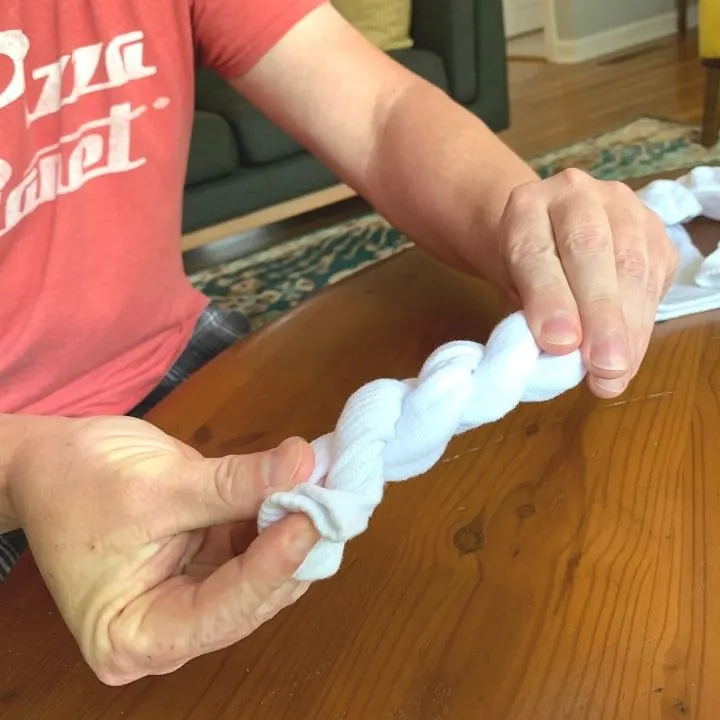
He took the sock and twisted it tightly until it looped back onto itself, created a tight bundle.
He secured each one with rubber bands on the ends.
Applying the Tie Dye to the Socks
Once the socks were folded, I moved them to our workstation to apply the dye.
Make Sure Those Socks Are Damp!
You’ll want to make sure the socks are still slightly damp at this point.
If they’ve dried out too much, you can put just a little bit of water on them.
You don’t want them soaking wet, so if they get over saturated, just squeeze the water out, so they’ll be left damp.
Mixing The Dye
At this point, you’ll want to mix up your dye.
Make sure you’re doing this in a place where it can be easily cleaned up, since overfill and spillage can happen easily.
One of the reasons I love Tulip Tie Dye kits is because the come with each bottle premeasured and ready to mix. You simply add water to the fill line and shake. It’s that simple.
Here’s some pro tips for mixing your tie dye.
- Wear your gloves for this step to avoid staining your hands.
- Fill the bottle halfway with water. Close it and shake it vigorously until the powder dissolves. Then finish filling the bottle with water and shake again. This makes it much easier to make sure all the powder gets thoroughly mixed into the water for the best results with the color.
- Run the water at a slow trickle to avoid overflowing your bottle.
- Make sure your lids are secured tightly on bottle before shaking. You don’t want dye to splatter everywhere when you go to mix it up.
The Cookie Rack
This is the point where that cookie rack comes in super handy!
Set up your cookie rack at in your pre-determined work space, ready to get started.
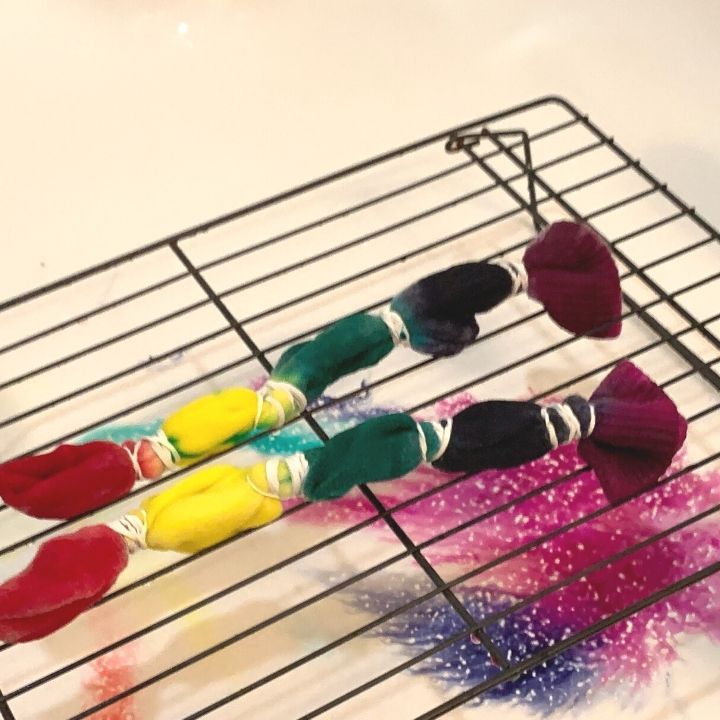

I used the cookie rack to help keep the dye from pooling around my item when I’m applying the dye.
If I simply set the item on a flat surface, I might get dye in places I don’t want it, as it collects and pools below my item.
By using the cookie rack, I’ve got an elevated space where the dye can drip off of the item, avoiding any unintended transfer in places I don’t want the dye to be.
This gives me a lot more control over where they dye goes and how i can apply it.
Finally Applying the Dye
I know it’s seemed like forever to get to this point, but here’s the final moment when you get to apply the tie dye to your socks.
Use caution when removing caps and with tilting your bottles forward to start applying the dye. Sometimes the dye will splatter out a bit when you don’t intend it to, and you don’t want dye on areas you intend to put another color on.
I took a different approach to applying the dye to each pair of socks.
For some I used multiple colors and for others I went with a single color. You can do whatever you like here. Be as creative as you want.
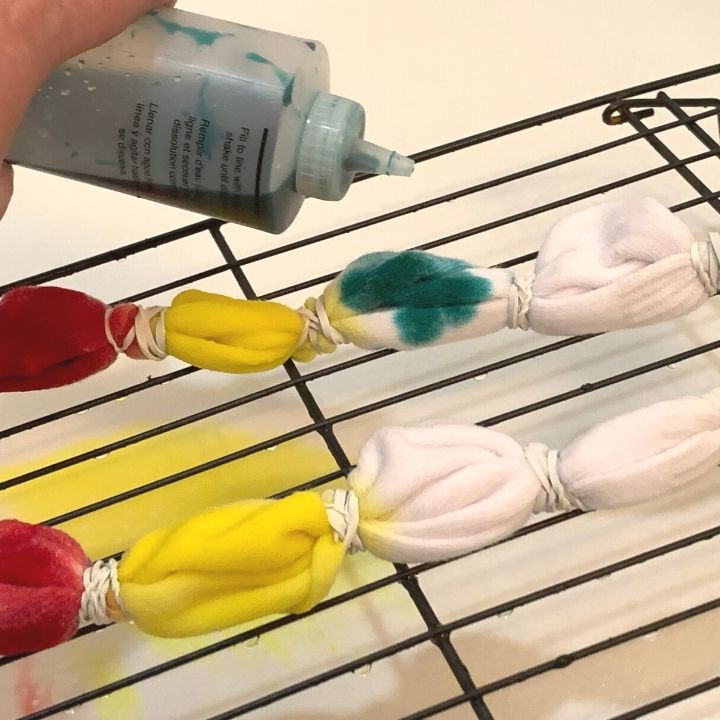

For best results when using multiple colors, it helps to keep in mind the natural progression of colors in the rainbow in your placement. That order is: red, orange, yellow, green, blue, indigo, violet (ROYGBIV).
This helps when colors bleed over into each other. You want to make sure your placement of each color would blend into the adjacent one to create a color you want on your garment.
To avoid unintended dye transfer, I rinsed my cookie rack and work area with water to clean it up a bit.
Final Tie Dye Sock Steps
Once you’ve completed applying the color to your tie dyed socks, there’s a few more steps you need to accomplish to finish them up.
You want to keep your socks damp as long as possible while waiting for the dye to set. This is why placing them in plastic bags is necessary.


Take your still-tied socks and place them into baggies. If you’re using just one color, multiple socks can go into the same baggie. But if you’re using multiple colors, it’s a good idea to put each sock into its own bag to avoid dye transfer.
Seal up your baggies and let them sit for as long as you can. The Tulip instructions recommend 8 to 12 hours of wait time, but I’ve found for the most vibrant colors, 24 to 48 hours works really well.
Once you’re waiting period is over, you can free your socks from their baggie prisons and finish them up.
Take each sock, and remove the rubber bands. This part is really exciting because you’ll get your first glimpse of the final pattern you created on your tie dye socks.
Rinse each sock thoroughly until the water coming out of the sock runs clear.
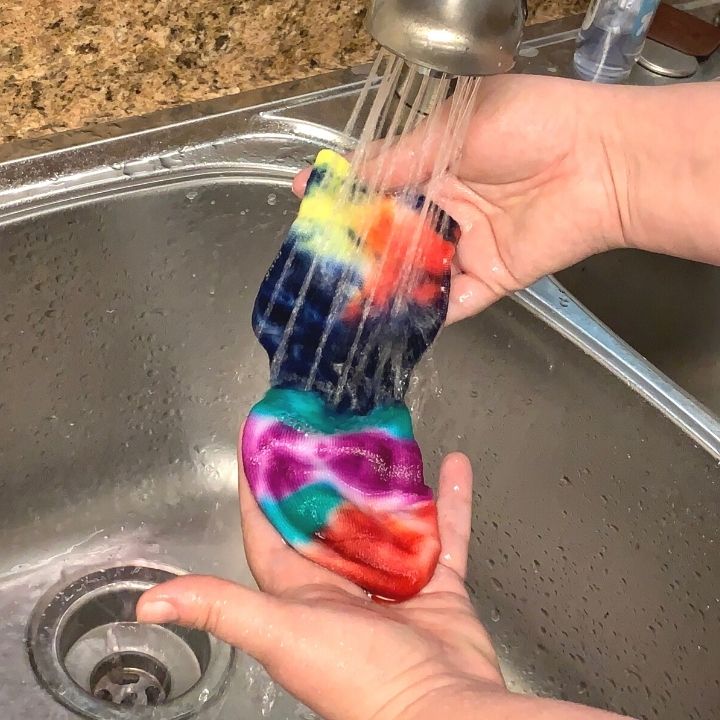

Next you’ll want to wash your sock, as you would for daily wear to remove any dye residue that might still be hanging around the tie dyed socks.
You can wash them all together once they’ve been rinsed thoroughly without fear of dye transfer.
Once they’re washed you can dry them and wear them as much as you like!
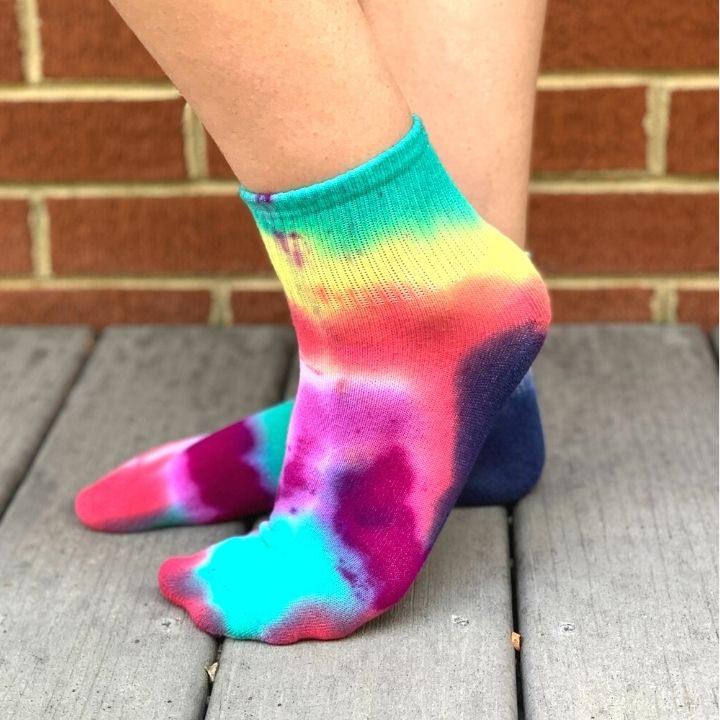
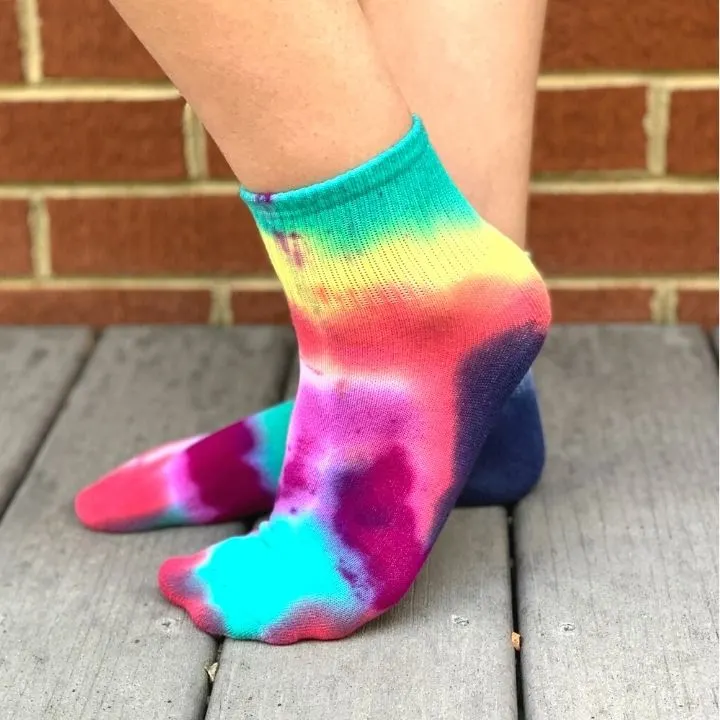
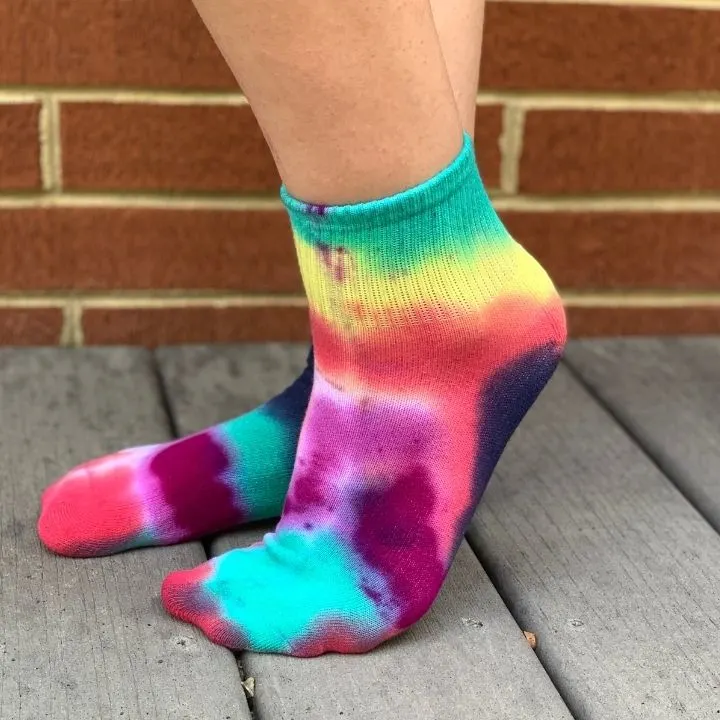
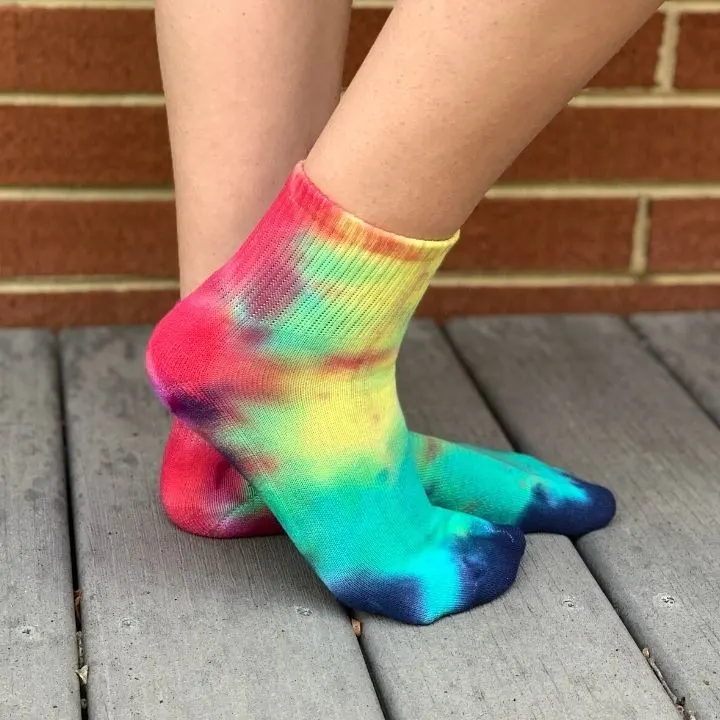
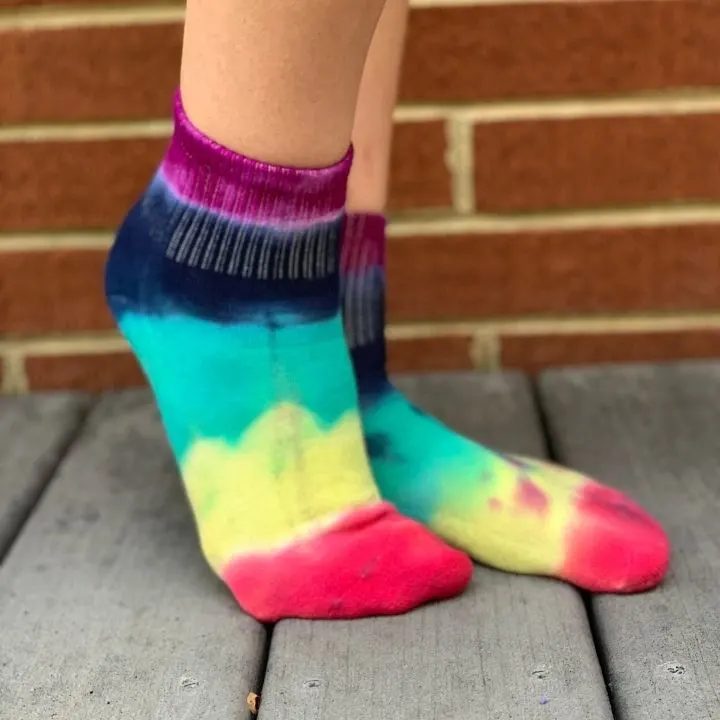
Finished Tie Dye Socks
Overall, I was really happy with how these tie dye socks turned out. Each pair is so unique and fun!
Here are the final results of each folding technique:
Plain, No Folding
The Crumple Technique
Vertical Bunching

“Twist and Twirl”


What I Would Do Differently
While I like how they turned out, I think I might try something a little different next time I complete this project.
I was pretty heavy handed on the dye when I applied it. I has just completed another tie dye hoodie for my daughter, and had been using a more saturated dye technique to create the look she wanted. I probably went a little overboard with what I put on the socks.
Next time, I think I’ll try less dye so I can achieve more white space in the final look of the socks.
Have you tie dyed socks? How did they turn out? Any additional tips? Tell me in the comments!
Looking for another cool, SUPER easy tie dye method? Check out my post on Ice Tie Dye!