Making your own Tie Dye Bullseye pattern is easier than you might think!
Tie dye is everywhere right now. From high fashion to homemade, everyone is rocking this look, and doing it well!
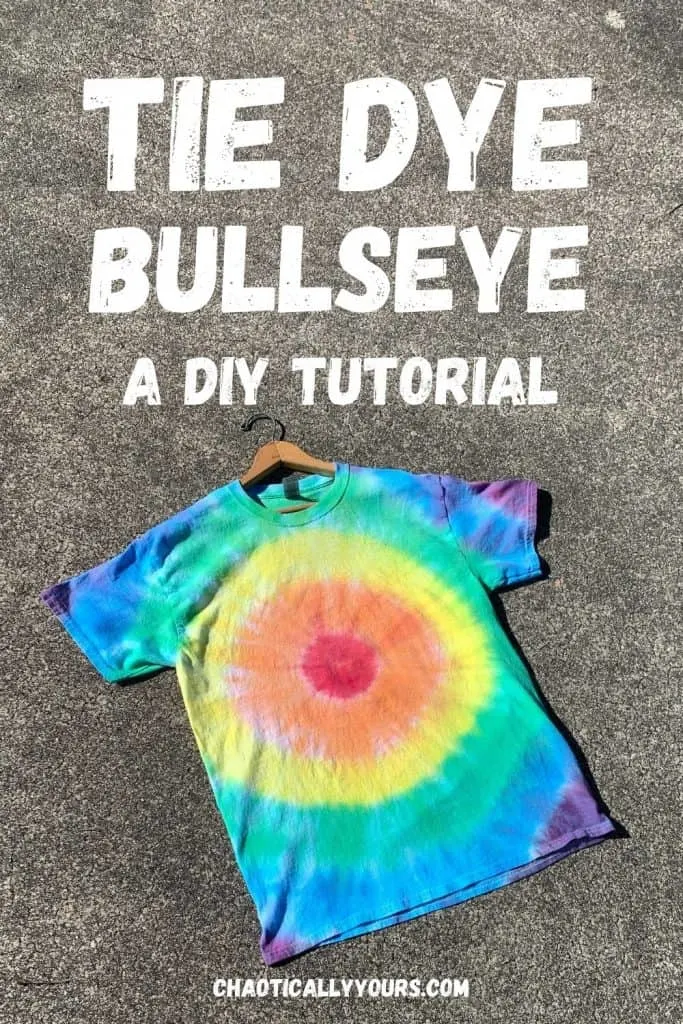
One of the most classic patterns you can create with dye is the tie dye bullseye, and in this post, I’ll be sharing how you can achieve those concentric circles yourself.
I’m including printable instructions at the bottom of this post, but it’s just the basics. You’ll want to read the whole post first to get all the tips and tricks to get this project right the first time!
Or if you’d like to just purchase some of our tie dye creations, check out our Etsy Shop!
Links in this post may be affiliate links, which means I may earn a commission if you make a purchase from any of them, at no additional cost to you. You can find out more information by reading my full disclaimer.

Tie Dye Bullseye Supplies
As with all fun projects worth doing, the first step is to gather your supplies.

For this project you’ll need:
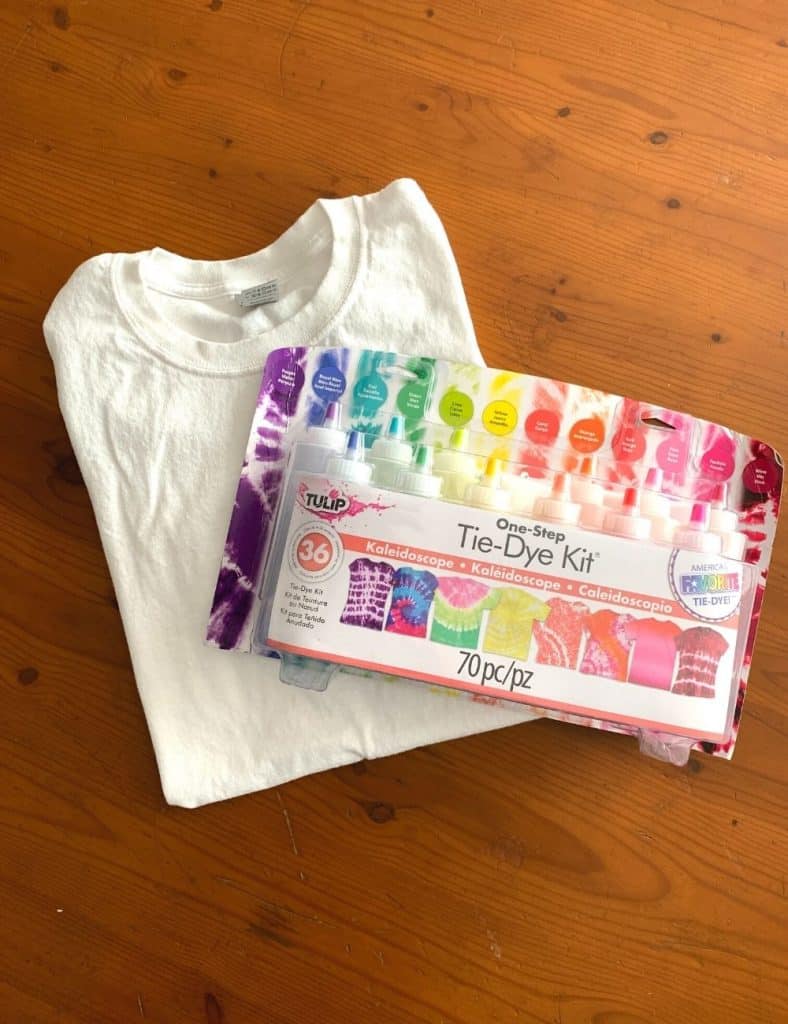
- An white item to tie dye (preferably cotton)
- Dye
- Squeeze bottles
- Rubber bands
- Disposable gloves
The tie dye bullseye pattern can be created on just about any item of clothing you could imagine.
For our example, we used a simple white t-shirt, but you could use this method on a number of things like sweatshirts, tote bags or even masks.
Just keep in mind that most tie dye works best on materials that are primarily made of cotton. Polyester and other synthetic materials can be dyed, but usually require a specific type of dye to get the desired colors.
For the actual dye you’ll use to create your bullseye tie dye pattern, I always recommend buying a tie dye kit.
Kits usually include everything you’ll need for the project (like the squeeze bottles, rubber bands and the gloves), just not the item you’ll be dying.
I’m particularly fond of Tulip brand tie dye kits, and have had great luck with their colors.
Do The Prep Work For Great Results
The prep work is a vital step to making sure you end up with a great tie dye session without a huge mess.
Wash Your Items
You’ll want to start by washing the item you intend to tie dye.
Skip the fabric softener or any other laundry add-ins for this step. Just detergent is all you need.
This helps make sure there aren’t any residual chemicals on your item that might inhibit the dye from taking to the fibers of the shirt or whatever you’re dying.
Do not dry your item. The tie dye will be easier to apply if your item is just slightly damp when you start putting on the color.
Find An Appropriate Workspace
Tie dye is a messy process, and can do permanent damage if you aren’t careful.
Be sure to find a space to work that won’t be damaged if there’s a spill.
I’ve done many tie dye projects outside, which is where I would recommend beginners do this project.
If you absolutely cannot do this project outside, make sure you work somewhere you can easily clean up, like a garage or in a stainless steel sink.
Also keep in mind that tie dye projects can ruin the clothes you’re wearing, so always work in clothes that you wouldn’t mind throwing away when you’re done.
Creating Your Tie Dye Bullseye Design
The last step before getting to the actual dying process is to create your design with your item and rubber bands.
This is definitely the most important step of the tie dye bullseye process. If you don’t set up your design properly, it won’t turn out right.
As you’ll see in our final result, we didn’t quite get the “pinch” centered in the shirt, and the design turned out slightly off center.
But we still loved the results.
To achieve the bullseye design, lay out your damp item and determine where you want the center of your tie dye bullseye to be.
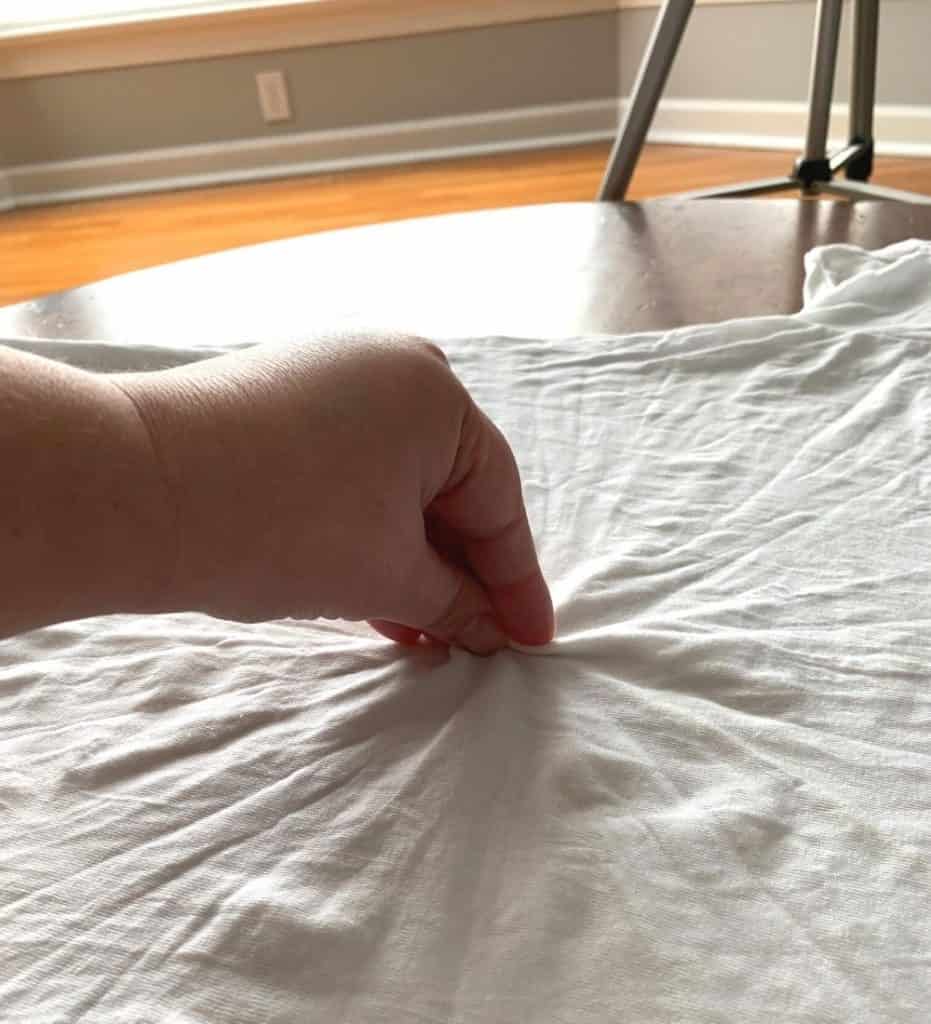
Once you’ve decided where to center it, pinch the item in that spot, and start gathering the rest of the material around it.
You’ll want to try to gather the item as evenly as possible, so that the dye won’t cover one side more heavily than the other side when applied.
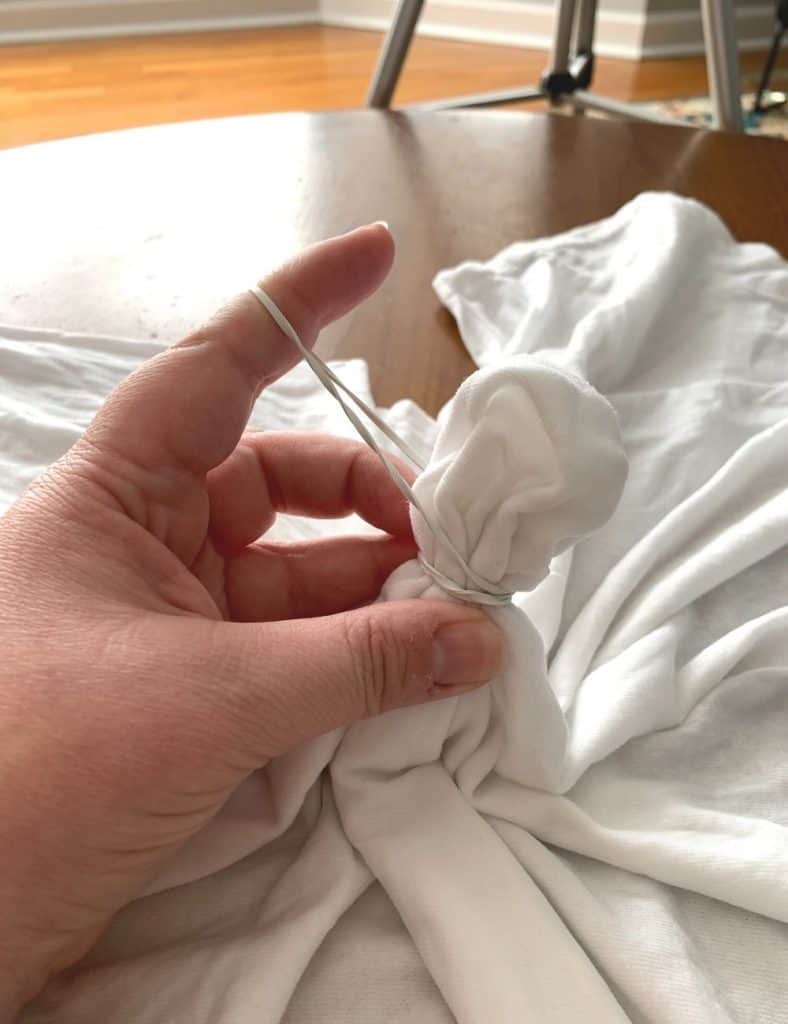
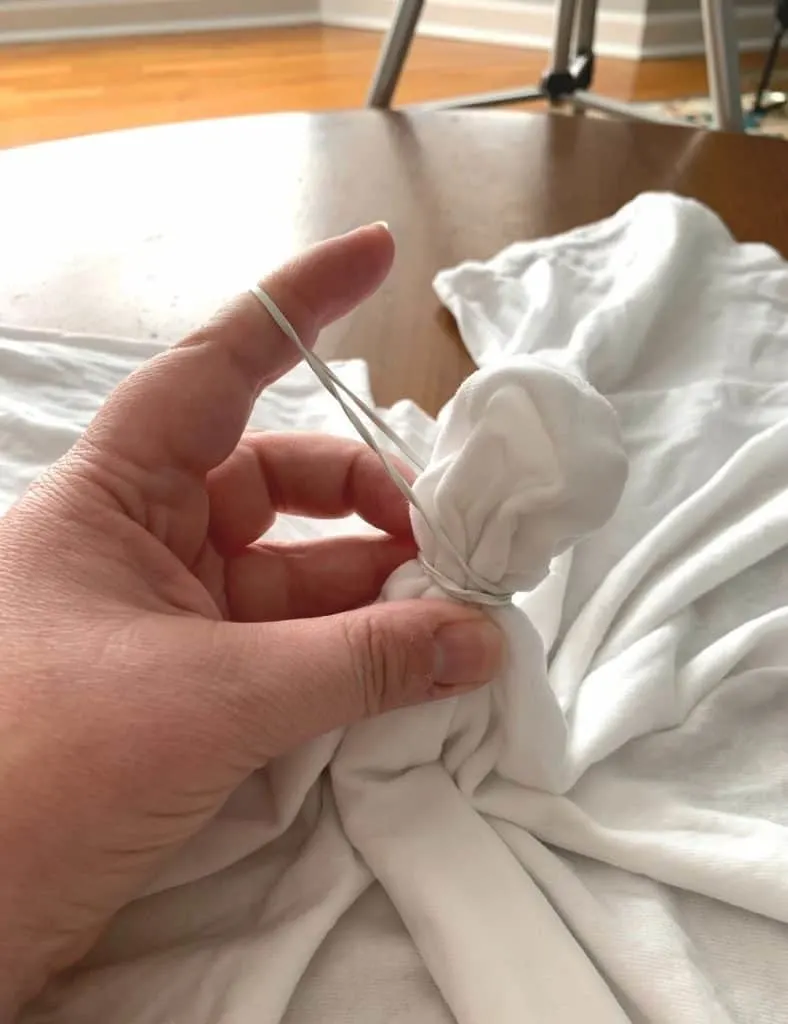
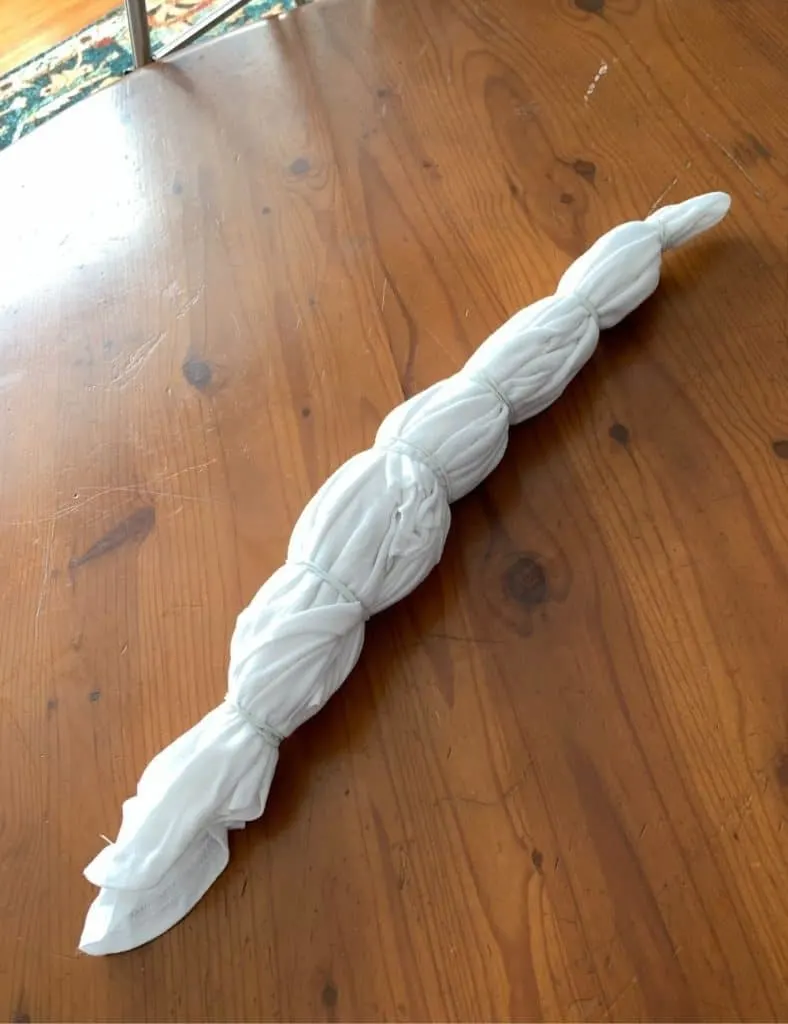
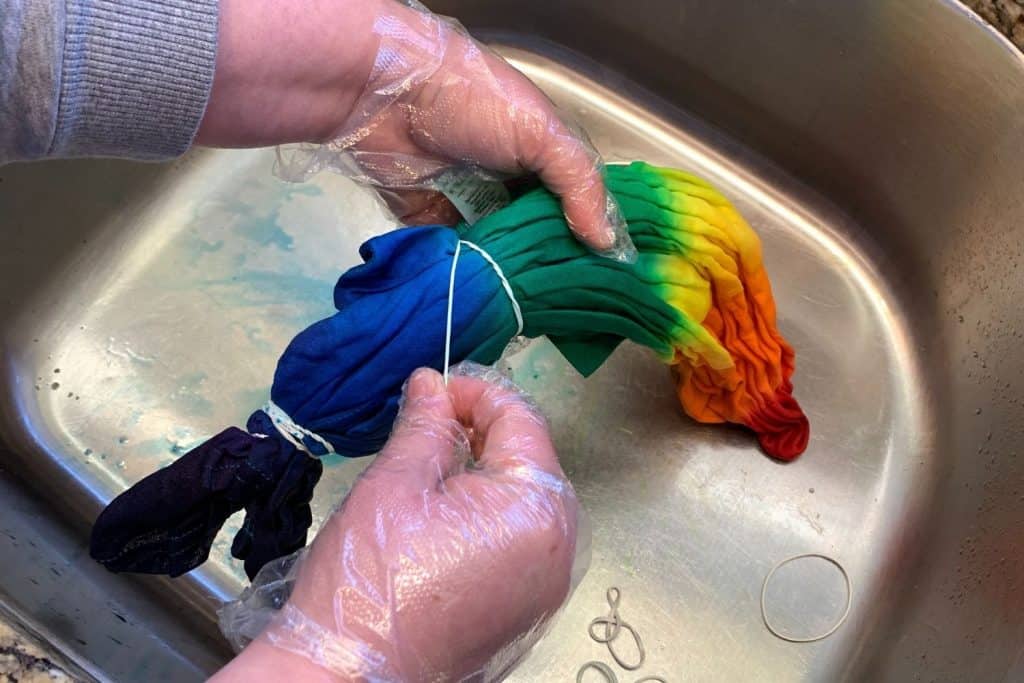
Start securing your item with rubber bands, spacing them evenly, until you have a nice long bundle of fabric.
Once you’ve secured your item, you can get to the dying process.

This wrapping technique is the one we used to create the design in our Reverse Tie Dye tutorial!
Dying Your Item
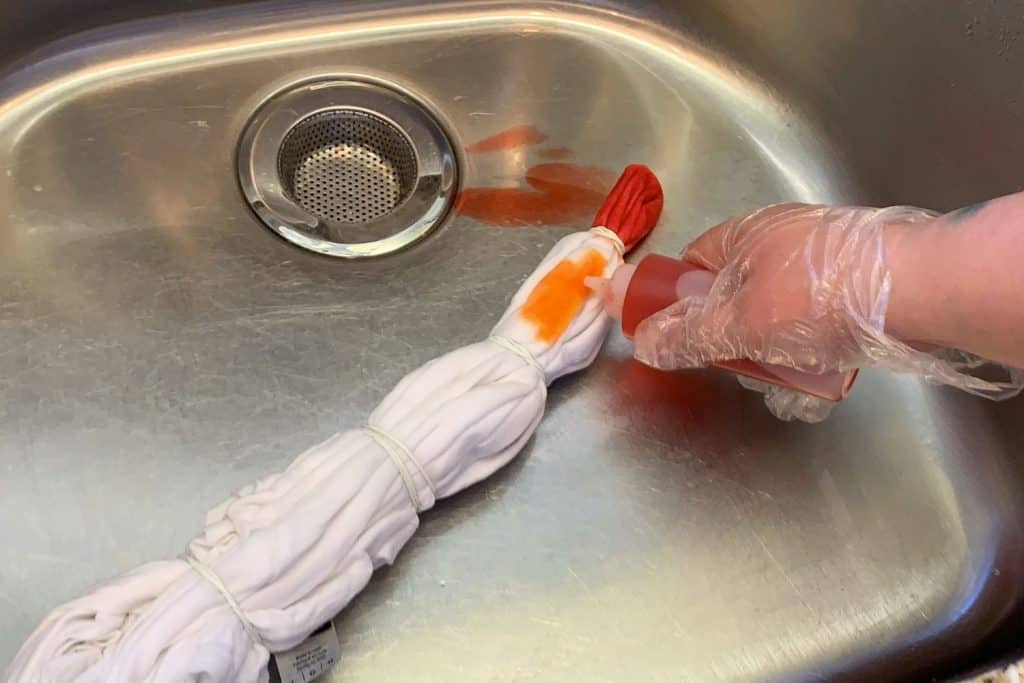
Now comes the fun part: actually applying the tie dye!
Be sure to put on your gloves for this part, or risk dying your hands (like I did).
Start by mixing up your tie dyes according to the package directions.
The Tulip tie dye kit we used for this project came with the dye powder already measured out in squeeze bottles. All we needed to do was add water.
Some tie dyes don’t come this way, and will require you to measure out your dye powder before mixing it.
Once you’ve mixed up your colors, it’s time to get dying.

A tie dye bullseye design can be achieved with any number of colors you want. Whether it’s a monochromatic look you want or the entire rainbow, it’s totally doable.
We chose to go with a classic rainbow look for this shirt.
You’ll want to apply the dye in sections, deciding if you want your colors to touch or not.
If you’re using just one color, I would recommend leaving some space between each section of color that you apply, so you get really defined circles when it’s done.
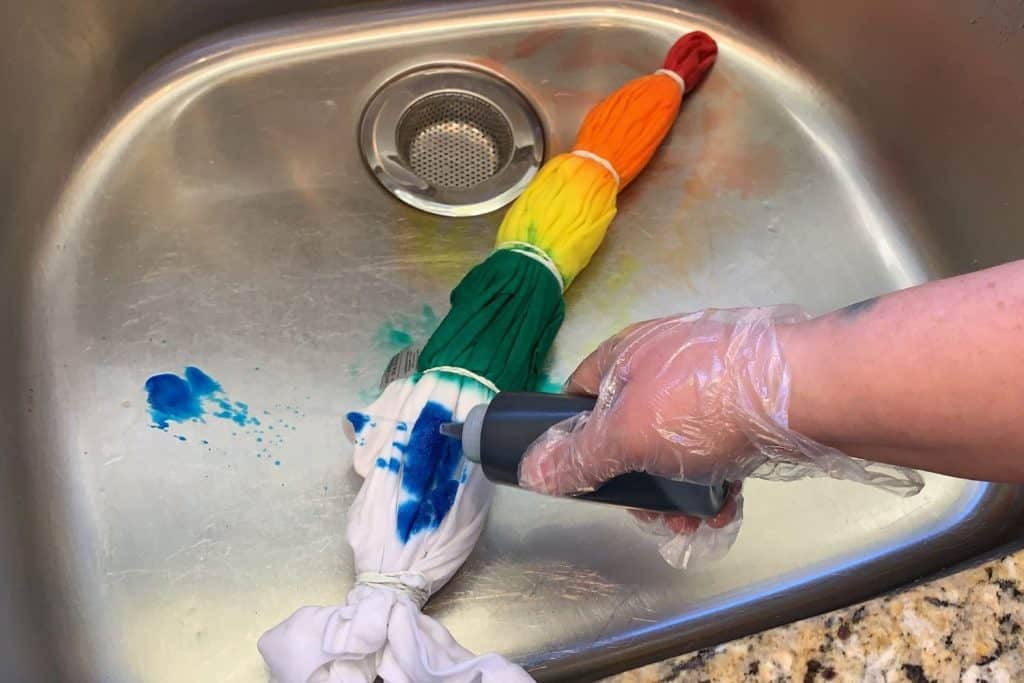
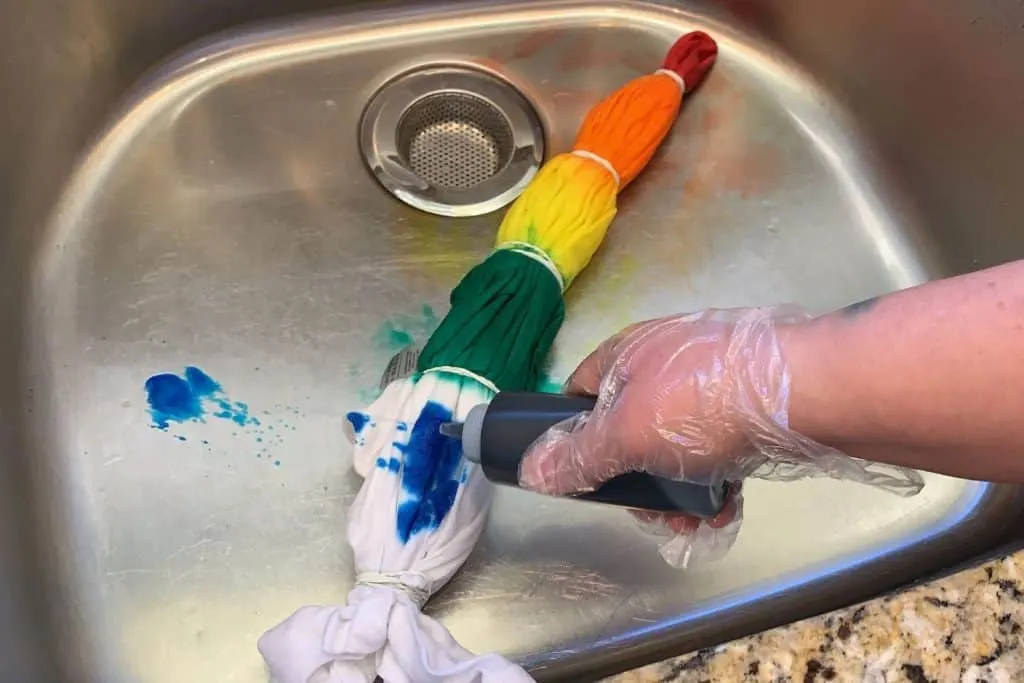
Since we were doing a classic ROYGBIV rainbow, we let our colors touch and bleed into one another a bit, but the look would be really cool as well if you left some space between each section.
Use a lot of care when applying your dye, especially if you use multiple colors, since you don’t want to accidentally touch a section of the shirt with a color you aren’t planning to apply there.

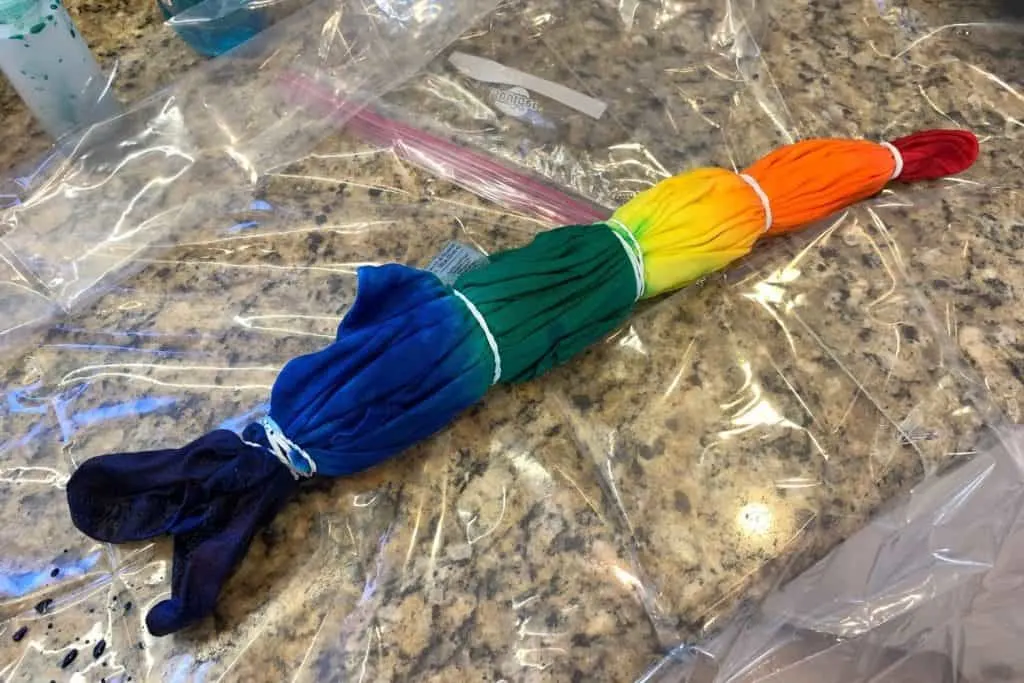
If you want less white space and a more colored look, be generous with the amount of dye you apply to your bullseye pattern.
Setting The Dye
Once you’ve applied the dye to your satisfaction, you’ll want to let the dye set.
The best way I’ve found to do this is to wrap the item in plastic.
I just use my kitchen saran wrap to secure the my t-shirt and keep the sections from dripping onto each other, and then placed the whole thing into a ziploc bag.
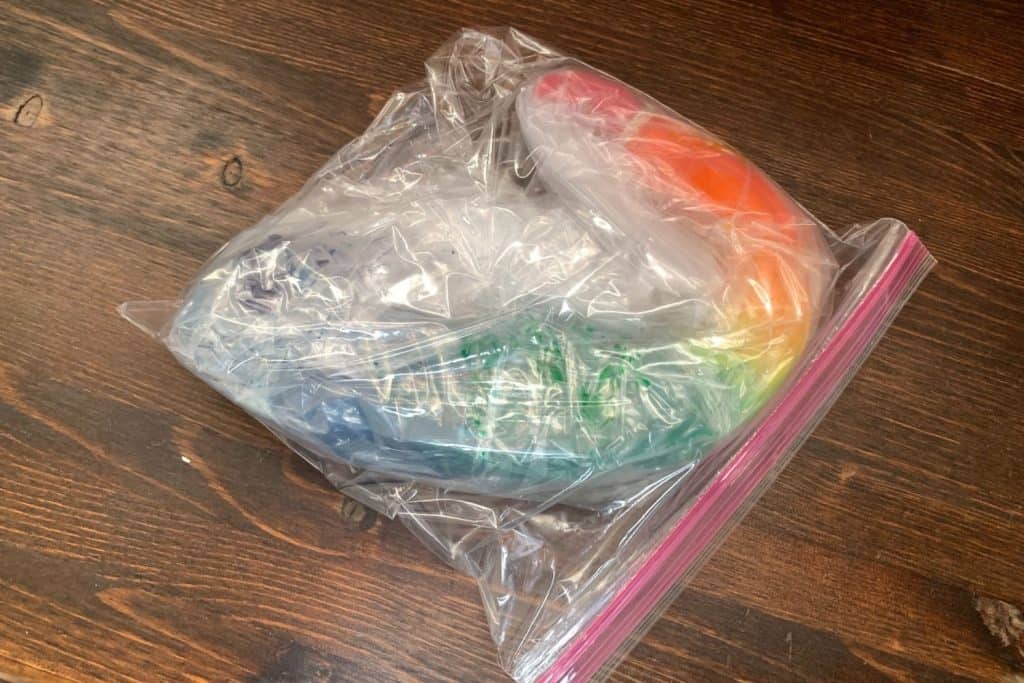

Once my shirt was sufficiently wrapped in plastic, the waiting begins.
Be sure to follow the package directions on your tie dye kit for how long you need to wait before moving on to the next step.
Our Tulip tie dye kit recommended six to eight hours, but we have found that waiting at least 24 hours before opening the shirt back up leaves us with brighter, more vibrant colors in the end.
Finishing the Bullseye Tie Dye Pattern
You’ll want to put on some gloves again for this part!
Once you’re dye has sufficiently set, carefully remove it from the plastic.
Again, make sure you’re working in a space that won’t be ruined by the dye, since you’re item will still be wet when you take it out of the plastic.

Take the rubber bands off, and admire your design, taking care not to let the colors transfer onto one another!
Next, rinse the shirt in cold water until the water runs clear.
Once you see no more dye coming out of your design, wash your item alone, to make sure any residual dye is removed from your item.
Dry the item on high to further set the tie dye bullseye.
Now your bullseye tie dye item is ready to wear or use!
I just love how this bullseye tie dye pattern turns out.

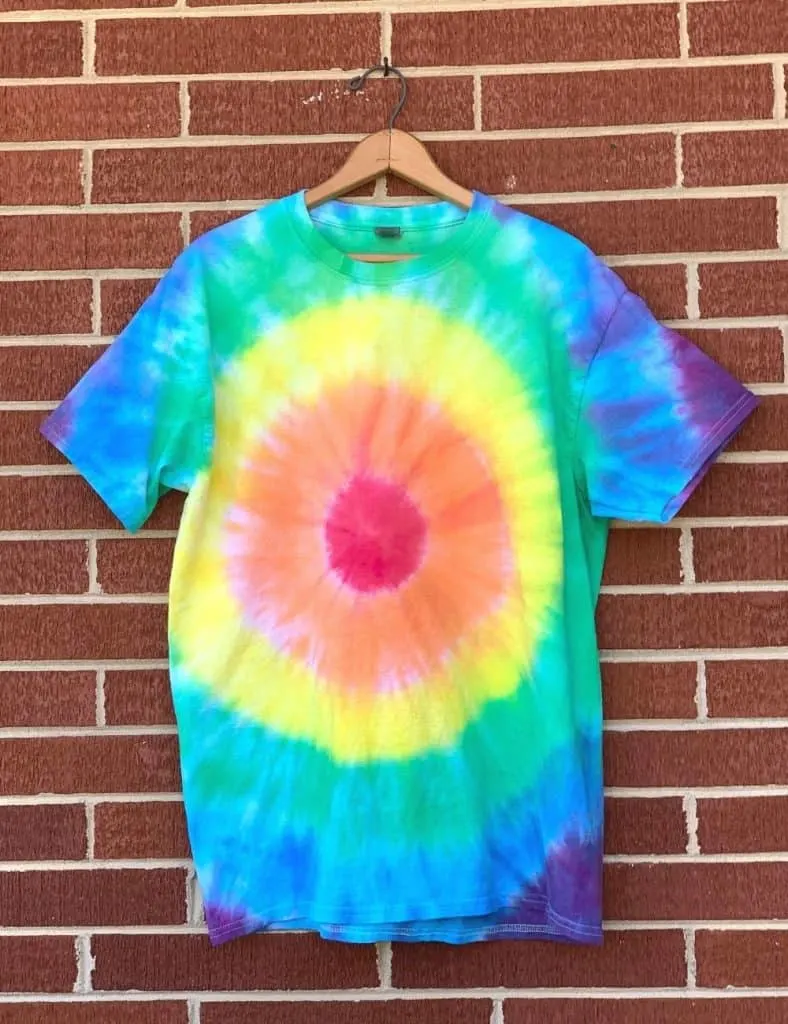
My pinch was a little off center when I made this particular shirt, but I still love how it turned out.
We’ve done lots of different patterns with tie dye in recent months in addition to the tie dye bullseye. Some of our favorites include Crumple Tie Dye, Spiral Tie Dye and Ice Tie Dye.
Tie Dye Bullseye: How To Make The Classic Tie Dye Pattern

Learn how to make the classic tie dye bullseye pattern!
Materials
- An white item to tie dye (preferably cotton)
- Dye
Tools
- Squeeze bottles
- Rubber bands
- Disposable gloves
Instructions
- Wash the item you plan to dye with no fabric softener or other laundry enhancements.
- Do not dry. Leave the item damp.
- Find an appropriate workspace to use the dye.
- Lay the item out flat.
- Locate where you want the center of your tie dye bullseye, and pinch the item there.
- From that center spot, start gathering the material together evenly.
- Secure your item with rubber bands, spacing them evenly around your item.
- Wear gloves any time you are working with dye.
- Mix your dye according to package directions.
- Apply the dye in sections, take care not to mix colors unintentionally.
- When finished applying the dye, wrap the item in plastic wrap and place it in a bag.
- Let it sit for at least 24 hours.
- Remove item from plastic and remove rubber bands.
- Rinse until the water runs clear.
- Wash alone to remove any residual dye.
- Dry on high heat to set.
Notes
Kids should not do this project unsupervised.
Tie dye can damage clothes and surfaces. Please take proper precautions to prevent damage.
Recommended Products
As an Amazon Associate and member of other affiliate programs, I earn from qualifying purchases.
