
Ice Tie Dye: How To Get That High End Tie Dye Look

In today's post, I'm going to teach you how to ice tie dye!
Everyone is loving tie dye right now. Especially that patternless, monochrome look you see in stores like Abercrombie and Fitch for upwards of $60 or $70 each. I even spotted one in Neiman Marcus for $118!
Guess what y'all! I figured out how to make it at home for a fraction of the cost.
For under $12 and just a little creativity, you can make your own ice tie dyed shirt and copy that high end look.
The ice tie dye method is actually easier and less messy than the regular tie dye process.
I've got all your instructions, including a free printable at the bottom of this post. Just remember, the printable is just the basics. You’ll want to read the whole post first to get all the tips and tricks to get this project right the first time!
Links in this post may be affiliate links, which means I may earn a commission if you make a purchase from any of them, at no additional cost to you. You can find out more information by reading my full disclaimer.

What is Ice Tie Dye?
With all this hype I'm giving it, you're probably wondering what exactly is ice tie dye?
Similar to other types of tie dye techniques, the ice tie dye process is just a method for dying clothing that leaves you with a random pattern of places that are dyed and some that are not.
What's the difference: Ice tie dye vs regular tie dye
Ice tie dyed clothes are made by covering an item of clothing with ice, sprinkling dye powder across the ice, then allowing the ice to melt and apply to dye to the shirt.
Regular tie dye uses liquid dye strategically place the dye on the garment in particular places.
With ice tie dye, the pattern of the tie dye is completely determined by the way the ice melts. It couldn't be more random.
The Supplies
You'll be really surprised by how simple and easy this process is. It really doesn't take much to make a really cool ice tie dye shirt.
These items are actually really easy to find. We were able to gather them all at our local Walmart, or you can order them through Amazon.
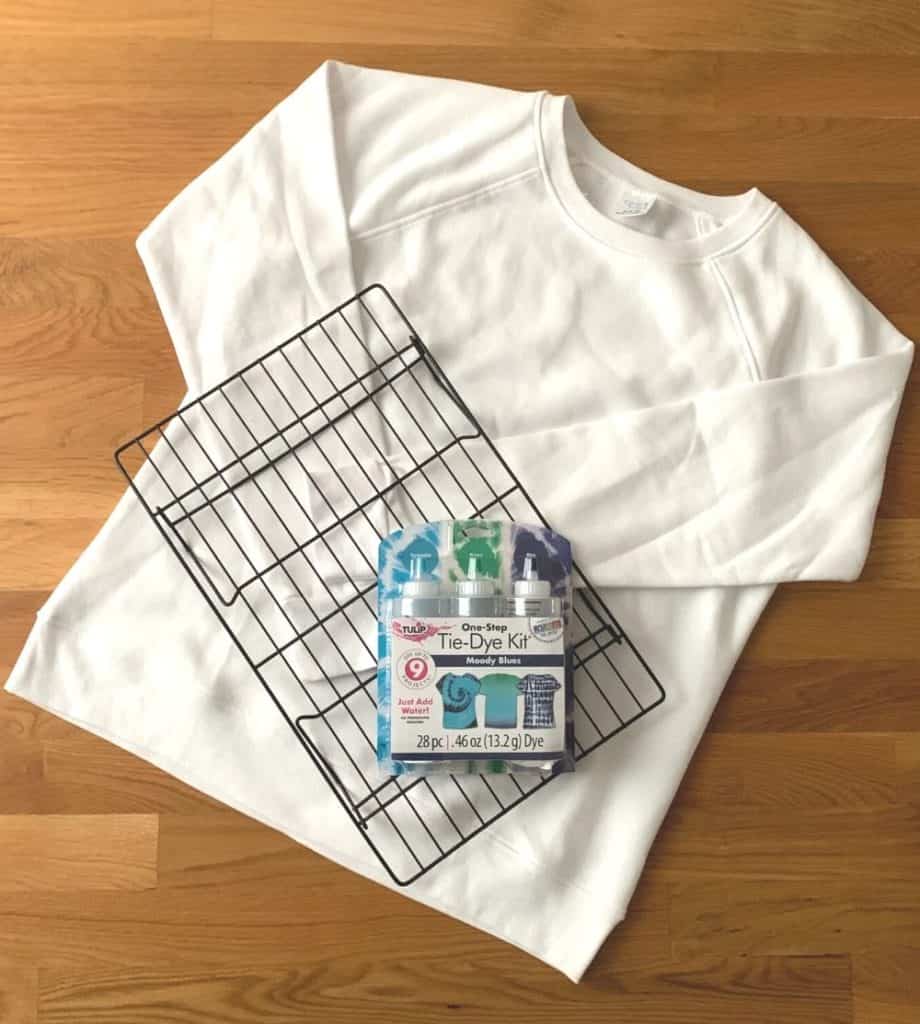
What You'll Need:
We used an $8 white sweatshirt for this project, but you could use any white piece of clothing you like. Sweatpants would be really cool dyed with this process.
For the dye, I choose to use just one color to achieve that popular monochrome tie dye look, but you could use multiple colors if you choose to.
I used powdered Tulip brand dyes from a tie dye kit, but you could easily use Rit Dye or any other brand you have, as long as it's in powder form.
I happened to have some metal cooling racks already in my kitchen for baking. My racks have legs that bring the main portion of the rack about 2 inches off the surface.
You'll want something that gives you a bit of clearance so that the shirt doesn't just sit in the dye as it melts.
For the plastic bin, we happened to have a large under bed box that was empty and would fit two shirts at once, but any container you have that will fit the cooling rack and hold water will work fine.
Keep in mind your bin may get stained in this process, so be sure you're ok with that before using one.
How To Ice Tie Dye
The first step of the process is to prep your shirt for dying.
You'll want to wash it without fabric softener. The goal is to remove any residual chemicals or substances that might be on the shirt.
Once you've washed the shirt, do not dry it. Leave the shirt damp. A damp shirt always takes the dye more effectively than a dry shirt.
After you're prepped your shirt, you'll need to prep your ice tie dying area.
It is completely acceptable to work outside for this project. Just work somewhere that you can make a mess.
Dye can be damaging stuff, and if you spill it in your kitchen or newly remodeled bathroom, the results could be disastrous.
I chose to work in our basement bathroom, in an area I've tie dyed in many times, and have easily been able to clean up with bleach cleaner.
Also make sure you're working in an area where your project won't be disturbed.
Once you've set up your ice tie dye to process, you will NOT want to have to move it. It really needs to just sit undisturbed for quite a while. Keep that in mind when selecting a work area.
Once you've determined where you're working, set up your bin with the cooling rack placed inside it.
Now you'll need to wad up your shirt randomly, just like you would do for the Crumple Tie Dye process.
Make sure your shirt will fit onto your cooling rack, bunching it up evenly across the shirt.
Applying the Ice and the Dye
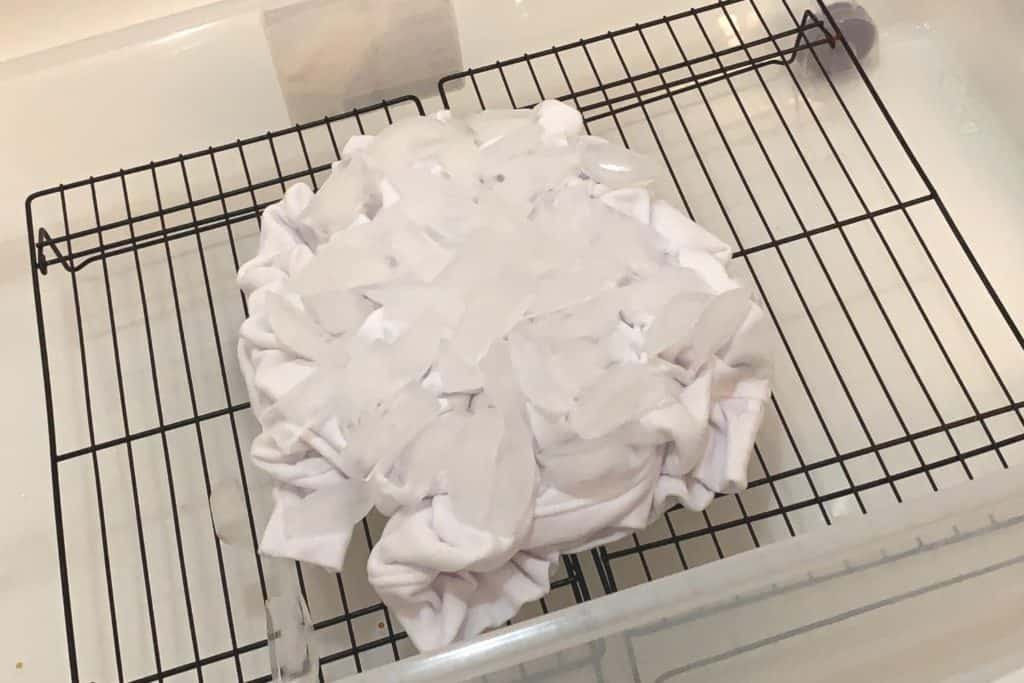
Once your shirt is nicely wadded up on your cooling rack inside your plastic bin, it's time to add the ice.
I just used ice from our ice maker at home, but you could easily go out and buy some ice from your local store. Any form of ice will do.
The next step is to lay the ice out evenly over the shirt.
You'll want to make sure you cover as much of the shirt as possible with the ice.
Once you're happy with your ice placement, it's time to apply the dye.
It's always a good idea to wear gloves when working with any type of dye. Like a dummy, I forgot to use them when working on this project, so now my finger tips are an interesting shade of black and blue.
Once you've gloved your hands, you can start sprinkling the dye over the ice.
Since we did two shirts during this ice tie dye project, we actually ended up using two different methods of applying the dye powder.
Our first set of dye powder came loose in a squeeze bottle, ready to be mixed with water for a traditional tie dye method.
To apply this powder, I simply did not add the water, and just sprinkled the dye powder directly from the squeeze tip of the bottle.
I actually liked this application method a lot. It was easy to control and not very messy.
For the second shirt, we were using a packet of dye that had been left over from another project. It was simply packaged in a little plastic pouch.
To apply this dye, I tore the top off the packet and just sprinkled it. I had to be a lot more cautious with this method so that I didn't accidently just dump it all out in one area.
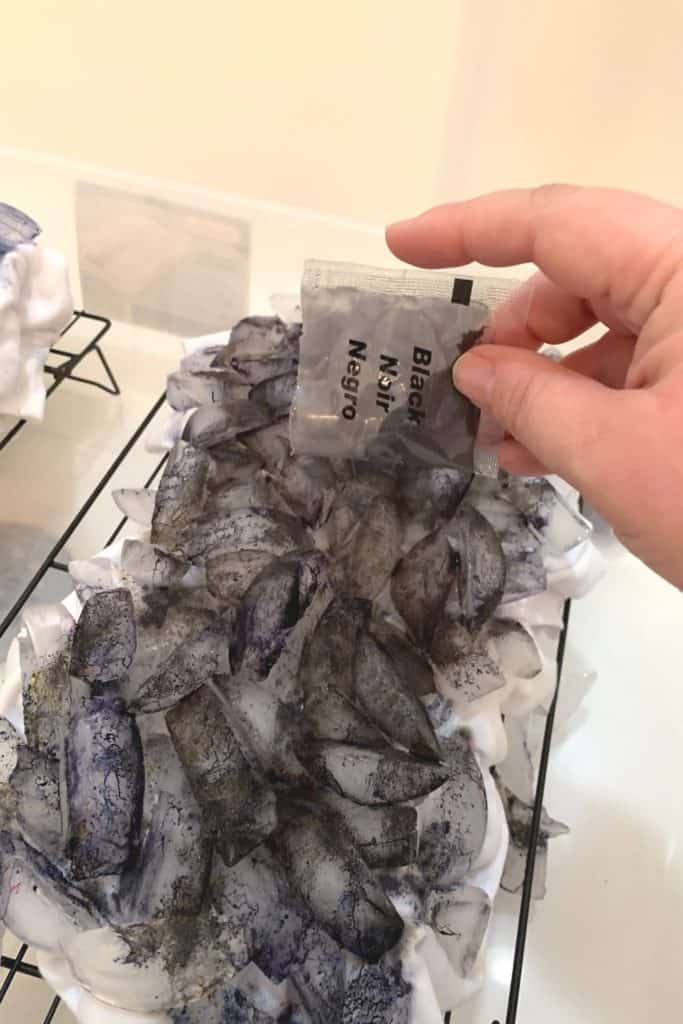
Either way worked, I just preferred using the squeeze bottle.
For the first time I completed the ice tie dye process, I evenly sprinkled the dye all over the shirt. While the result was still really good, it wasn't quite as much of a variation of color shades as I was hoping to get in the finished product.
The second time I attempted ice tie dye, I sprinkled the dye much heavier in some areas than others, and I got that color variation I was looking for.
Ice Tie Dye: The Waiting
Once I'd applied the dye to my satisfaction, I simply walked away from the project.
For this method of tie dye to work well, it really just needs to be left alone.
When I finished applying the dye powder to the ice, I just cleaned up the packaging and left my ice tie dye there to start working it's magic.
We let our project sit for 24 hours.
That's right, a full day!
Once the ice melts, the dye needs time to really adhere to the fabric.
The longer you can leave it, the more vivid your colors are going to be when it's finished.
If you're looking for a very pastel look, you might want to move onto the final step early. But if you're like me, you're gonna want to let the shirt sit with the ice tie dye on it for as long as you can.
The Final Steps
Once you've let your shirt sit for as long as you deem necessary, it's time to finish the process.
Again wearing gloves, removed your shirt from the rack, taking care not to drip on anything. I used a trash bag to help me transfer my shirt to the sink.
Thoroughly rinse the shirt in cold water to remove any residual dye.
Once the water is running clear into the drain, you'll want to wash your shirt by itself to remove any last bits of dye that might still be hanging in there.
Once it's washed, dry your ice dyed shirt as usual.
A note about colors
We did this ice tie dye project three times when testing out the methodology.
We used turquoise, dark blue, and black dye powders. The two blues turned out as expected, but the black had a little different effect.
While most of the shirt turned out very dark or light gray, we did end up with a few spots with hints of other colors in the mix, which gave us a really cool look on the finished product.
My theory for why this happened is that because black is a combination of all colors, the dye powder likely had bits of other colors in it as well.
Since we didn't mix it with water before using it, it didn't have a chance to blend as it normally would. Using this ice tie dye method allowed the color to sit on its own and not combine completely to form the black.
That's just my theory, but either way we loved how it turned out.
Your Finished Ice Tie Dye Shirt
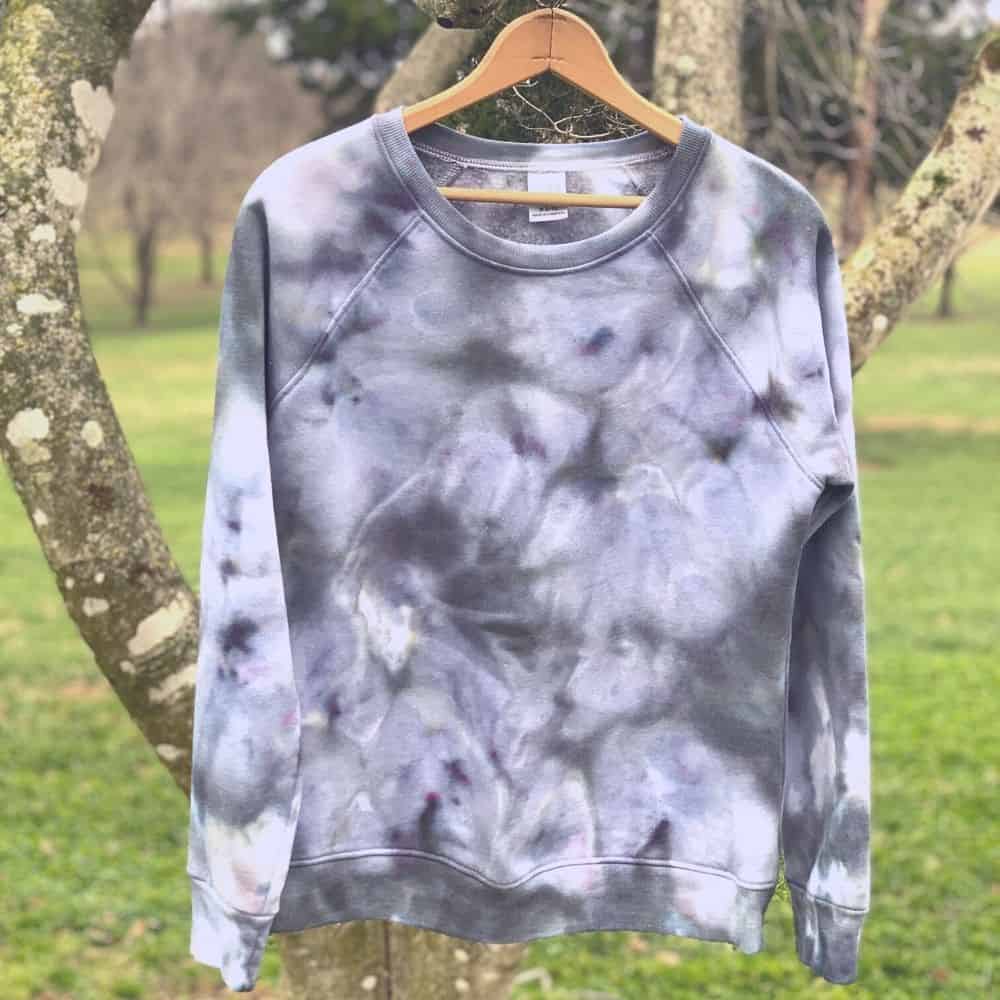
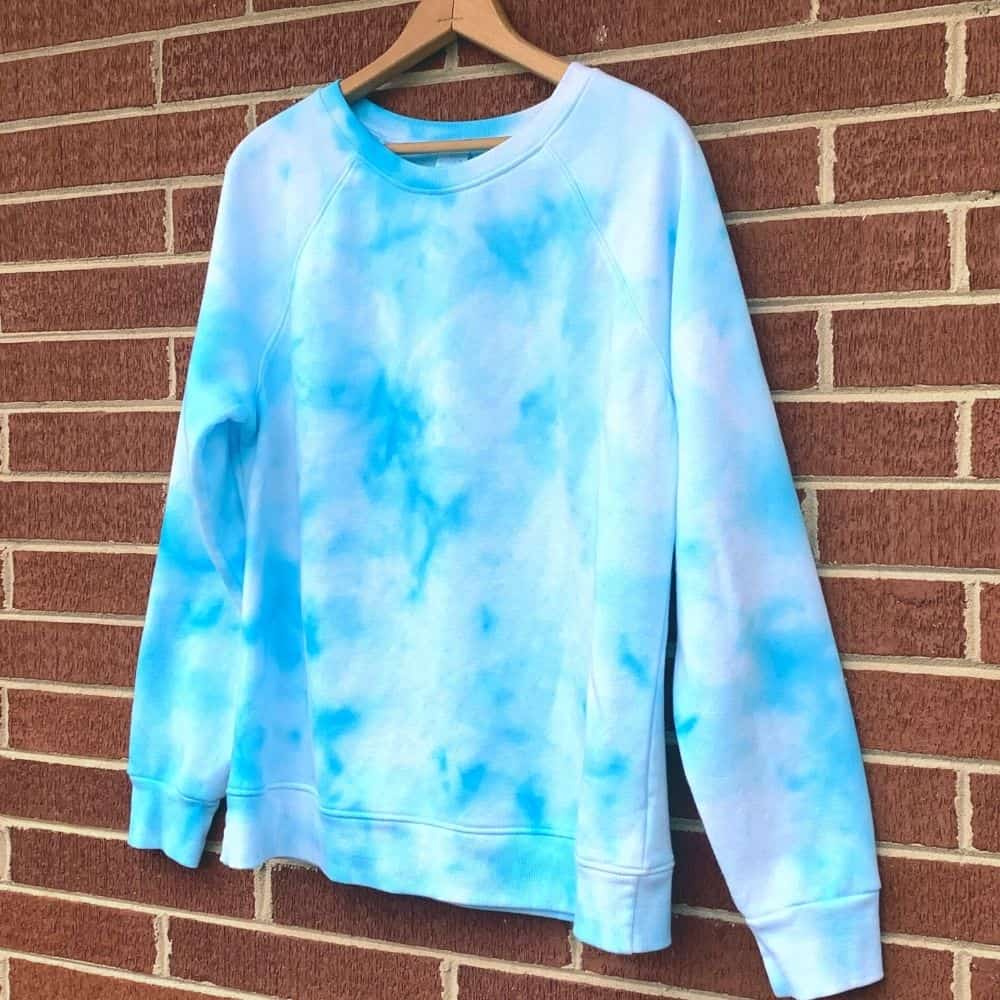

I absolutely LOVE how our ice tie dye shirts turned out! That subtle monochromatic look gives me all the feels.
My teenager daughter especially loves her black and white shirt. All those hints of gray mixed in with the white and black really make this shirt one of a kind. She loves it as much as she loved the Bleach Tie Dye shirt we made earlier this year!
Have you tried Ice Tie Dye? How did your project turn out? I'd love to hear about it in the comments!
Ice Tie Dye: A DIY Tutorial
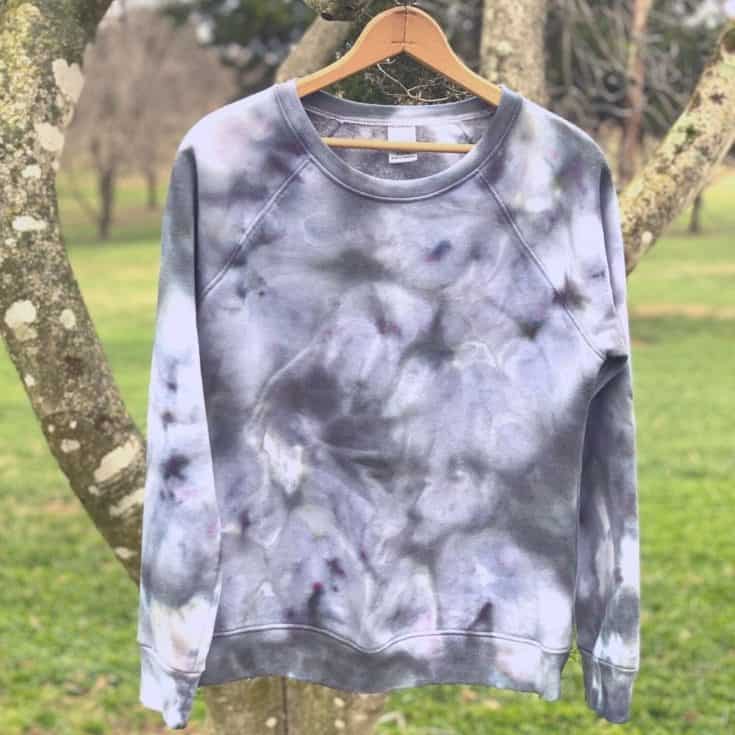
This ice tie dye method is easy to make and creates a one of a kind shirt that you're sure to love!
Materials
- A white shirt
- Dye powder
- Ice
Tools
- A cooling rack
- A plastic bin
Instructions
- Wash your shirt with no fabric softener. Do not dry the shirt. Leave it damp.
- Set up your cooling rack inside the plastic bin.
- Crumple your damp shirt and place it on the cooling rack.
- Cover the shirt with ice.
- Sprinkle dye powder over the ice.
- Let sit for 24 to 48 hours.
- Rinse shirt until water runs clear.
- Wash the shirt alone to remove any residual dye.
- Dry as usual and enjoy your ice tie dyed shirt!


From what I’ve read, black dye will only set properly in hot water. I’ve tried black with ice and it almost completely rinsed and out of the shirt after the ice dye process
That's interesting. We used black on one of the shirts in the post. It worked just like the others did, giving a softer color on most places and more intense color in some areas than others. We rinsed and washed them all in cold water. It could have been the material of the shirt causing the problem. If the shirt wasn't mostly cotton, the dye may not take. Or maybe the dye didn't set long enough. Did you pre-wash it to remove any chemicals left behind from manufacturing? Sometimes that can cause issues as well. Also, the brand of dye you use can be more effective on different fabrics. Tie dye is a guessing game a lot of times. Best of luck!
Do you have to do the same process on the back? Or will it seep thru?
It will seep through all the way to the back, but the pattern will be different.
I'm planning on doing a tie-dye day, but I'm nervous about washing. I'm going to have different kinds of tie-dye done with family, but I don't know if washing them all together will harm the process. I don't want someone tie-dying a light blue shirt to have their's stained black because someone else used black dye. Do you think that will happen, or do I just need to wash them all separately?
I've found that if they're rinsed really thoroughly, that dyes don't bleed in the wash. If it still concerns you, you could wash them separately.
Do you have to do both sides?
You don't! With ice tie dye, the color will seep into the other side, making it unnecessary to do the other side.
If you want to do 2 or 3 colors, do you put all colors on at once or do you have to do each color separately repeating the steps each time?
We've done multiple colors at once with no problem. Just be aware of of where they might bleed into each other. If the colors blend well (like yellow and green/red and blue/etc.) it looks cool!
Can I use the cooling rack with food again after it’s been washed? Or should I buy a new one?
It's completely up to you. We've washed ours thoroughly and reused it for food. Since it's metal, it's not absorbing the dye onto it.
Do you have to do anything to make sure the full sweater gets dye on it? Or does that naturally happen?
In my experience, the dye drips through the sweatshirt and gets on all parts of it, front and back.
Thanks for this tutorial! The monochrome tie dye look is SO classy!
how much of the powder should be used?
That really depends on the look you want to go for. If you want light color, use a little. If you want heavy color, use more.
Fiber reactive dye colors are made from a mixture of pigments. Color splits that it produces results are beautiful and expected,and random.
Sorry if this has been asked before. I’m thinking about doing this for a cheer group outdoors and was wondering if I would be able to use a hair dryer to help melt the ice faster, then transfer to individual bags and bring home to wash. I’d love to do a crafty team bonding activity where the girls created orange and blue sweatshirts. Open to ideas and suggestions! Thanks!
I think a hair dryer would work fine. I'd give it a try first before doing it on a large scale. I'd also be careful about not focusing too much on one area, and evenly distributing heat across it. If it's a hot day, the ice will melt quite quickly on it's own. But it would make a fun group activity!
Wow! I followed your directions to the T and it came out perfectly! I have a printed white tee shirt for my granddaughter’s volleyball team and I do not like to wear white tees. I found the ice tie dye tutorial and now the shirt is so cute! Thanks so much!!💜
Yay! I'm so glad it worked out well for you! I just love this process.
Where is the best place to get affordable powder? Is it a certain type of powder? Can it be bought in bulk?
I've only done these projects in small batches, so unfortunately I don't have a source for doing these in bulk.
Do you recommend using soda ash? I hadn’t seen it mentioned on this page, but it’s included in my black/grey tie-dye kit and I’m wondering if soaking my shirt in it first might help the grey take better?
Soda ash is known to help. I've never used it myself, but it wouldn't hurt if you wanted to use it.