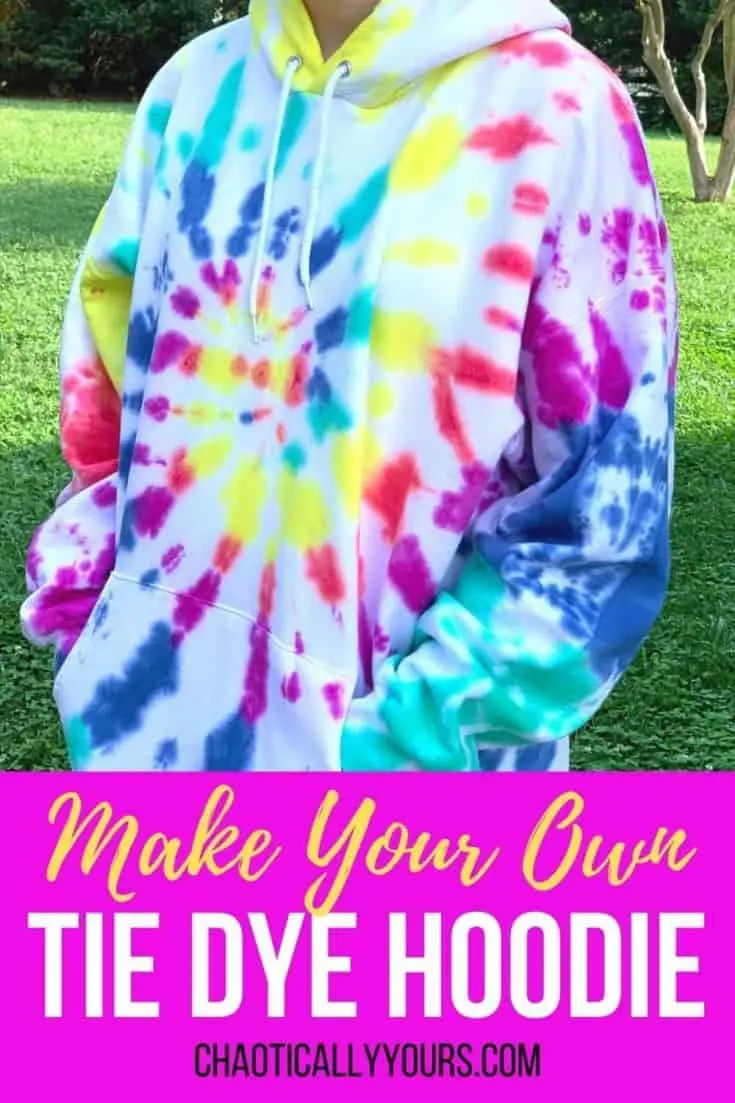
We had a blast making our own tie dye hoodie!
This project was extremely fun to make, and required only a few supplies and a little basic know-how to bring it all together! I’m super excited to teach you how to tie dye a hoodie!
I have two middle schoolers in my house at the moment. And as any middle school parent will tell you, hoodie sweatshirts are standard attire for them all year round.
Hoodie and jeans, hoodie and track pants, hoodie and shorts. It doesn’t matter the season, all they seem to want to wear is a hoodie.
Add in the rising popularity of tie dye lately, and this tie dye hoodie project is perfect for the teens in your life.


I do not recommend letting children or teens do this project unsupervised.
Links in this post may be affiliate links, which means I may earn a commission if you make a purchase from any of them. You can read my full disclaimer HERE.
Tie Dye Hoodie: What You’ll Need
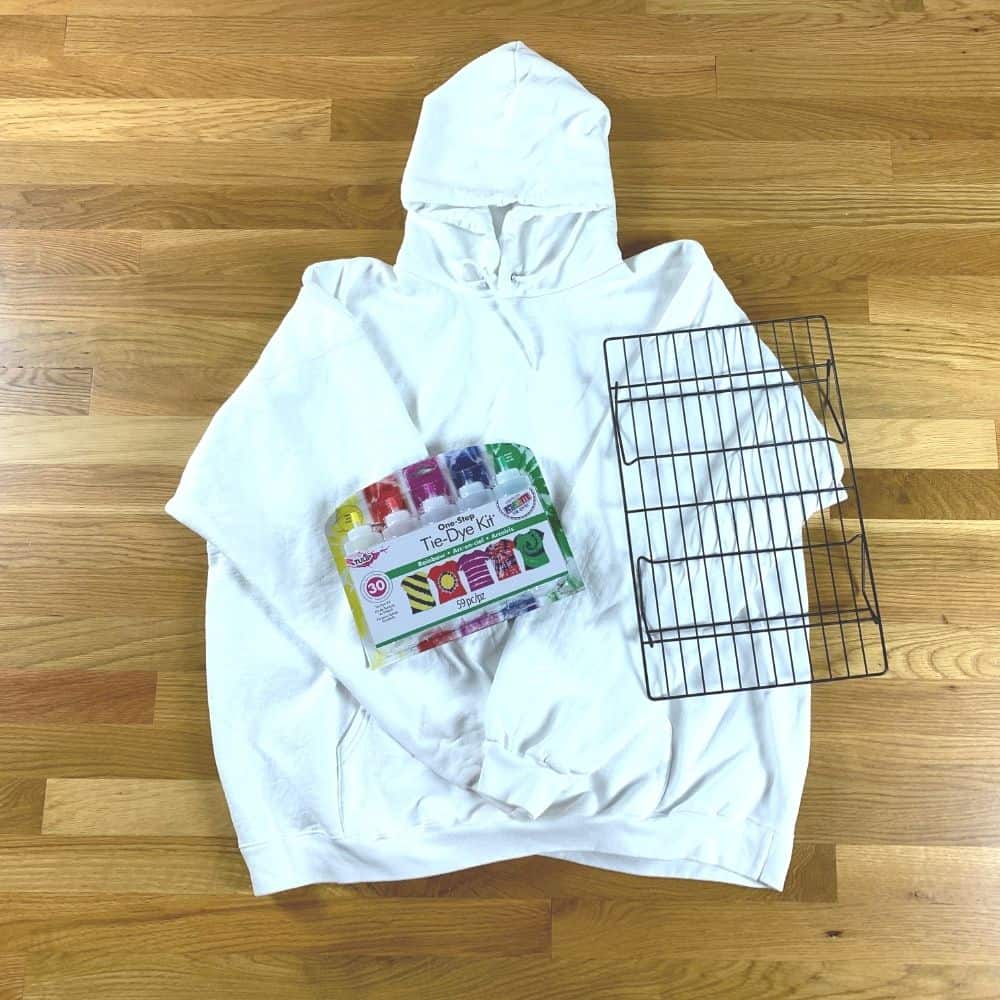

Supply List:
- White Hooded Sweatshirt
- Tie Dye Kit
- Baking Racks (optional, but SUPER helpful)
- Disposable Gloves (not pictured)
- Trash Bags (not pictured)
Let’s break down the supplies so you know exactly what you’ll need here.
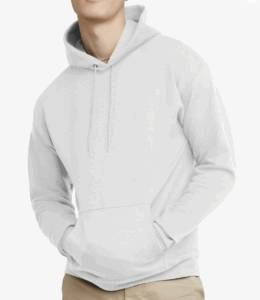
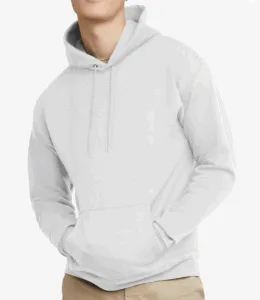
Of course, to make a tie dye hoodie, you’ll need a white hooded sweatshirt.
We like a basic, inexpensive Hanes or Gildan brands for this. You’ll want to look for one with a high cotton content, as cotton takes the dye better than other fibers.
You can pick up a gread hoodie for this project here:
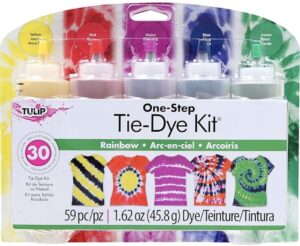
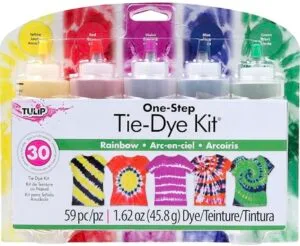
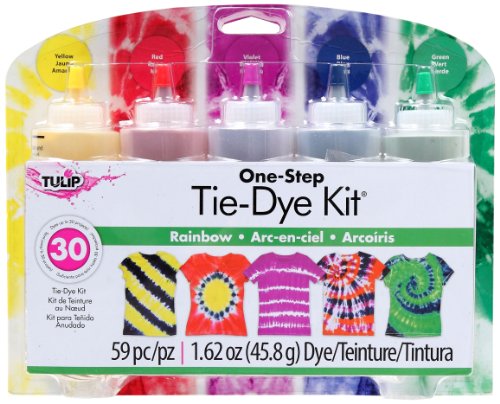
As far as tie dye kits go, I REALLY like the Tulip line of products. They’re easy to use and their kits usually come with everything you’d need, even down to the disposable gloves and rubber bands.
We used this kit because I *LOVED* the bright colors.
NOTE: Don’t let the price of this kit freak you out. We actually made at least five different projects with this kit, which is a lot, considering this tie dye sweatshirt project used A LOT of dye.
You can order the kit here:
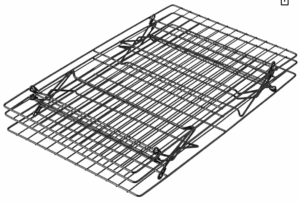
As for the baking racks, I KNOW it seems weird, but they come in really handy.
I was able to do the entire dye process in my kitchen sink with these racks. They keep the item you’re dying elevated to avoid bleed over from other colors. More on this later in the post!
If you already have some stackable racks that will bring your project more than an inch off the surface, GREAT!! If not, these Wilton racks are the exact ones I have and work beautifully.
You can order baking racks here:
You’ll also need some disposable gloves to protect your hands and a trash bag to let the tie dye hoodie soak in.
Prepping Your Sweatshirt
You’ll want to start this project by washing your hoodie. This will get out any chemicals or softeners that might have been put on the garment.Do not dry the hoodie. Leave it damp. Using a wet sweatshirt makes it easier for the dye to penetrate the fibers of the garment.
Now you’ll want to fold your shirt for the desired effect of the tie dye. There are TONS of ways to do this.
We used a spiral method of folding the shirt to get the swirl effect on tie dye sweatshirt. You can read all about how to do it in my Spiral Tie Dye Tutorial.
Make sure you shirt is thoroughly secured with rubber bands or ties. Just make sure it will stay way you’ve folded it.
Tie Dye Sweatshirt: Applying the Color
This is the really fun part of the tie dye hoodie process.
You’ll want to do this step in an area that won’t be damaged by the dye. Some people do this outside or use big tubs. I used our stainless steel kitchen sink.
This is where those baking racks come in!
By using the baking rack, the dye is able to just drip down to the bottom instead of settling and mixing with other colors where you don’t want it.
By keeping it up off the surface, you can prevent unintentional mingling of colors.
So, you’ll want to set up your rack, and place your damp, folded hoodie on top of it.
Mix up your dye according to package directions, making sure to wear your gloves!
Now you can apply your color!
We applied ours in a pinwheel shape to achieve that spiral look we were going for.


Make sure you dye the front and the back of the hoodie, using plenty of dye! You don’t want to forget one side and end up with a very weird looking pattern.
I felt like I used a TON of dye on this thing. But my end result probably could have used even more color. Be liberal with your use of dye if you want a lot of color on your finished product.
And Now We Wait…
Once you’ve finished applying the color to your tie dye hoodie, wrap it in plastic to keep it damp.
We placed ours in a plastic garbage bag and tied off the end.
Now you get to wait…
Our directions say to let the dye sit for 6 to 8 hours, but we actually did more like 20, since we let ours sit overnight.
This makes sure the dye “sets” and really adheres to the fibers of the fabric.
I know waiting stinks, but you’ll have much more vibrant colors if you wait.
If you want a more pastel look to your colors, wait a shorter amount of time.
Final Steps
After we’d let our tie dye hoodie sit in the garbage bag overnight, we finally were able to bust into it.
Again, you’ll want to do this in an area that won’t be damaged by the dye.
I opened mine in my stainless steel kitchen sink.
Do not remove the rubber bands yet!!
Next you need to rinse out as much dye as you can from the shirt, while it’s still bundled up. This will help prevent accidentally dying areas you don’t want dyed.

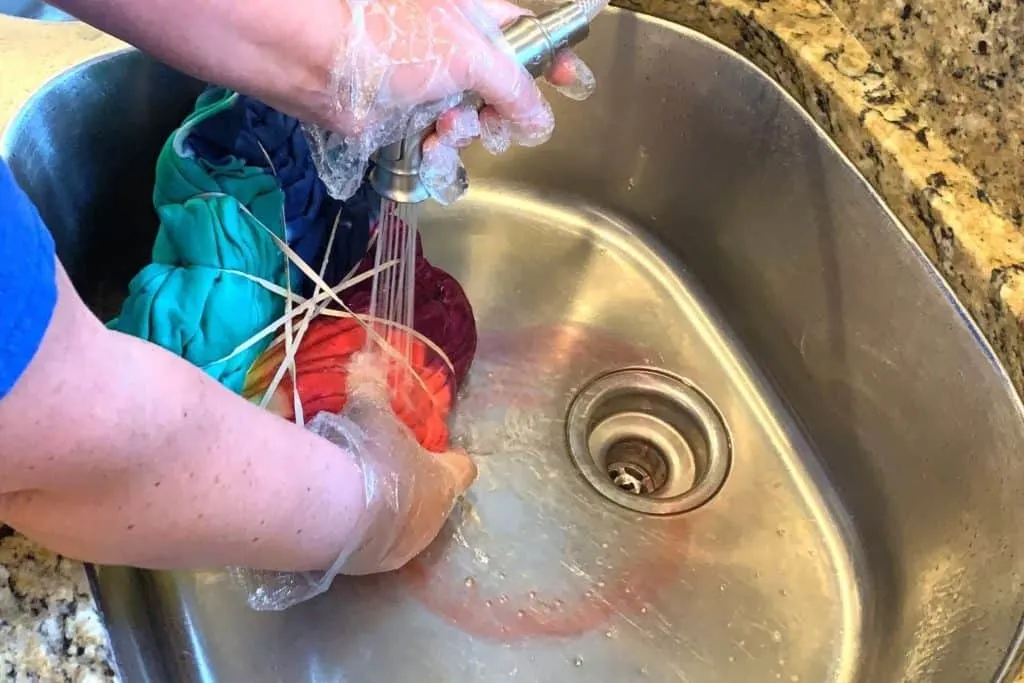
I took my time, rinsing and squeezing each section as individually as I could. You’ll want to keep rinsing until the water runs clear when you squeeze it.
Then unbundle your shirt. If you’re using scissors to cut off the rubber bands, make sure you’re very careful and do not cut the shirt.
This is your first glimpse at your finished product!! It’s super gratifying!
Give the shirt another rinse and squeeze, just to get out any residual dye. Again, do this until the water runs clean.
Once you’re happy that you’ve rinsed it completely, you’ll want to wash your tie dye sweatshirt in the washing machine by itself, with just a little bit of detergent.
Once it’s washed, you can throw your tie dye hoodie in the dryer or hang it up to dry. Whatever you would normally do with it.
Now it’s ready to wear!
The Finished Hoodie

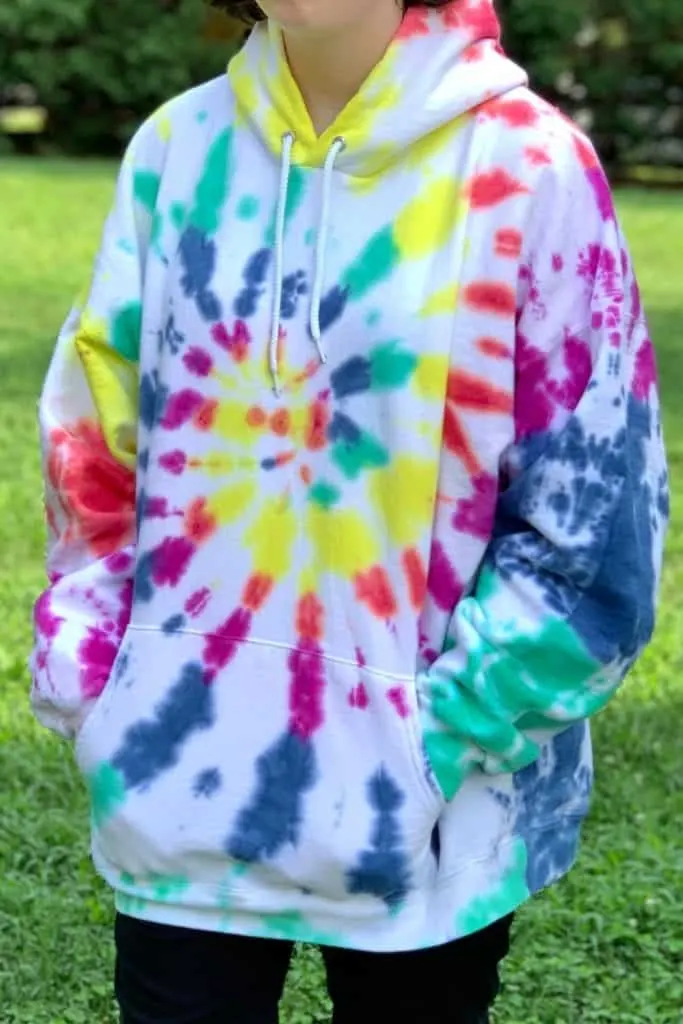
Don’t you love it?!?!
My teen was thrilled with the final results of ours. She now proudly wears her one-of-a-kind tie dye hoodie just about all the time.
For the first couple of times you wash your hoodie after wearing it, I would recommend washing it alone, just in case any residual dye is still left.
Have you made a tie dye hoodie or a tie dye sweatshirt? I’d love to see your results!!
Looking for other fun apparel projects? Check out these other awesome tutorials:


Tie Dye Hoodie: A Do-It-Yourself Guide

Make your own one-if-a-kind tie dye hoodie with this simple tutorial!
Materials
- White Hooded Sweatshirt
- Tie Dye Kit
- Rubber Bands
- Disposable Gloves
- Trash Bag
Tools
- Baking Racks
Instructions
- Wash your hoodie as you would regularly. Do not dry.
- Fold your damp hoodie in the desired configuration and secure with rubber bands or ties.
- Find a workspace that won't be damaged by the dye.
- Mix dye according to package directions.
- Set up baking rack and place bundled hoodie on top.
- Apply the dye to the shirt, letting excess dye drip down from the racks.
- Place shirt in garbage bag to keep damp.
- Leave shirt in bag for 6 to 8 hours or according to package directions of your tie dye kit.
- Remove your shirt from the bag in a place that won't be damaged by the dye.
- Keeping shirt bundled, rinse until water runs clear.
- Unbundle shirt and rinse again until water runs clear.
- Wash alone in washing machine with a small amount of detergent.
- Dry as normal and wear!
Notes
WARNING: Dye be damaging to surfaces and clothing. Wear old clothes and work in a space that won't be damaged by the dye.
I do not recommend this project for children.
Recommended Products
As an Amazon Associate and member of other affiliate programs, I earn from qualifying purchases.


NS
Friday 26th of August 2022
How do you spiral fold a sweatshirt? How do you fold in the long sleeves? I did a short sleeve tee shirt with no problem. Having issues with the long sleeves and the sweatshirt.
Louise Emery
Monday 29th of August 2022
Sweatshirts are always more challenging because of the bulk. I did not fold mine it. I always let them twirl in naturally as they would when I'm doing the process on a t-shirt. It's definitely difficult to wrangle sometimes, and takes some trial and error to get it secured properly, but it is possible.
M
Wednesday 16th of December 2020
Next time show how you spiral folded a sweatshirt. Spiraling a t-shirt is slightly different since its not bulky.
admin
Wednesday 16th of December 2020
Next time I do the project, I'll film it and add it to the post. Thanks for the suggestion!
Sonya
Wednesday 28th of October 2020
I cant wait to try!!