This rope rainbow wall hanging project is giving me all the feels, y’all! Looking at it just makes me happy!
It’s such a fun and cute project that’s perfect for just about any room, from a nursery to a teen bedroom!
The best part is that I found everything I needed to make this project at my local dollar store!!!
Cute, trendy, and cheap! That’s definitely my kind of project.
Here’s everything you need to know to make your own Rope Rainbow Wall Hanging!

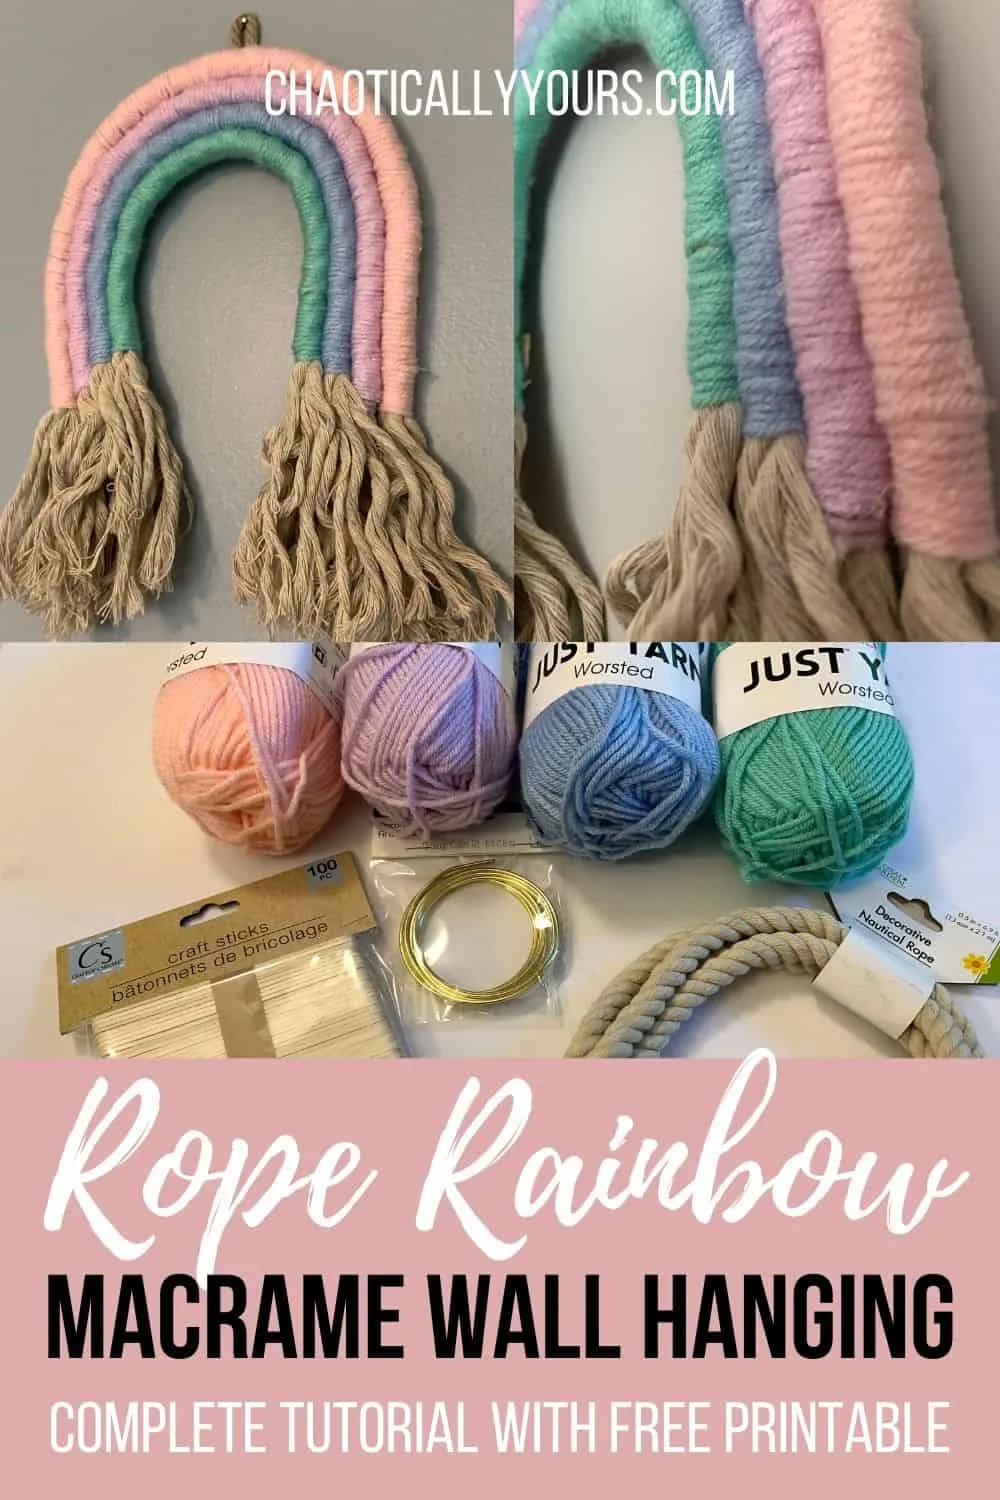
Rope Rainbow Supplies
The Dollar Tree has REALLY upped their craft game in recent months! We’ve found all sorts of fun projects and supplies there lately.
When looking for supplies for this rope rainbow project, I was super happy to find literally everything I needed right in the store. Even down to some extra hot glue gun sticks, my local Dollar Tree had it all.
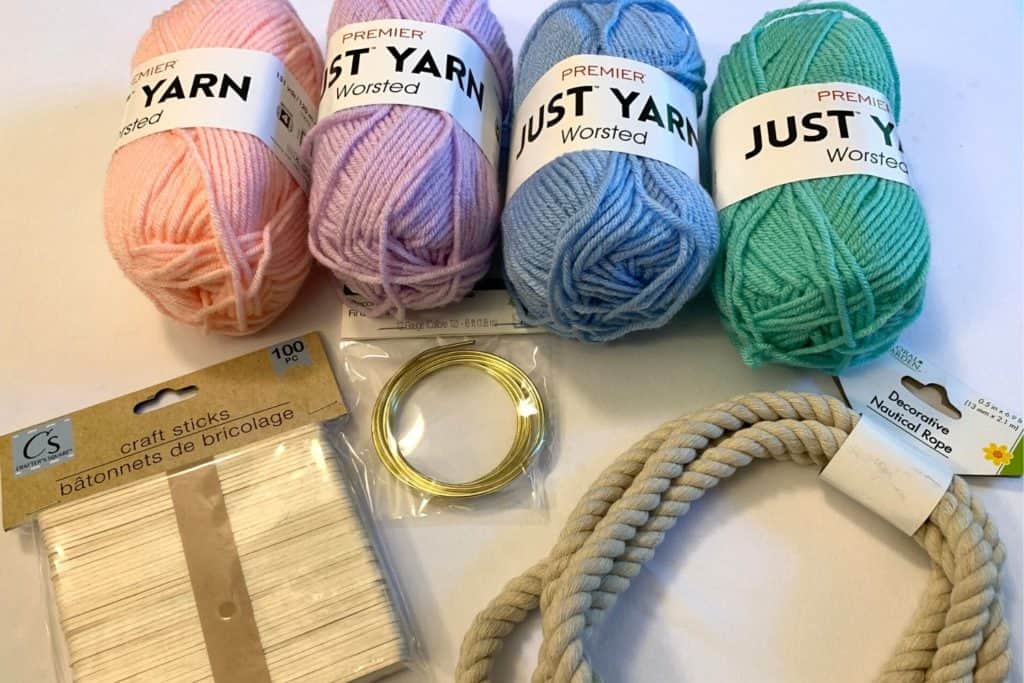

For this project you’ll need:
- Rope
- Several colors of yarn
- Popsicle Sticks
- Floral wire
- Masking tape (not pictured because I didn’t realize I needed it until I got started)
You’ll also need to utilize scissors and a hot glue gun to make it all come together.
As far as rope goes, the Dollar Tree actually had a couple of options available. I chose this “decorative nautical rope” because it had more of a smooth, thread-like feel to it. The other, more rough textured rope would have functioned just fine for this project as well.
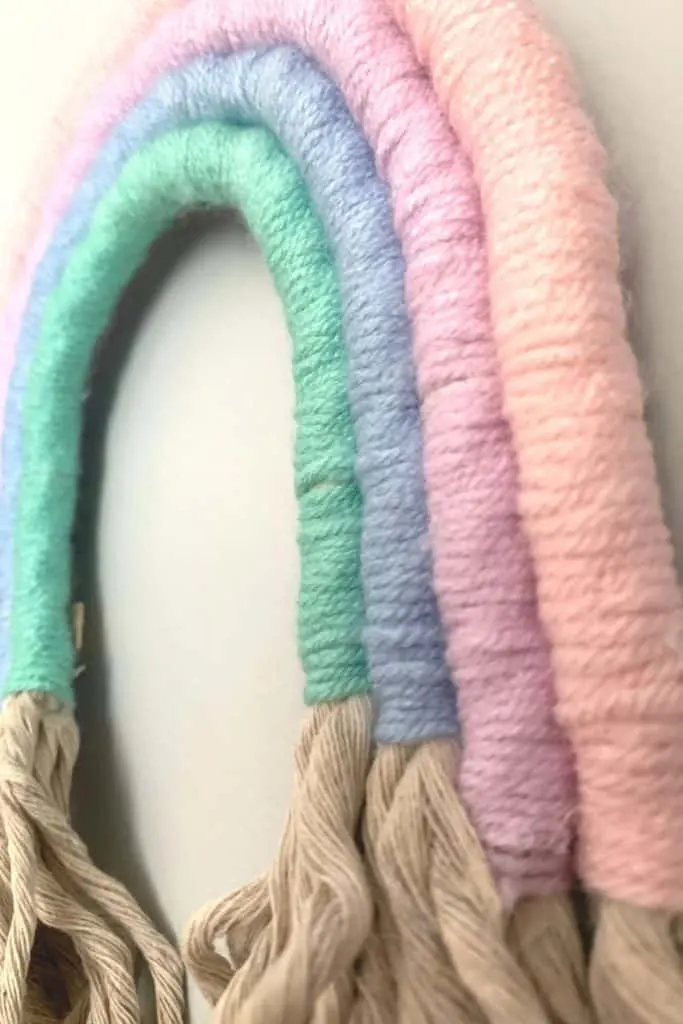
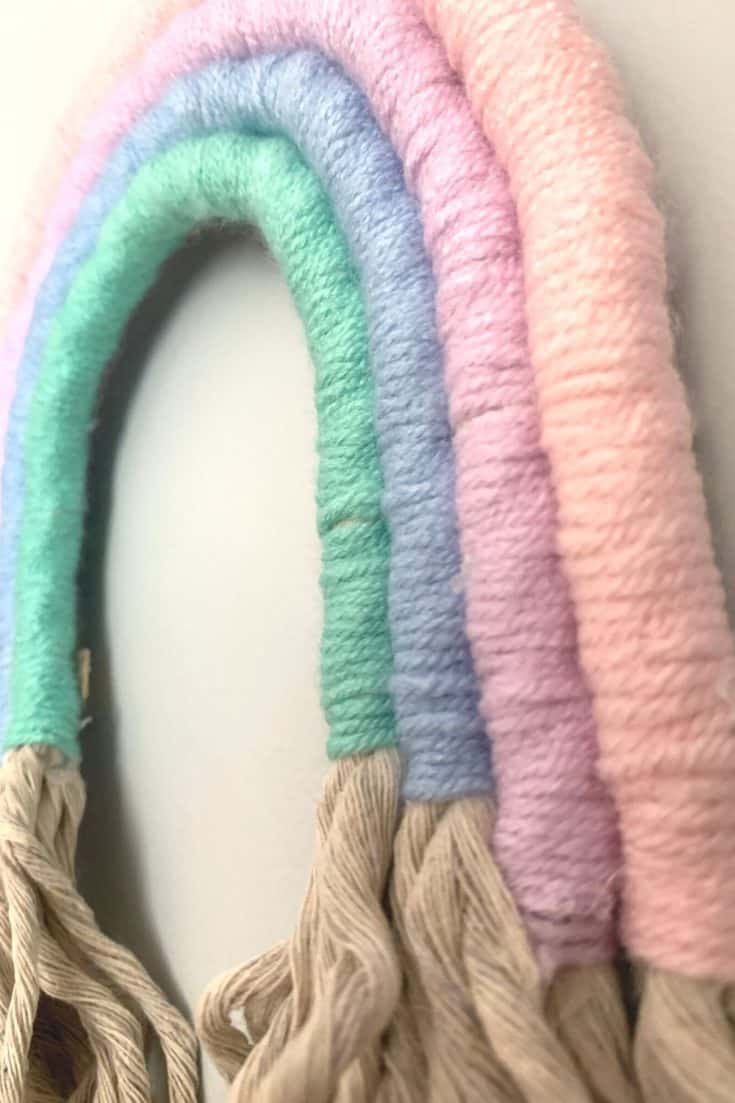
The colors of yarn you use is totally up to personal preference. I love pastels, and was glad to see a nice selection of them available to make this rope rainbow. But this project would be gorgeous in primary shades or fall shades as well.
You can use as many or as few colors as you like. I’ve seen up to seven layers done in larger versions of this project, but I wouldn’t do less than three.
Rope Rainbow Steps
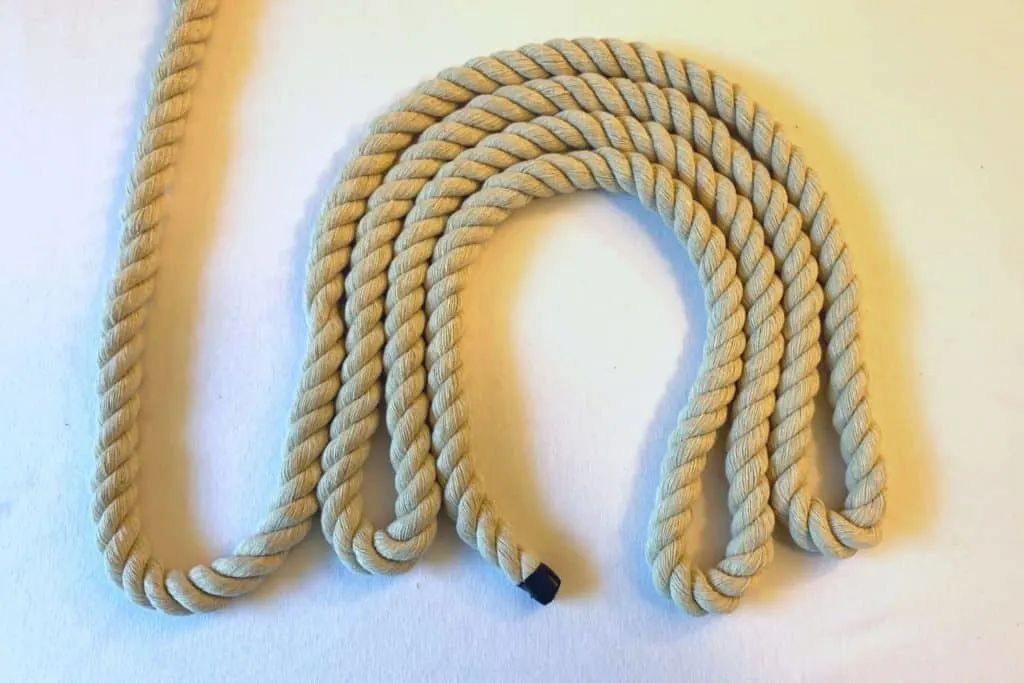
The first thing you’ll want to do is arrange your rope. I laid mine out in the shape I was planning to create, making sure I had four layers, one for each color of yarn I planned to use.

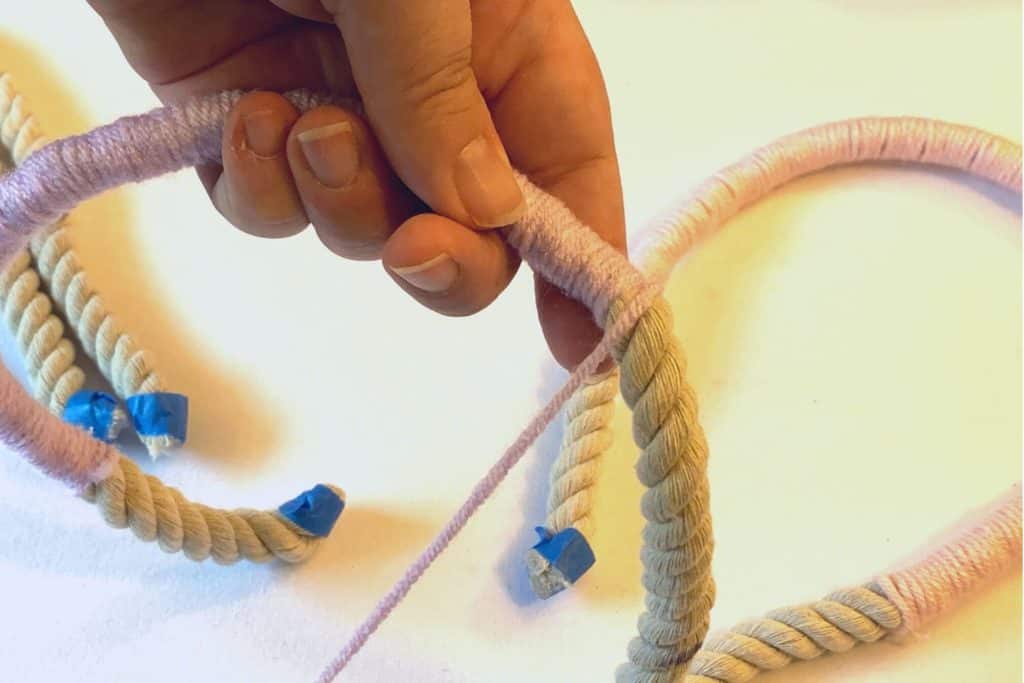
Next I wrapped some painters tape (you could use masking tape for this as well) around the areas I planned to cut. This helps assure that your rope won’t start to fray when you’re working with it. You’ll want to leave the tape on the rope until the very end of the project.
After trimming each rope, I used a ruler and a sharpie to mark where I needed to start and stop wrapping the yarn. This was SUPER helpful when I put together the final rope rainbow and saved me time not guesstimating where to start and stop.
Now you’ll want to add the floral wire to the rope. It is possible to skip this step if you are unable to find floral wire, but I find that it adds rigidity to the final product and makes for a more stable Rope Rainbow in the end.
To add the floral wire, start by measuring how much you’ll need. The wire needs to be covered by yarn, so make sure you cut a piece that fits within the marks you made on your longest rope.
Once you have your piece cut, use the hot glue gun to attach it to that long rope in between your markings.
You only need to add floral wire to this top piece, it’s really not necessary to add it to any of the other layers.
It’s also a good idea to determine the order you want your colors to be in and keep the arranged that way. This makes it easier not to get mixed up as to which color goes on which rope.
Now you need to start wrapping the rope with the yarn.

Starting at the mark you made on the rope, put a dab of hot glue and place the yarn on top of it. Once it has dried enough to be secure, start winding the yarn around and around the rope tightly.
Make sure you’re getting the yarn as close together as possible. You don’t want too much of the rope peaking out from under the yarn.
When you’ve covered the length of the rope with the yarn all the way to the other mark, put another dab of hot glue on the rope. Place the yarn on top of that glue and hold the yarn securely until the glue is fairly secure. Now you can trim the yarn.
Repeat this process for each layer of your Rope Rainbow.
Once you’ve covered all your ropes, you can move on to attaching them together.
When I first made this project, I hot glued each layer of the rainbow together. But now that I’ve made a few pieces, I find that step to be unnecessary.
It’s just as secure to use a piece of a popsicle stick to attach the layers on the back.
Simply trim a popsicle stick down to the size you need and glue it across all the layers. You’ll want to do this in several places, depending on the size of your Rope Rainbow. Definitely no less than three.
Once you’ve attached the layers together, you can add your hanging loop to the top.
Just take a short piece of smaller rope, or you can even use some of the yarn, and cut a small piece that you can make a loop out of. Glue the loop to the top most popsicle stick you’ve attached to the back.
Now comes the fun part. Once your glue is dry, flip your Rope Rainbow over and start loosening the rope at the bottom ends.
I like separating out lots of the individual strands of the rope, but you can adjust how much you loosen it to your own preference.
The Finished Product

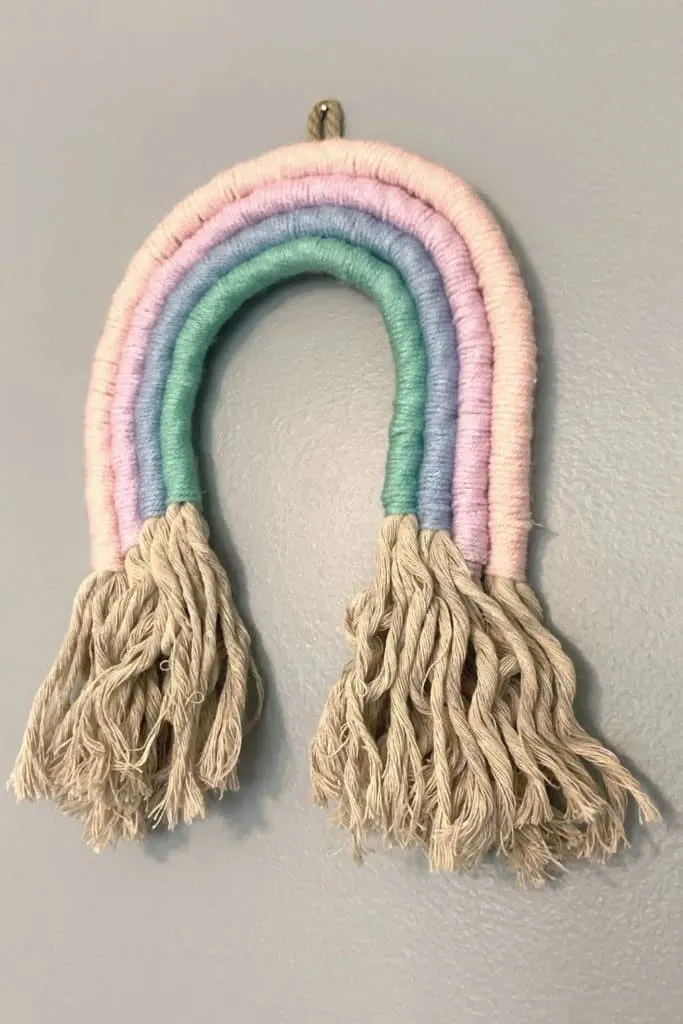
I can’t tell you how much I love my final Rope Rainbow.
This project came together so quickly and easily. It’s one of those rare crafts that makes you look really skilled even if you really aren’t.

I’d love to see pictures of your finished Rope Rainbow projects!
Looking for other fun and easy craft projects?
Check out my Easy Felt Flower Magnet tutorial!
Or make your own Bleach Stencil T-Shirts!
If you’re really adventurous, try this Mason Jar String Art project!
Rope Rainbow Wall Hanging

Make this beautiful Rope Rainbow with just a few simple items available at your local dollar store.
Materials
- Rope
- Several Colors of Yarn
- Popsicle Sticks
- Floral Wire
- Masking Tape
Tools
- Hot Glue Gun
- Scissors
Instructions
- Arrange the rope in the shape of the rainbow, allowing one layer of rope for every color you plan to use.
- Wrap masking tape around areas to cut, and trim the rope to the lengths needed for your Rope Rainbow. Leave the tape on the rope.
- Use a ruler and a marker to make a line across the rope to indicate where to start and stop wrapping the yarn.
- Cut floral wire to the desired length and attache to the top rope with hot glue.
- Attach one dab of hot glue along the marking you made to one piece of rope. Attach one color of yarn to the glue.
- Wrap the yarn tightly around the rope, trying not to leave any gaps where the rope shows through.
- When you get to the other marking on the rope, place another dab of hot glue and attach the yarn. Trim once yarn is secure.
- Repeat this wrapping process for each layer of your Rope Rainbow.
- Line up your wrapped pieces of rope together in the order you want them to be in the finished wall hanging.
- Trim a popsicle stick to fit onto the back of the Rope Rainbow.
- Glue the layers to the trimmed popsicle stick.
- Attach the layers together in a minimum of three places.
- Add a small loop of rope or yarn to the back top of the piece with hot glue to hang it from.
- Once your glue is dry, flip your Rope Rainbow over and start loosening the rope at the bottom ends.
Notes
Please use extreme caution when using a glue gun! They can cause severe burns.