
Flying Wish Paper is a fun way to add an exciting touch of whimsy to a holiday celebration like New Year’s Eve, Christmas Eve, or even a birthday party.
We experienced Flying Wish Paper this past New Year’s Eve at a friend’s house. I’d never heard of it before, and was really charmed by the way our older kids really got into participating in this activity.
While you can always purchase Flying Wish Paper, I recently discovered a way to make your own using things you probably already have at home!
Links in this post may be affiliate links, which means I may earn a commission if you make a purchase from any of them, at no additional cost to you. You can find out more information by reading my full disclaimer.
WARNING: Any activity that involves the use of flames carries the risk of starting a fire. Always be very careful when using a lighter or an open flame in any circumstances, and be prepared with a fire extinguisher in case something goes wrong. Do not allow children to do this project on their own. When you recreate this project, you do so at your own risk.
What Is Flying Wish Paper?
Flying Wish Paper is a tradition that utilizes special, super light weight paper that will lift off into the air as it burns.
The way we experienced it was really special. We were instructed to write a wish for the new year on our paper. Then we took turns lighting them and watching them float away, hoping our wish would come true.

It’s a really fun activity to do with just about any group of people.
If you don’t have time to make your own, Flying Wish Paper is available at places like Amazon or sometimes you can find it in a gift store. But honestly, it’s so easy to make, you would spend less time (and money) just doing the DIY Flying Wish Paper version.
DIY Flying Wish Paper
To make your own Flying Wish Paper, you’ll need just a few things that you probably already have.
What You’ll Need
Here’s what you’ll want to gather together:
- tea bags
- matches or a lighter
- a staple remover or a flat head screwdriver (optional)
- makers or food coloring (optional)
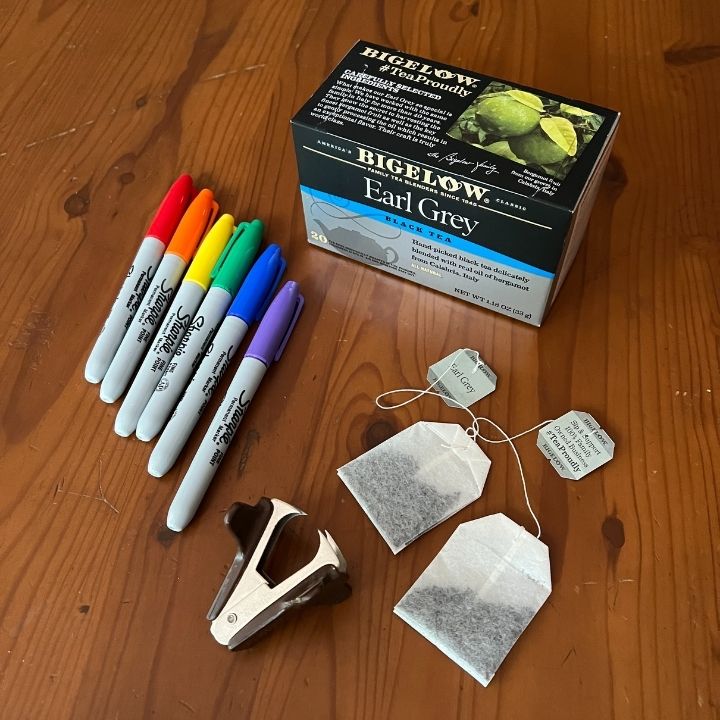

Make sure you get the tea bags that are folded at the top with a string attached to them. You do not want the ones that are a square, completely sealed packed. The structure of those bags won’t work as well.
What To Do
To make your own, you’ll first want to deconstruct your tea bags.
Most tea bags have the string just tied on. The kind we used was set up this way. It was super easy to just gently unfold the bag and pull out the string.
Some types of tea bags use a small staple to hold the string on. If you have this kind, use the staple remover (or a flat head screwdriver), remove the small staple from the top of the tea bag and take off the string and the tag.
Once the tea bag is open, remove the tea. Be careful doing this since the bag is now open on both ends and can spill out easily. I realized this the hard way and ended up having to vaccum tea leaves out of my carpet.

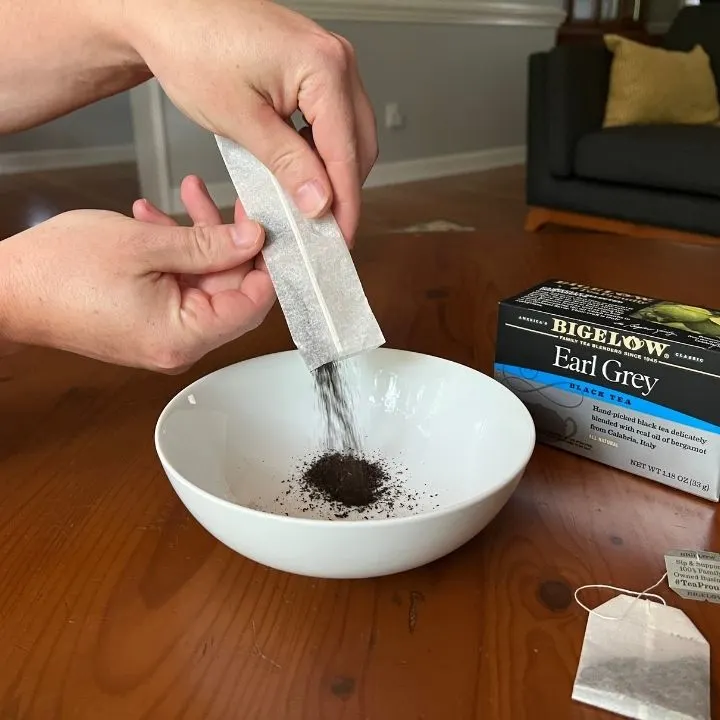
The tea is still completely usable, and can be placed in a tea ball or just brewed loosely and strained for drinking.
The empty tea bag can now become your wish paper!
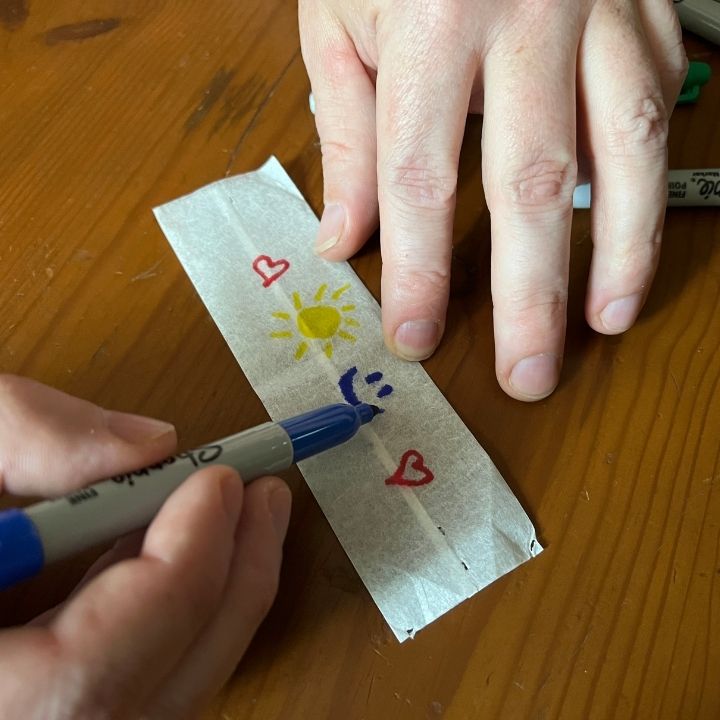
You can use the tea bag exactly how it is, or you can decorate it with the markers or the food coloring.
If you’re planning to write wishes on your newly created with paper, it’s nice to have darker wish paper so the wishes can be kept secret.
To make darker wish paper, I simply mixed a little bit of water with some food coloring. Then I used a small paint brush to apply it to the empty tea bag.
Once I let it dry completely, the new, darker “flying wish paper” was ready to use.
How To Set Up Your Wish Paper
Now that you’ve got your DIY Flying Wish Paper ready to do, it’s really fun to implement.

Simply gather your group together, then hand out a piece of flying wish paper and a pencil to each participant.
Have the write their wish of the paper. It’s up to you whether you want them to be secret or not.
Then take turns lighting your paper.
How Does Flying Wish Paper Work?
It’s super easy to get your flying wish paper to work.
Protect your surfaces by setting up your wish paper on a something not easily flammable, like a plate or a dish.
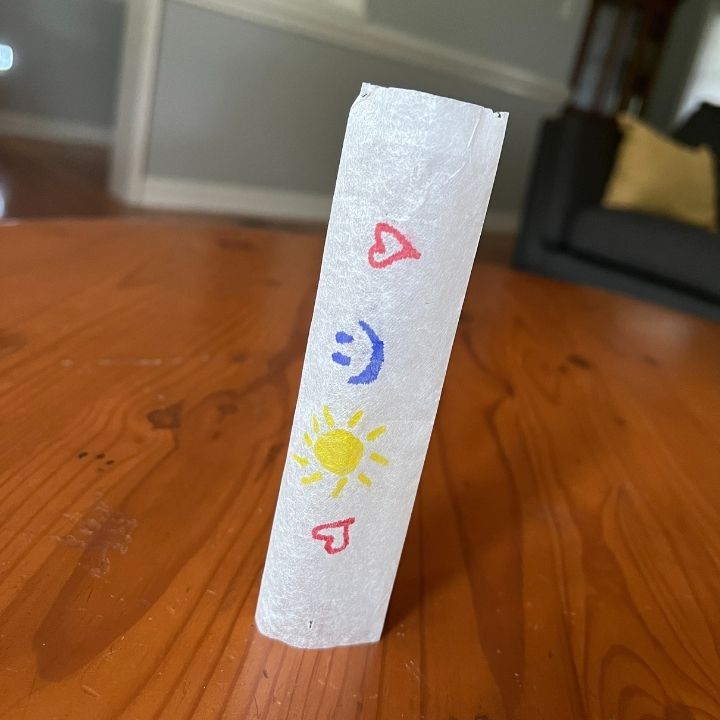
If you’re using our DIY flying wish paper, you’re paper will already be in a tube shape. You’ll want to open up that tube and get it to stand up straight, creating sort of a chimney.

If you’re using store bought wish paper, you’ll need to wad the paper up and then open it again so that the paper has a wrinkled texture to it. Then you can roll it into a tube and set it up to light it.
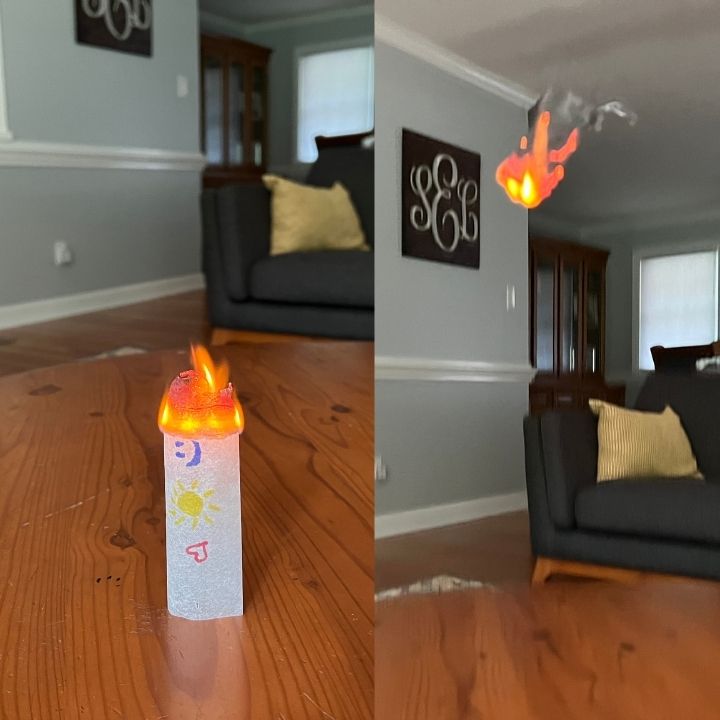
Once you’re wish paper is set up, simply light the top and watch it burn until it takes flight.
The fire creates a little current of hot air in the tube you’ve made, and once enough of the paper has burned off, the paper becomes light enough for lift off.
It’s really hard to see it flying in pictures. Watch this video to see the full effect:
It make take a few seconds for it to burn down enough to take off, but don’t worry. We found that there are rarely duds in this process.If it doesn’t take off, it likely wasn’t set up right. That tube shape is imperative to it flying up in the air.
Once the paper completely burns up, a little remnant is left floating in the air.
If you’re doing this outside, it will just float away on the breeze. If you’re doing it inside, it can be fun to try to catch the remnant. We decided that if you catch it, your wish has a better chance of coming true!
*Safety note: Please use caution when lighting your flying wish paper on fire. Anytime you use an open flame, there is risk involved, so make sure children aren’t handling matches or lighters to complete this process.
Can You Use Wish Paper Inside?
We’ve used flying wish paper indoors frequently, but always with extreme care. Always have a fire extinguisher handy in case something goes wrong.
Make sure you have plenty of clearance (I’m talking at least 7 feet) above where you’re lighting your flying wish paper. Nobody wants soot marks on their ceiling!
And again, use extreme caution when handling anything with a flame, and NEVER let children do this activity unsupervised.
What Will You Use Flying Wish Paper For?
We love flying wish paper. It is such a fun new year’s eve tradition that we plan to use for years to come.
What will you use flying wish paper to celebrate?
If you like this quick and easy project, you might like my Origami Star Tutorial or my Fairy Hair Instructions.
DIY Flying Wish Paper
WARNING: Any activity that involves the use of flames carries the risk of starting a fire. Always be very careful when using a lighter or an open flame in any circumstances, and be prepared with a fire extinguisher in case something goes wrong. Do not allow children to do this project on their own. When you recreate this project, you do so at your own risk.
Materials
- Tea bags
- Markers or food coloring (optional)
Tools
- A staple remover or a flat head screwdriver
- Matches or a lighter
Instructions
- Remove the tag and string from the tea bag. Then take out the small staple at the top of the tea bag using the screwdriver or staple remover. .
- Dump out the tea from the tea bag.
- Decorate the tea bag and write your wish on it.
- Open the tea bag at the top and bottom creating a tube, and set it on a flat surface, creating sort of a chimney.
- Light the top end of the tube, and watch your flying wish paper float away.
Notes
*Safety note: Please use extreme caution anytime you use matches or a lighter. Do not let children handle matches or lighters.