

Today I’m sharing my foolproof way to make a DIY gift box in just seconds.
This method not only helps you make the right size box for those smaller gifts, it makes those expensive gift boxes go even further!
I’m sure you’ve been here. You’ve purchased the perfect gift for someone you love. You go to wrap it, and you suddenly realize you don’t have the right size gift box to wrap it in.


You’re scrambling around, trying to find something to shove this present into to make it look even halfway nice.
You’re all out of gift bags, and all you’ve got is a gigantic shirt box that’s WAY too big for what you’re wrapping.
Never fear! I’ve found a great way to pair down that shirt box to make it just the right size!
This technique comes in handy all year round, but especially at Christmas time.
With just one tool and a little know how, you can make your own DIY gift box in just a moment.
Links in this post may be affiliate links, which means I may earn a commission if you make a purchase from any of them, at no additional cost to you. You can find out more information by reading my full disclaimer.
What You’ll Need
The supplies to make your own DIY Gift Box are super simple:
- Half of a shirt box (lid or bottom, it doesn’t matter)
- Scissors
- Tape (optional)
That’s it! You probably have it all lying around your house already.
How To Make Your DIY Gift Box
Making a DIY gift box is super easy once you master the process. I’m including a free printable at the bottom of this post that outlines all the details for you.
To get started making your DIY gift box, follow the instructions in this video, or check out the step by step process listed further down the page.
Here’s the process in a little more detail:Step 1:
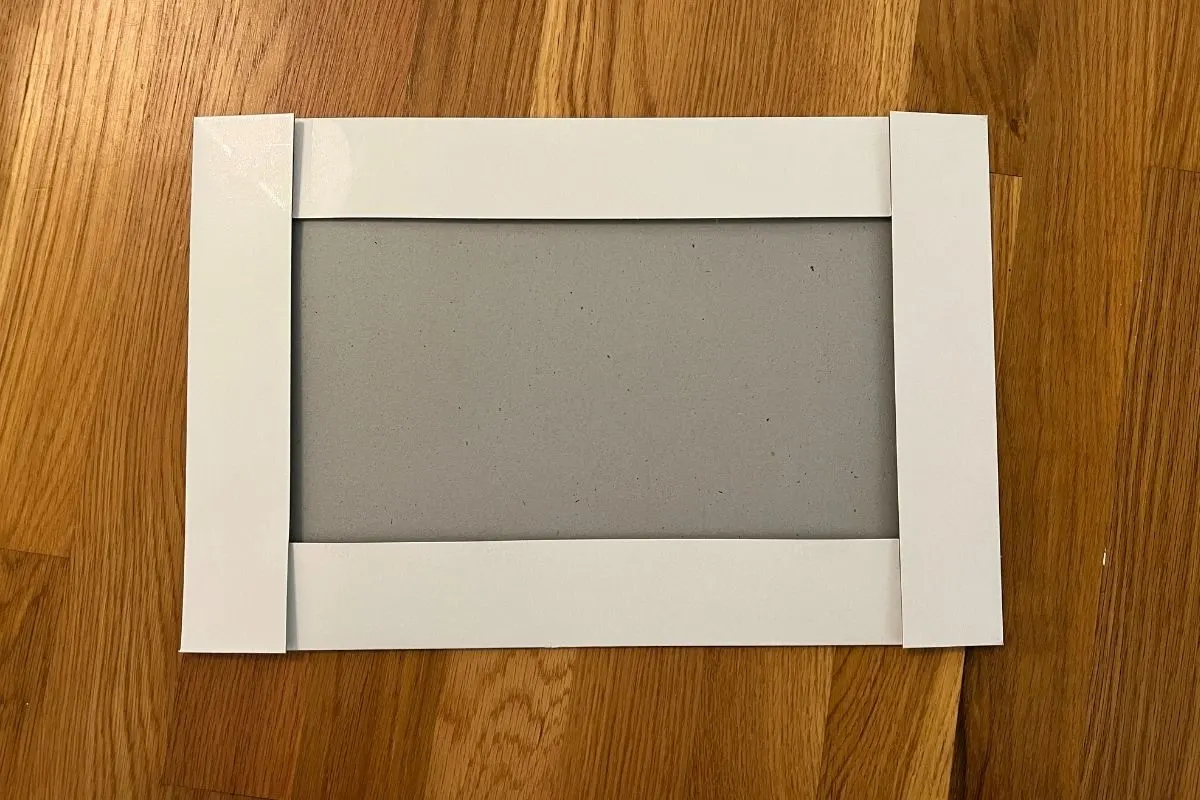
Lay the top or the bottom of a shirt box out in front of you horizontally, still folded to lay flat.

Step 2:
Fold the box so that one end just touches the edge of the folded in side of the box.

Step 3:
Repeat this fold on the other side of the box so that you have two vertical folds in the middle of the box.

Step 4:
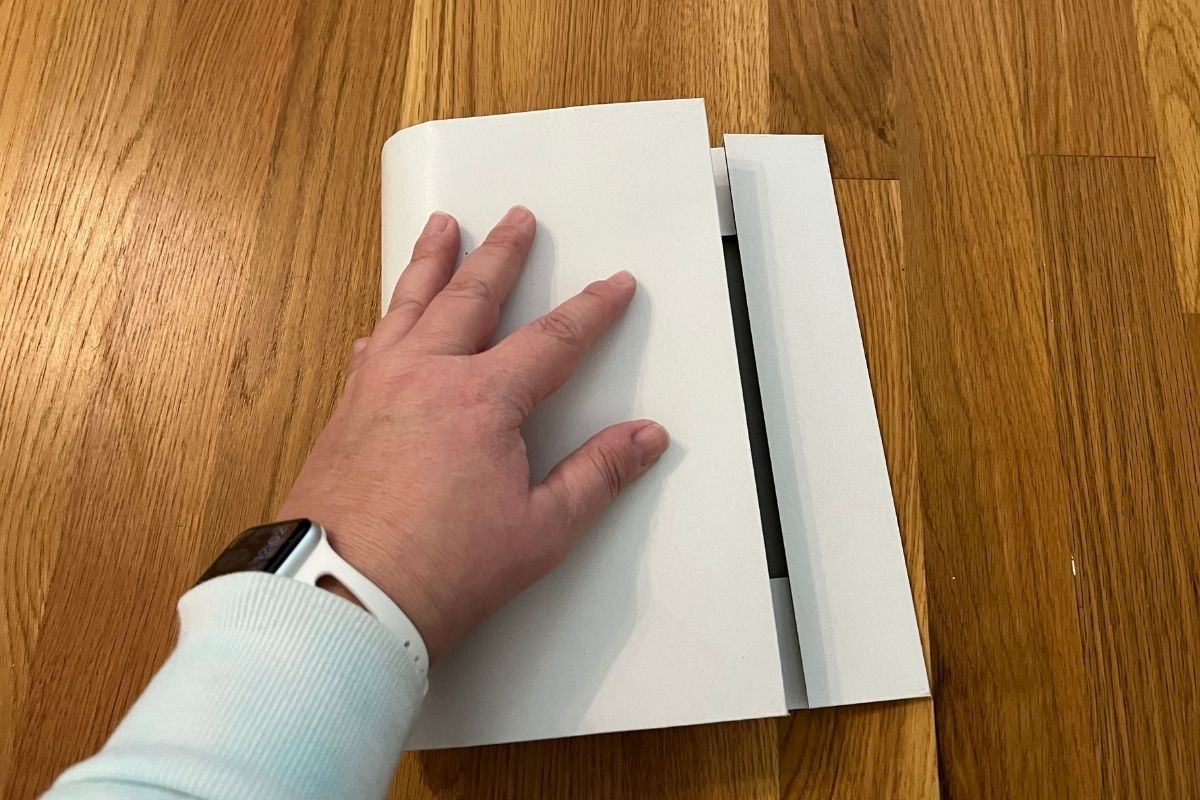
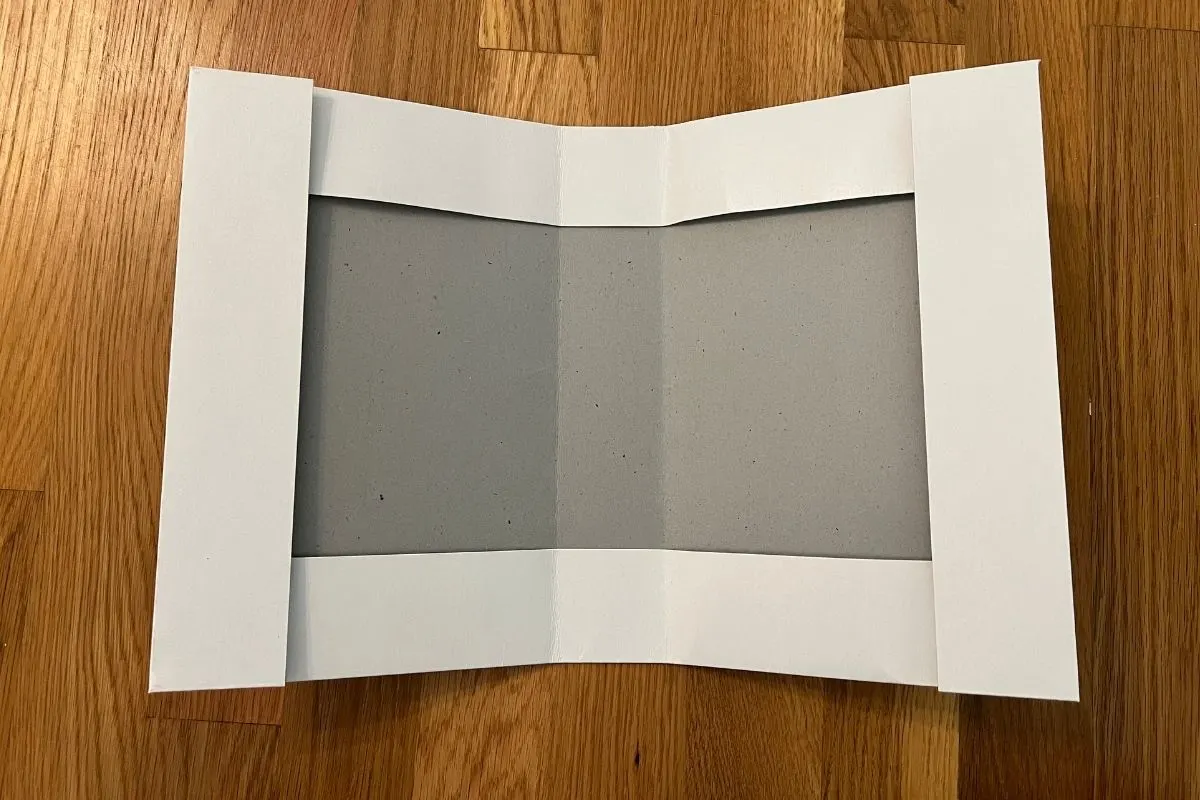
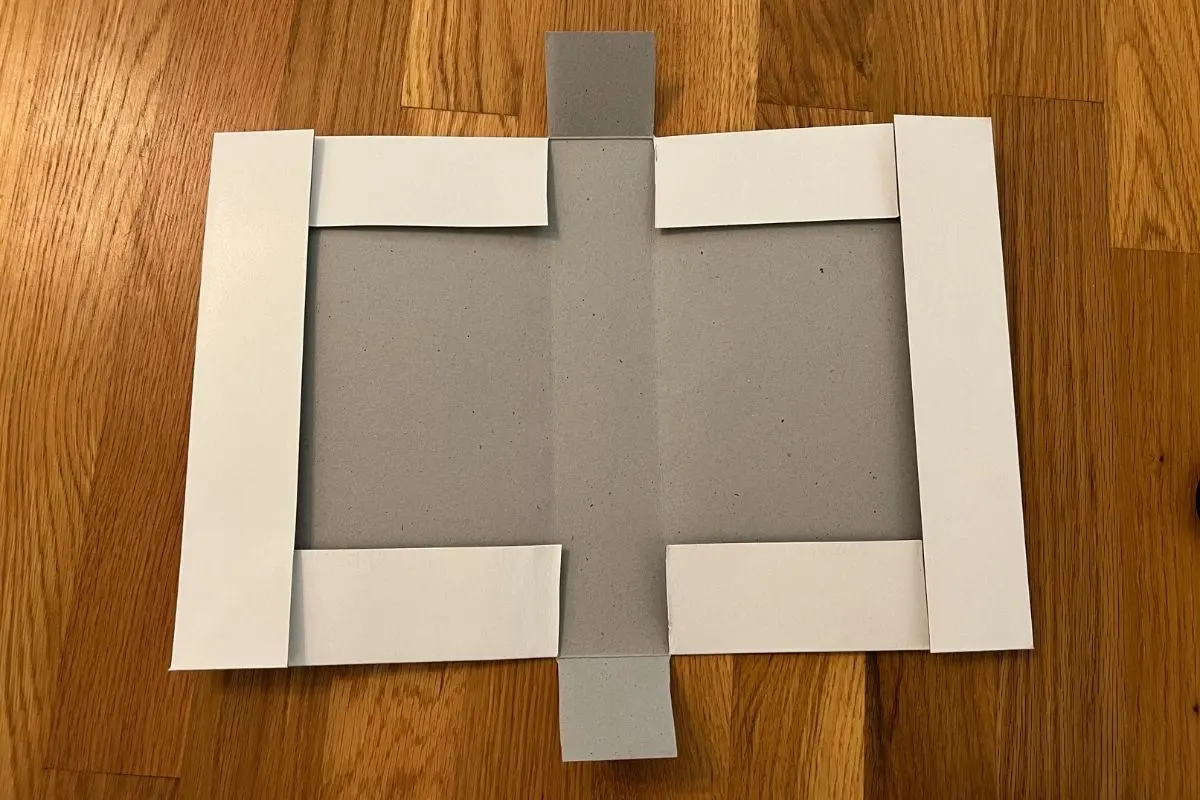
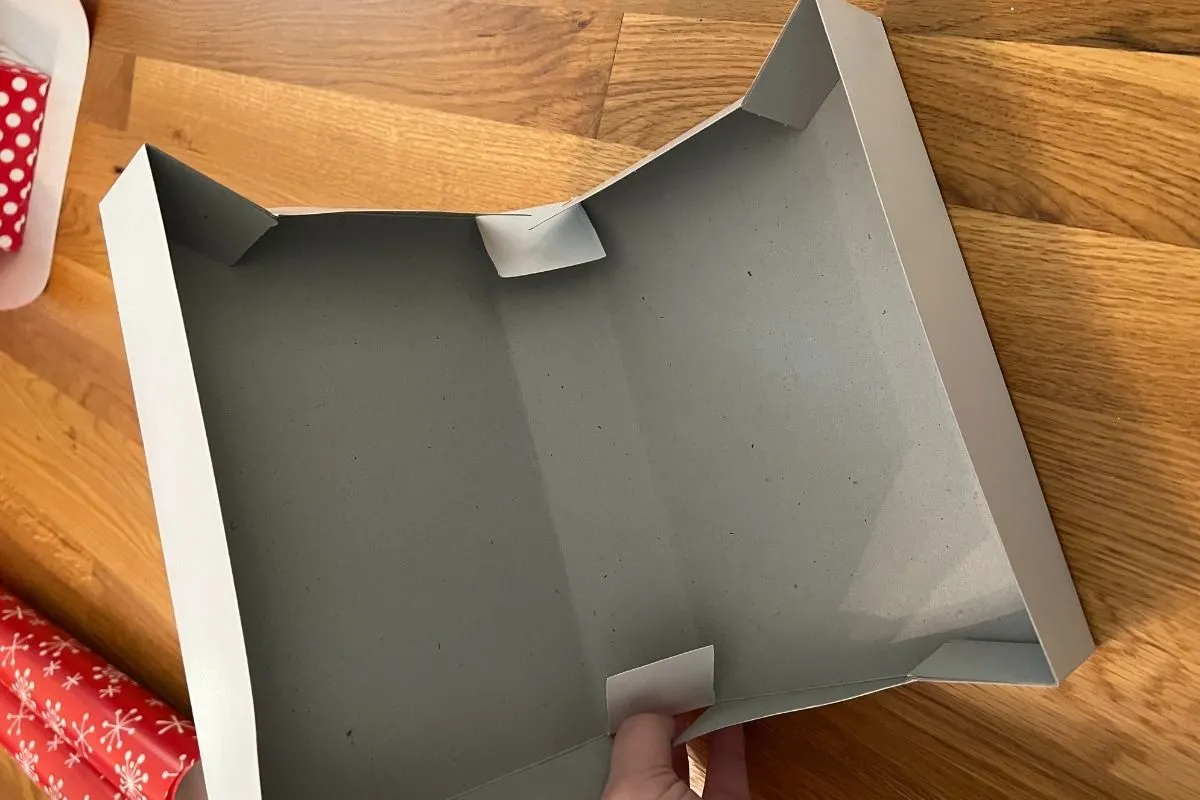
Cut the side of the box along each fold, stopping when you reach the bottom of the box. You should make four cuts.


Step 5:
You should now have two flaps in the middle of each horizontal side of the box.

Step 6:
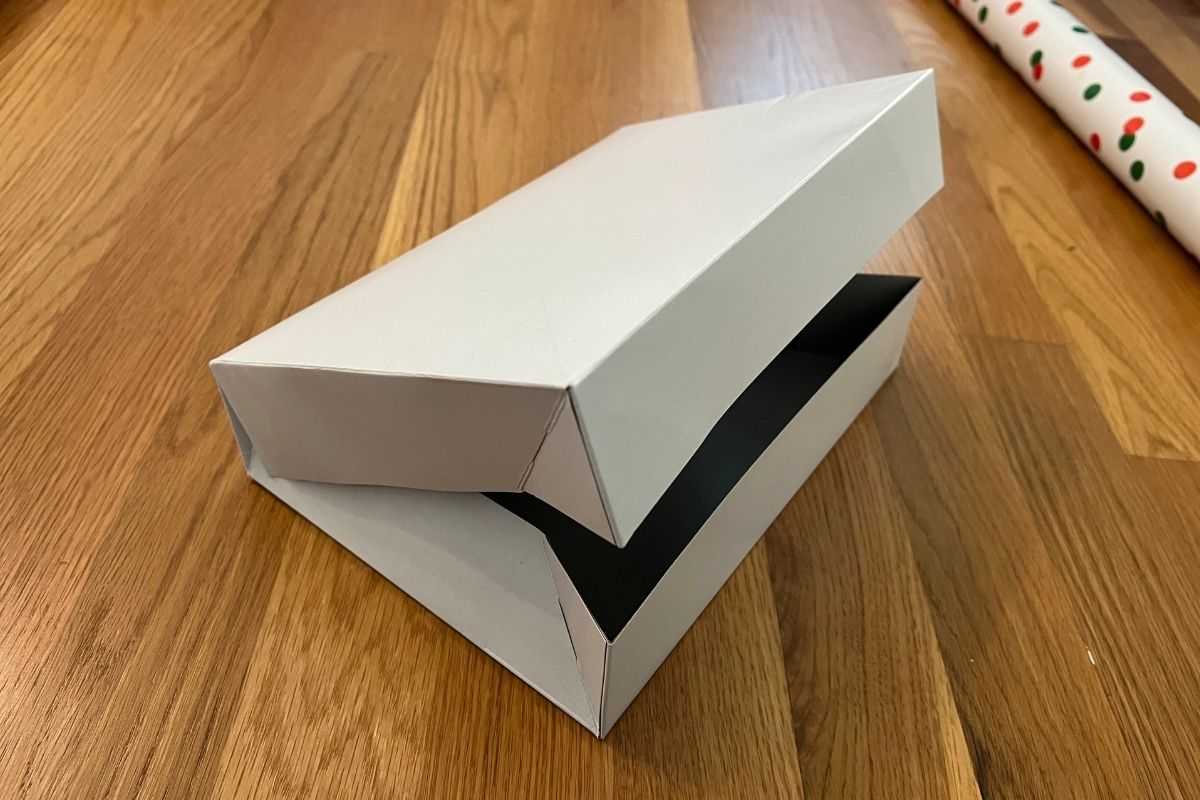
Tucking the flaps in, fold one side of the box over to cover the other side of the box, almost like closing a book.

Step 7 (optional):
Secure the inside flaps with tape to make the box more sturdy.
Step 8:
Now you can use your new smaller gift box!

Wrap it! Decorate it! Make it gorgeous!
Don’t forget to print out the free instructions at the bottom of this post so you can stash these instructions away with your wrapping paper for when you need them!
Looking for something fun to put inside these gift boxes? Try out DIY Bleach Stencil T-shirt project or these Make Your Own Silhouette Instructions!
DIY Gift Box


Repurpose a shirt box lid or bottom to make a smaller, more compact DIY gift box!
Materials
- Half a shirt box (can be top or bottom)
- Tape (optional)
Tools
- Scissors
Instructions
- Still folded flat, place your chosen half of a shirt box out in front of you horizontally,
- Fold one end of the box towards the other end, so that the edge just touches the end of the folded in side.
- Repeat this fold on the other side of the box so that now you have two vertical folds in the middle of the box.
- Along each fold, cut the side of the box, stopping when you reach the bottom of the box to create a flap.
- You should now have two flaps in the middle of each horizontal side of the box.
- Tuck the flaps inward and fold one side of the box over to cover the other side of the box, almost like closing a book.
- If you want, you can secure the inside flaps with tape to make the box more sturdy, but this isn't strictly necessary.
- Now you can use your new smaller gift box ready to fill and wrap!