
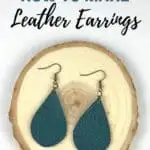
In today’s post, I’m going to show you how to make your own leather earrings!
I’m sure you’ve seen leather earrings everywhere lately. They’re so cute and go with so many outfits!
They light weight material of the leather makes them super comfortable to wear.
Did you know that in addition to be an super trendy fashion item, that they are also SUPER easy to make?
In face, making leather earrings is the perfect project to use if you plan on hosting a craft night!
Today, I’m sharing the extremely easy steps to make your own leather earrings, complete with a free printable instructions and cut template!
The printable is at the bottom of this post, but it’s just the basics. You’ll want to read the whole post first to get all the tips and tricks to get this project right the first time!
Links in this post may be affiliate links, which means I may earn a commission if you make a purchase from any of them, at no additional cost to you. You can find out more information by reading my full disclaimer.

What You’ll Need
The supplies needed to make leather earrings are pretty common and easy to find. Your local craft store or even a big box retailer will have them all.
Supplies:
- A small piece of leather
- Very sharp scissors
- Earring hooks
- Jump Rings
- Needle nose pliers
- Sharpie
- Leather punch or a thumb tack
- Printable Cut Pattern
Where to Find Leather
Leather is actually easier to find than you’d think for this project.
Most fabric and craft stores carry leather in small pieces that are perfect for this project. You can also order leather for earring from Amazon. Amazon is also a great source if you prefer working with faux leather.
My favorite way to source leather for this project is to utilized leather scraps, left over from other artists projects. I’ve had great luck finding lots of leather scraps for great prices at The Scrap Exchange, a fantastic artist thrift store in my area.
Tools for Making Leather Earrings
As with any project, you need good tools to make leather earrings the right way.
I recommend using very sharp scissors for cutting the leather. It’s much easier to get clean lines with a good pair.
You’ll also need a good pair of needle nose pliers.
If you have a leather punch, fantastic, but don’t have to run out and buy one if you’re only planning on making a couple of pairs of earrings.
While a leather punch makes the process really easy, you can get appropriate holes punch in the leather with just a thumb tack.
Jewelry Making Supplies
To make leather earrings, you’ll also want to make sure you have earring hooks and jump rings ready to go.
Again, most craft store will have earring making supplies readily available, or you can order them from Amazon.
You’ll need both earring hooks, which are the small hooks that will go through your ears when the leather earrings are complete, and jump rings, which are small, bendable rings that have an opening cut into them so you can attach things together.
How To Make Leather Earrings
Grab Your Templates
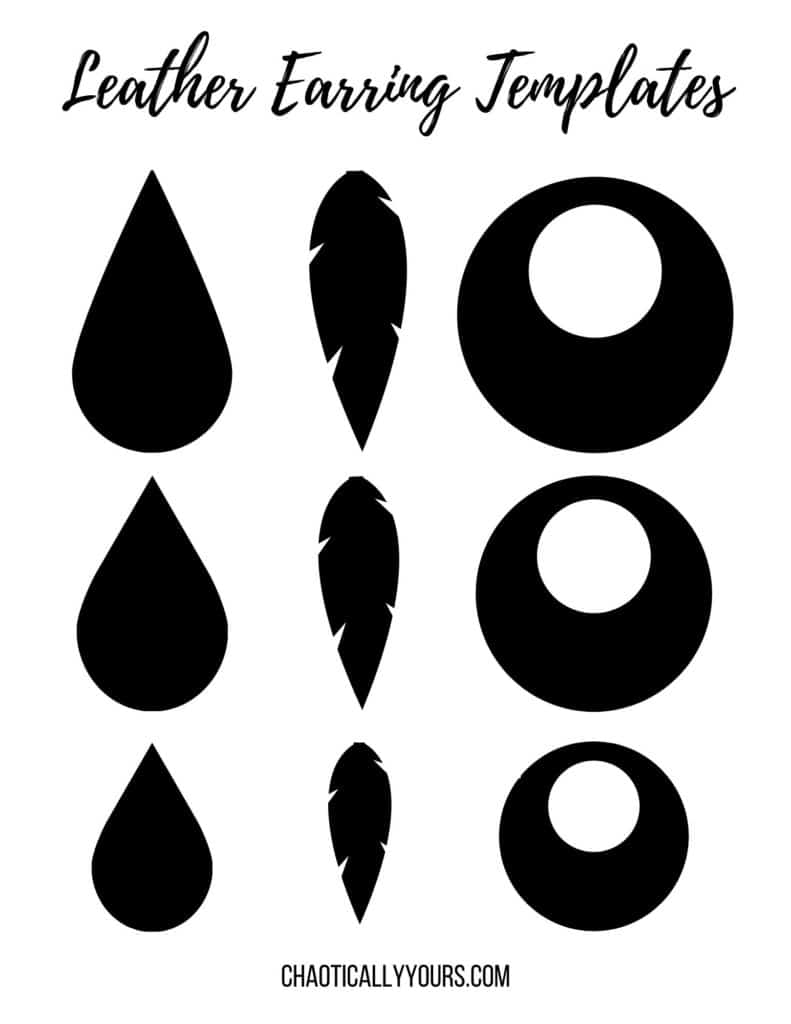
To get started making your leather earrings, you’ll need to print my PDF template for the shapes.
The template offers three different styles, each in three different sizes, teardrops, feathers, and hoops.
You can download it by clicking here: LEATHER EARRINGS TEMPLATE
It should look like this:

Once you’ve printed the template, it’s really easy to get started making your leather earrings.
Cutting The Leather
The first thing you’ll want to do is inspect your leather for blemishes and discoloration. There’s nothing worse that getting your piece all cut out, only to realize it has a mark or bad spot right in the middle of the piece you intended to be the earring.
Once you’ve found a good section of leather to work with you’re ready to get started.
Now carefully cut out the template from the sheet you just printed.
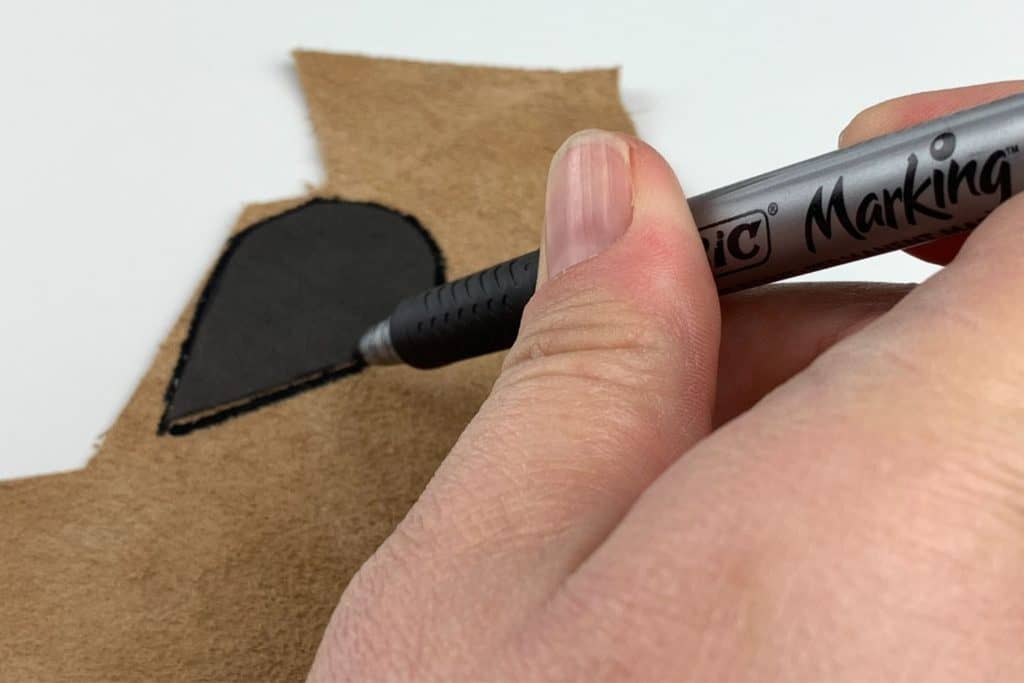
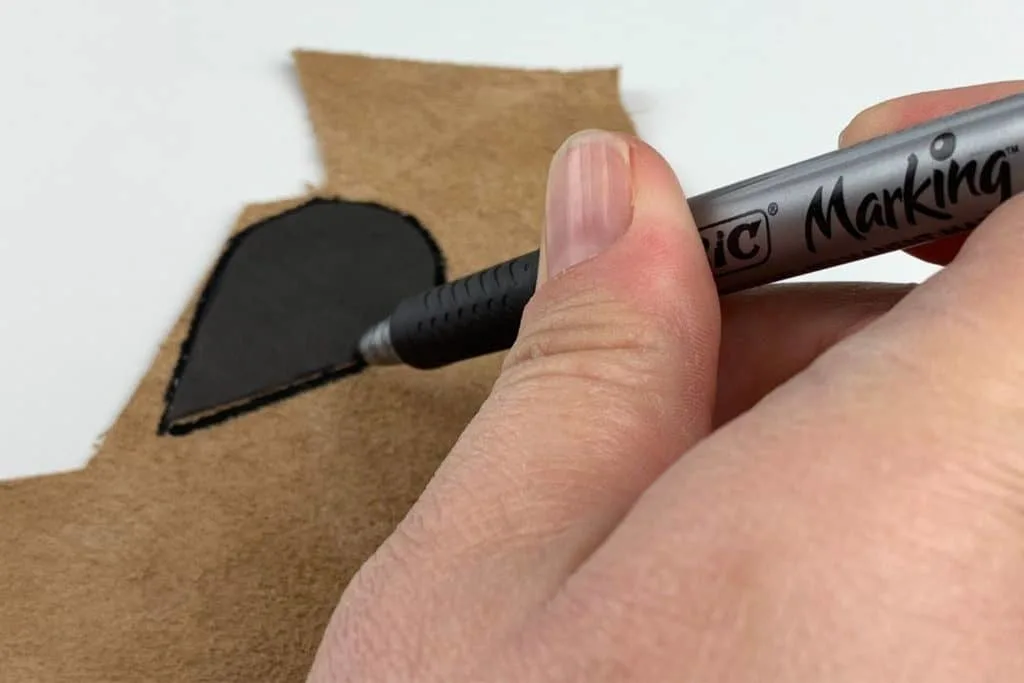
Lay your leather out on your work surface face down, making sure the side you want facing outward is NOT the side you’ll be marking on.
Then place your template on the leather and carefully trace around it. I like using a sharpie for this step because it marks so easily on the leather, but you’re welcome to use a pen or another type of marker.
Try to make good use of the leather placing your shapes as close together as you can. This way you’ll get more earrings out of your piece of leather.
Once you’ve traced out your leather earring out, you can start cutting it.

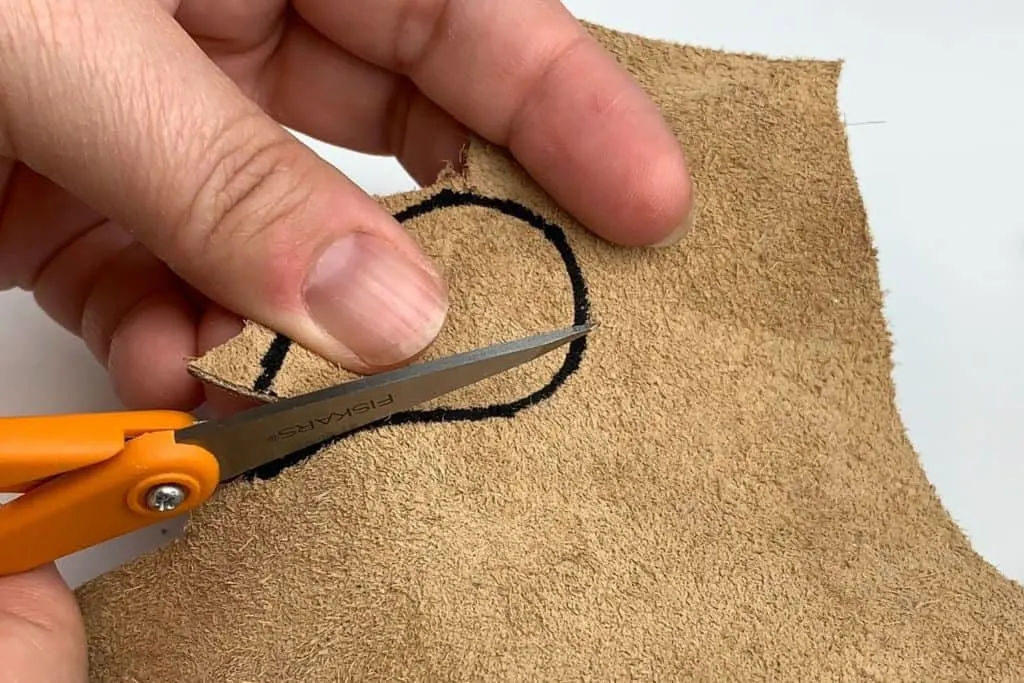
This is the most important step of the whole leather earring making process, so TAKE YOUR TIME!
Cut slow and steady, right along the inside of that line you traced.
Punching Holes in Your Leather Earrings
Now that you’ve got your leather earrings cut out, it’s time to punch the holes.
If you have a leather punch, use the smallest setting for this step. If you don’t have a leather punch, use a thumb tack or a sharp needle to complete this step.
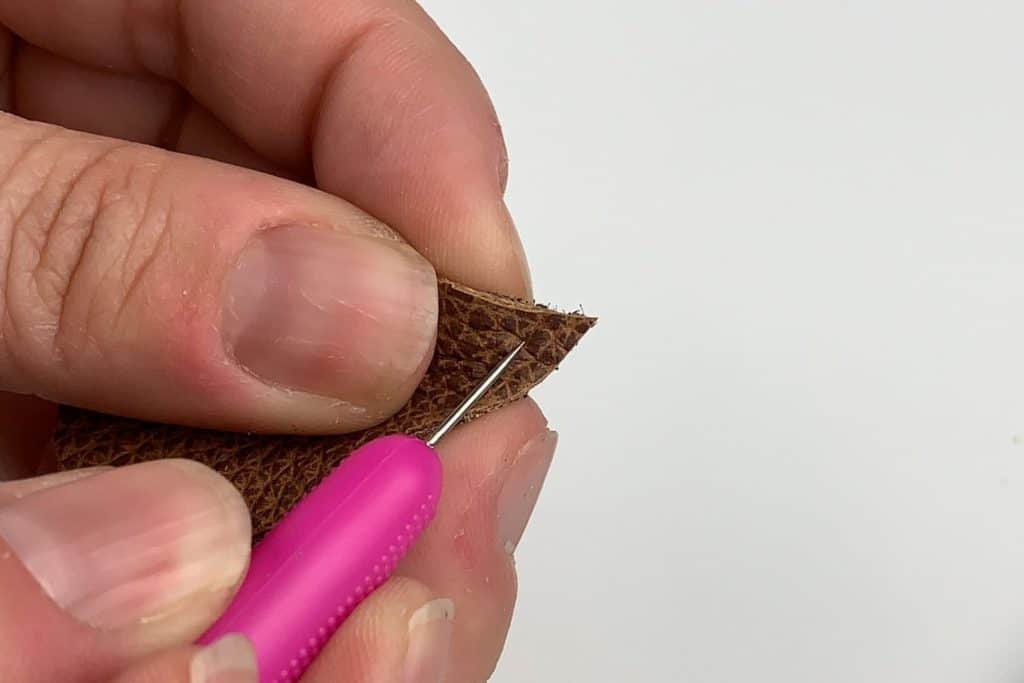

Find a point close to the top where you want to punch your hole. Make sure you don’t cut too close to the edge and that you leave enough leather to handle the weight of your earring hanging off the ear hooks.
Be sure to punch your hole in the exact same place on both leather earrings.
Now use the pliers bend and attach a jump ring to the top of each earring. Depending on what material your jump rings are made of, you can sometimes do this part of the process with your fingers.
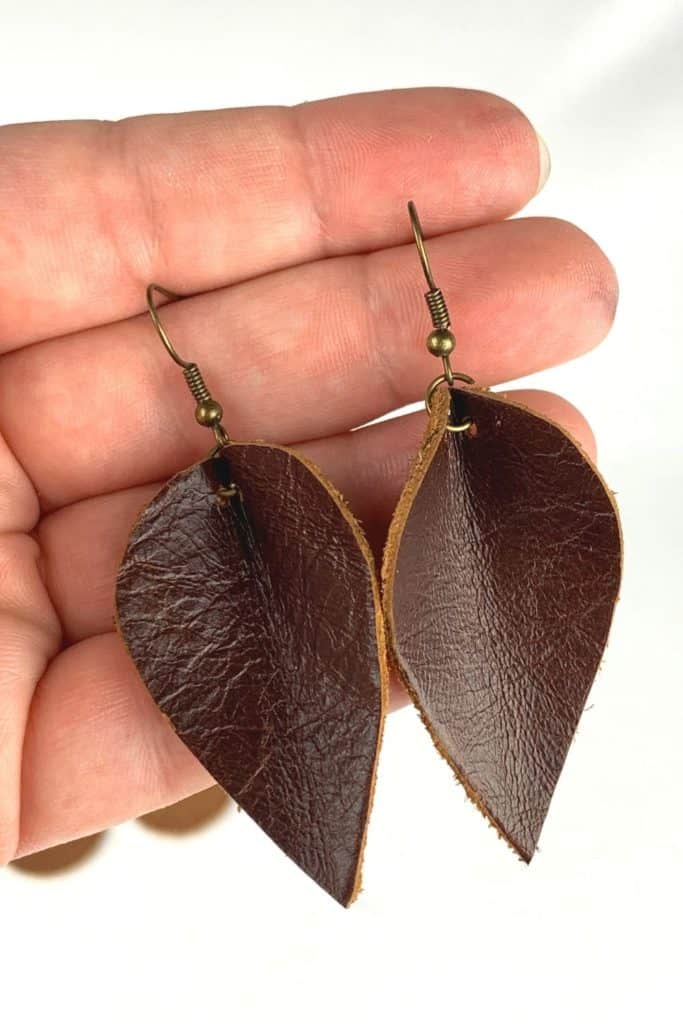
Making Pinched Leather Earrings
If you want to make a pinched, leaf-like effect, fold the teardrop in half and punch two holes in the leather at the bottom fattest part of the teardrop shape.
You want these holes to be even and relatively close together, but far enough apart that the leather has to “pinch” a little when you connect them with a jump ring.
Use the pliers to bend open a jump ring and thread it through the two holes. Bend it closed tightly over the top so that the leather folds towards itself a bit, giving you that pinched look.
Finishing Your Earrings
Now that you have the leather portion created, the rest is pretty easy.
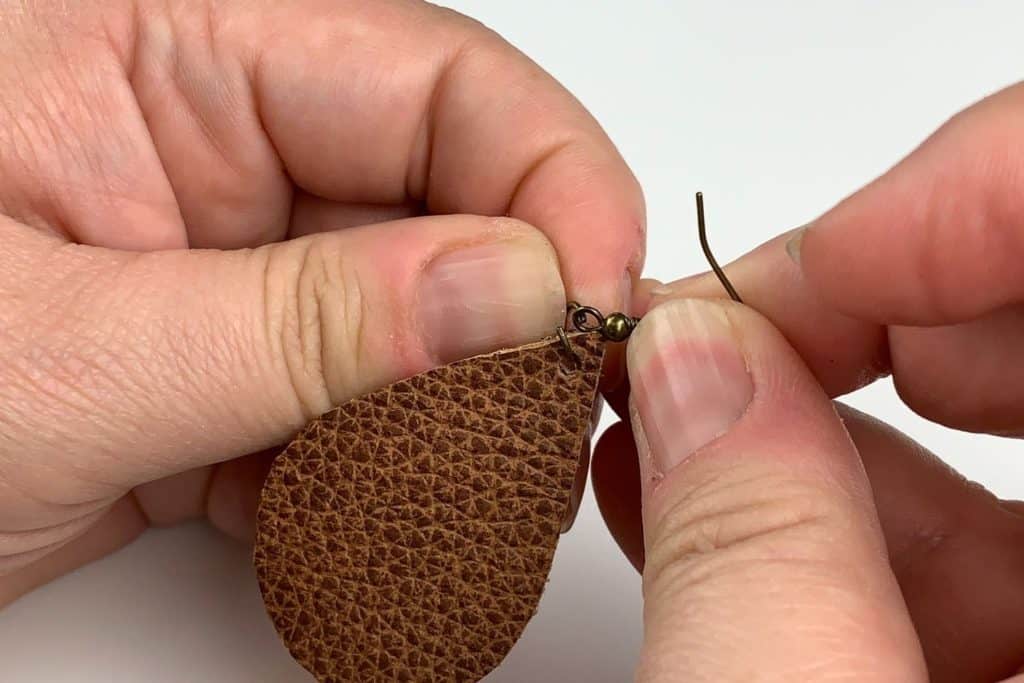
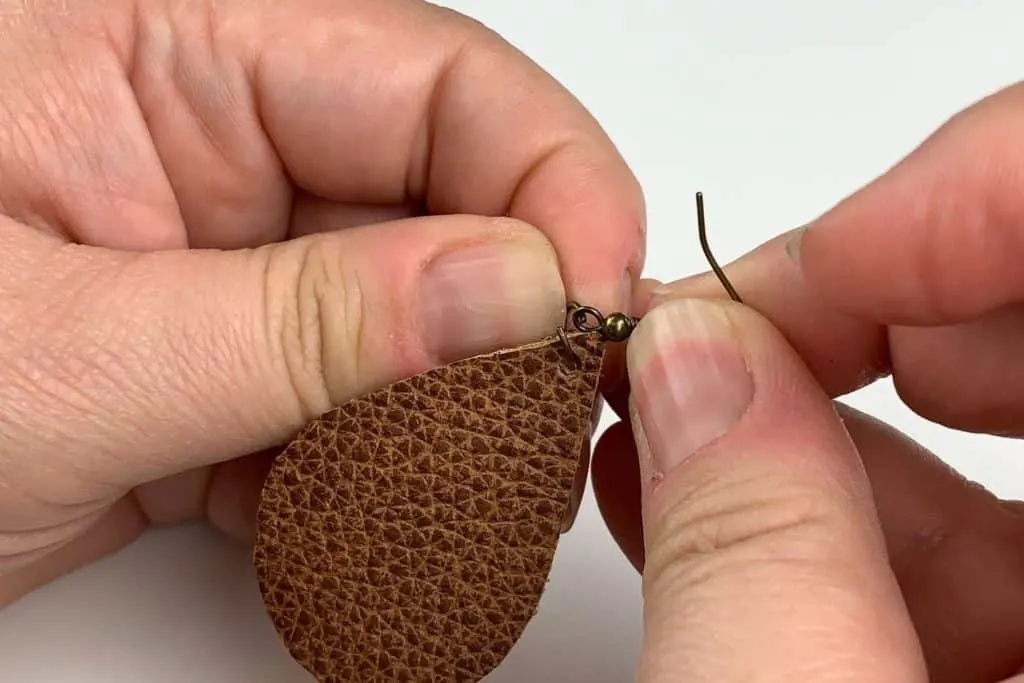
If you’re making the basic flat shapes, take another jump ring and connect the earring hook to the jump ring already attached to the leather. This may seem a little excessive, but if you don’t do this step, the earrings will hang sideways and not flat.
If you’re making the pinched leather earrings, you can skip the extra jump ring and just attach the earring hook directly to the original jump ring that is holding the pinched area together.
Now your earrings should be completed.
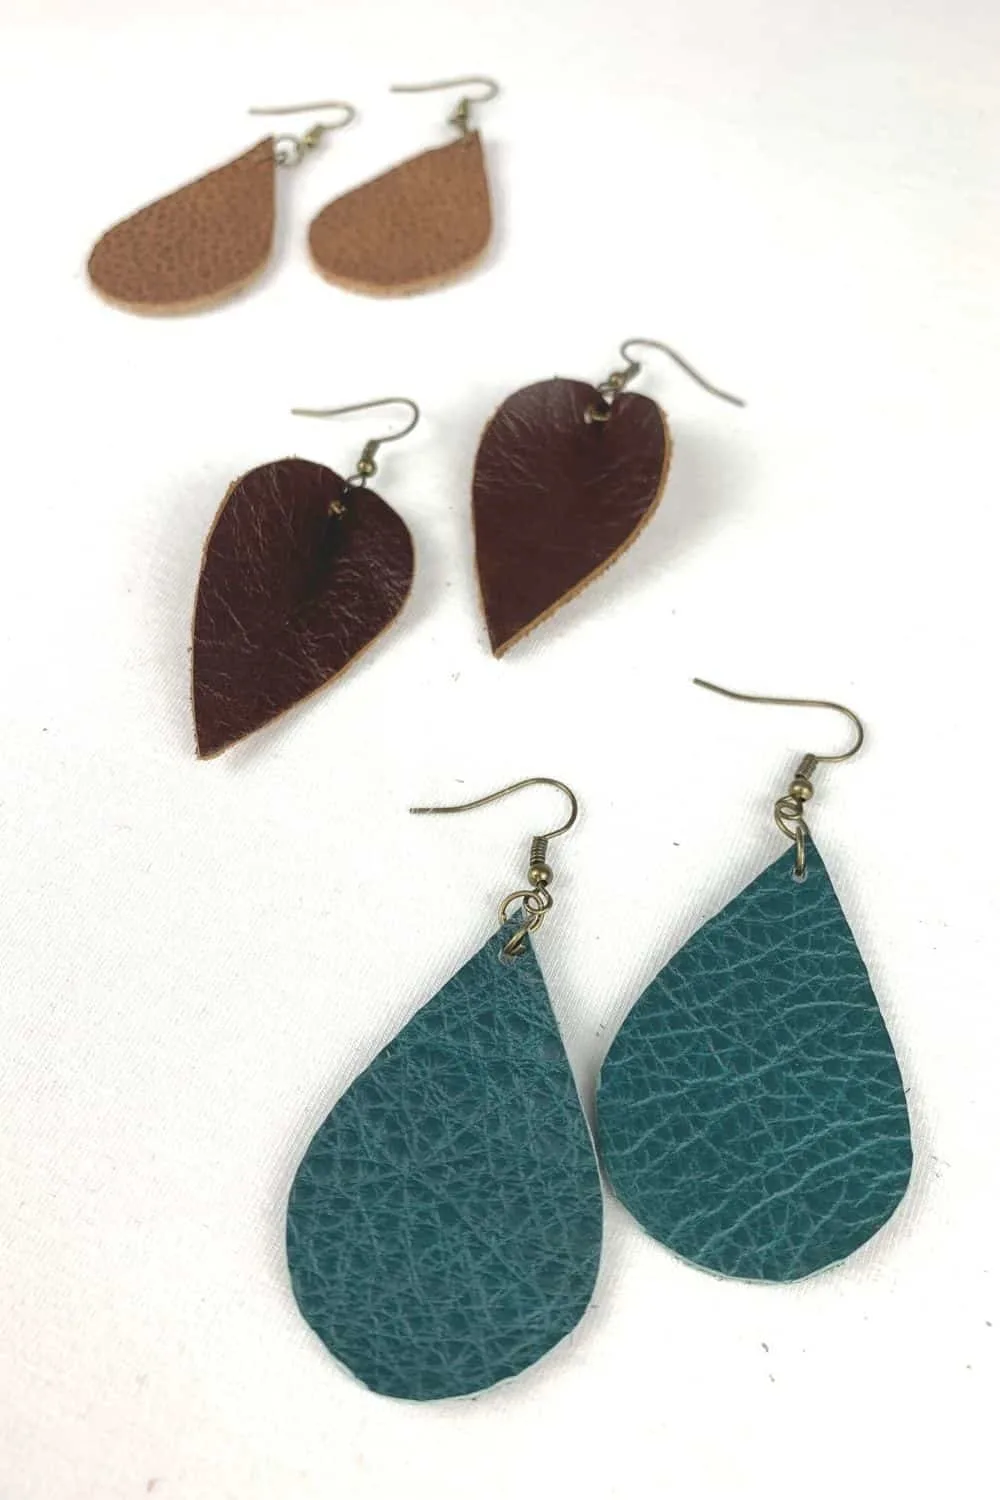
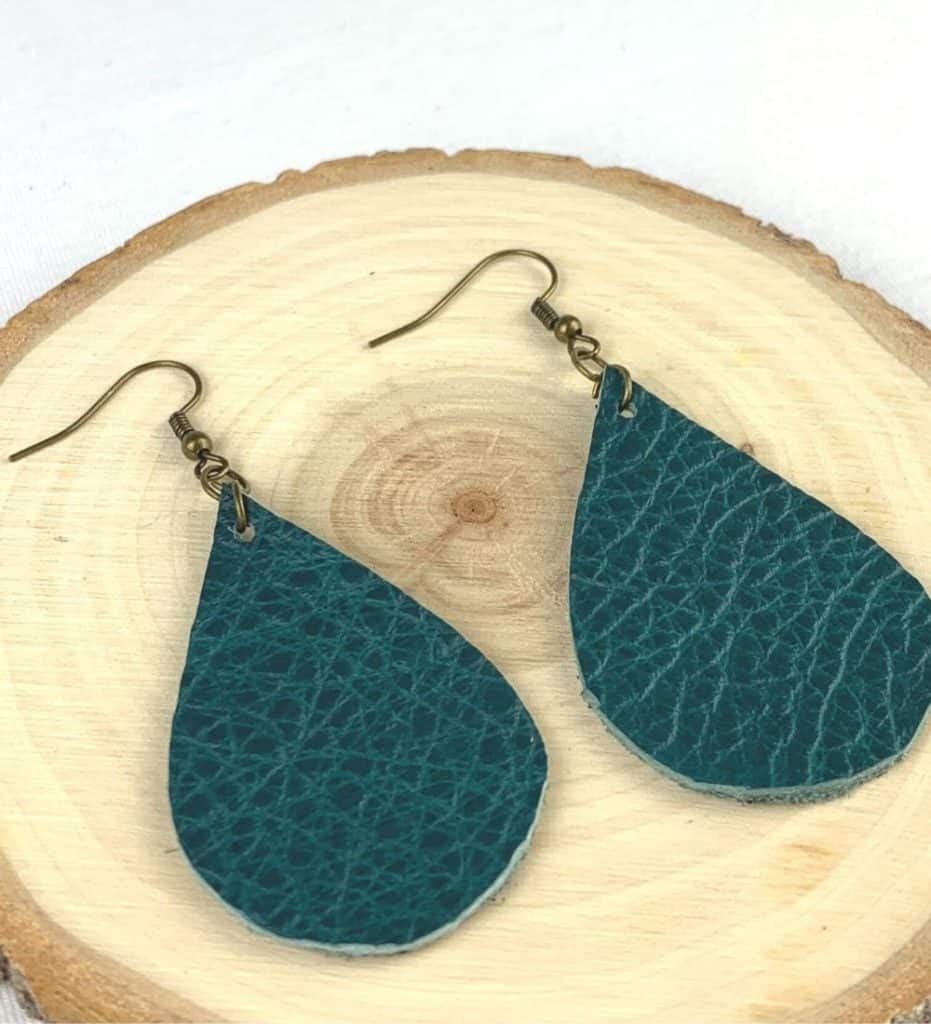
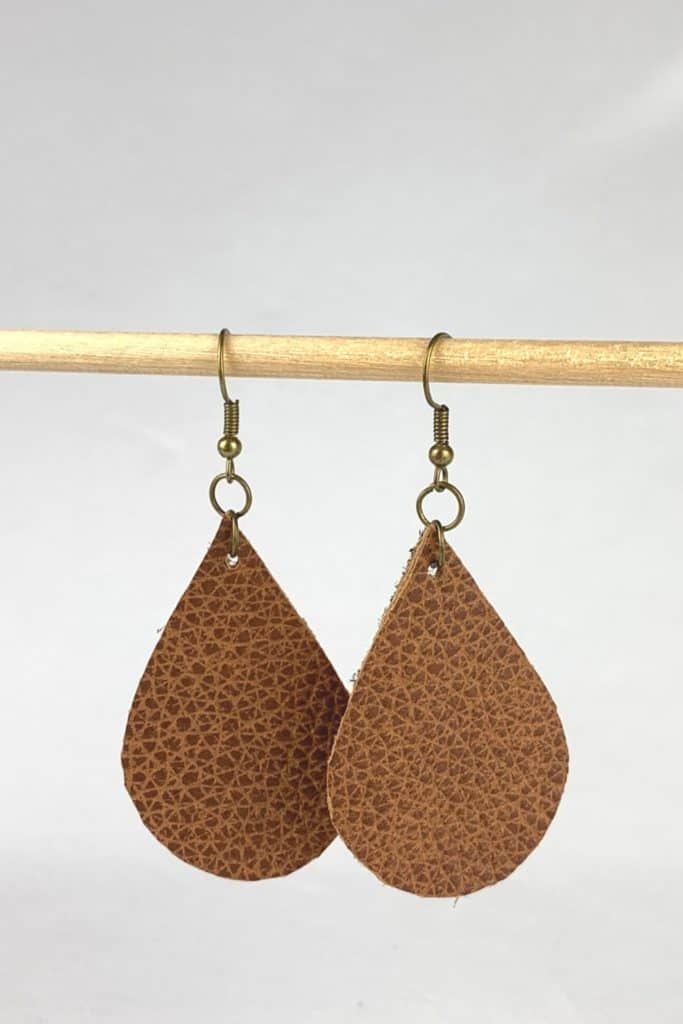
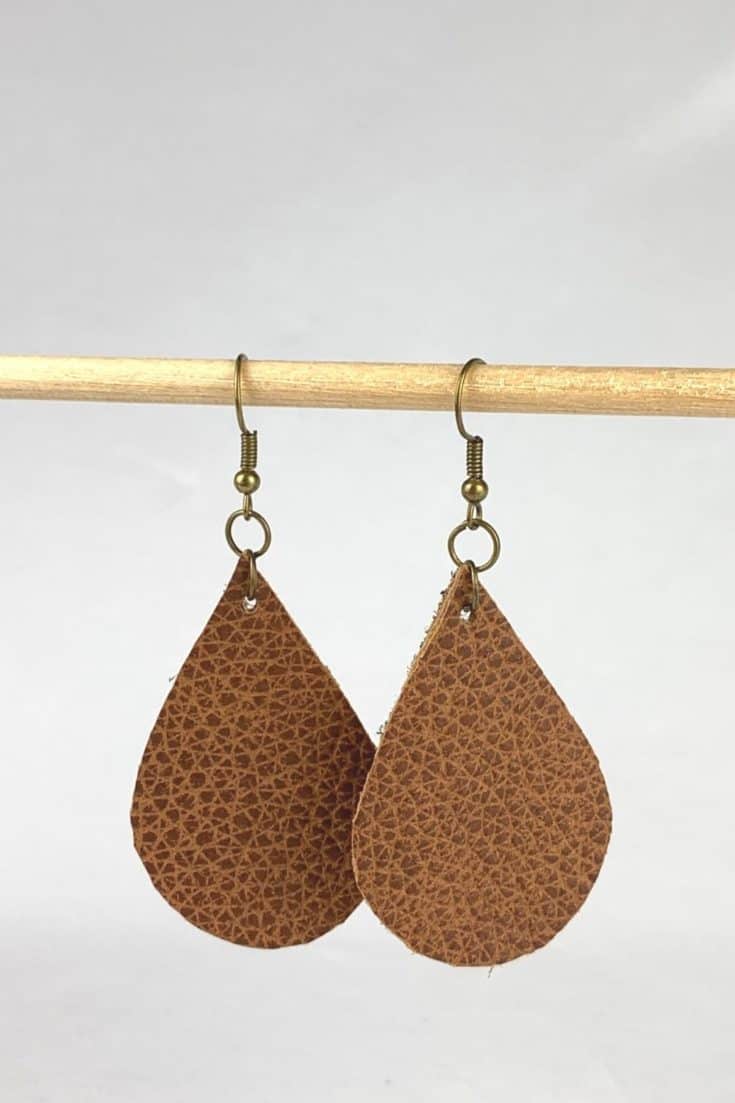
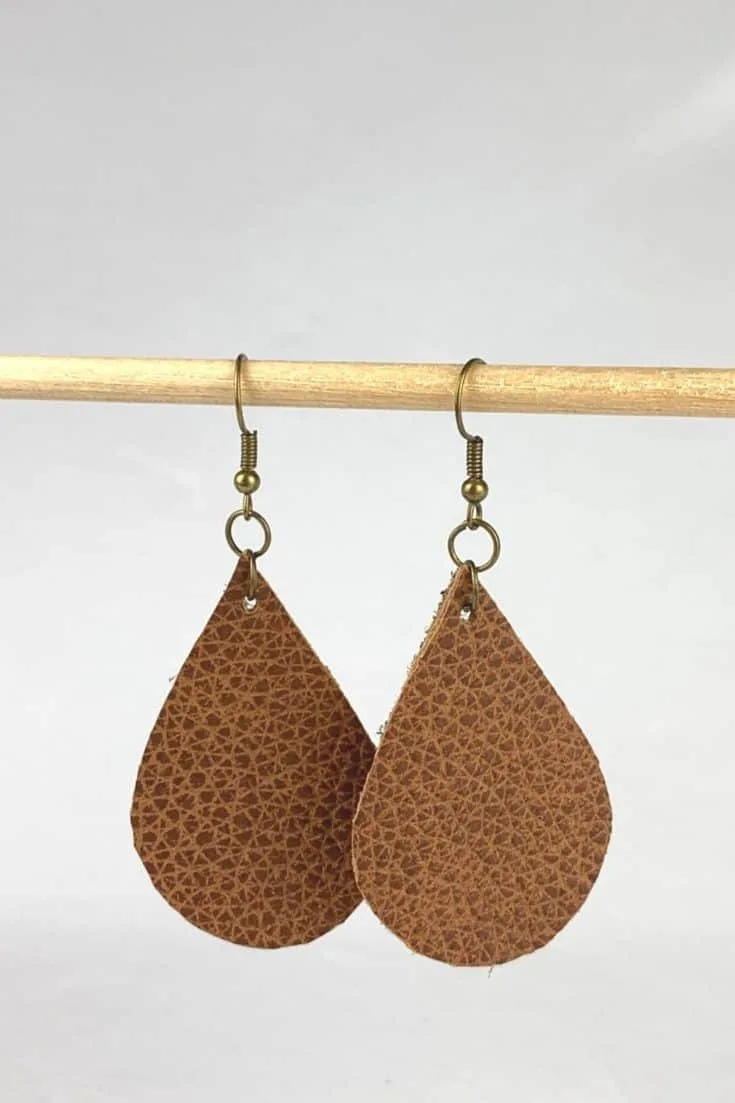
Here’s some picture of finished leather earrings:


Embellishing Your Leather Earrings
Once you’ve made a few basic pairs, you can start playing with look.
Layering different sizes, colors, or textures of leather looks great. You could also add some metallic paint or glitter for a flashier look. Adding beads could also be a lovely addition.
It’s really up to you and the aesthetic you prefer. The possibilities are really endless.
Have you made your own leather earrings? Tell me about your experience in the comments!
Leather Earrings DIY
Make your own leather earrings with these easy instructions. Read the full post for all the detailed tips and tricks to get this project right the first time.
Materials
- Leather
- Earring hooks
- Jump rings
- Pattern template
Tools
- Sharp scissors
- Needle nose pliers
- Sharpie
- Leather punch or thumbtack
Instructions
- Cut out the desired pattern
- Trace pattern onto the back of the leather
- Carefully cut out the leather
- Punch holes in the top end of the leather piece
- Attach a jump ring to the leather piece
- Connect the leather piece to earring hook using another jump ring.