I’ve been wanting to complete a gnomes DIY project for quite a while now.
Gnomes are everywhere lately and they are so cute! I just love the cute little beards and oversized hats.
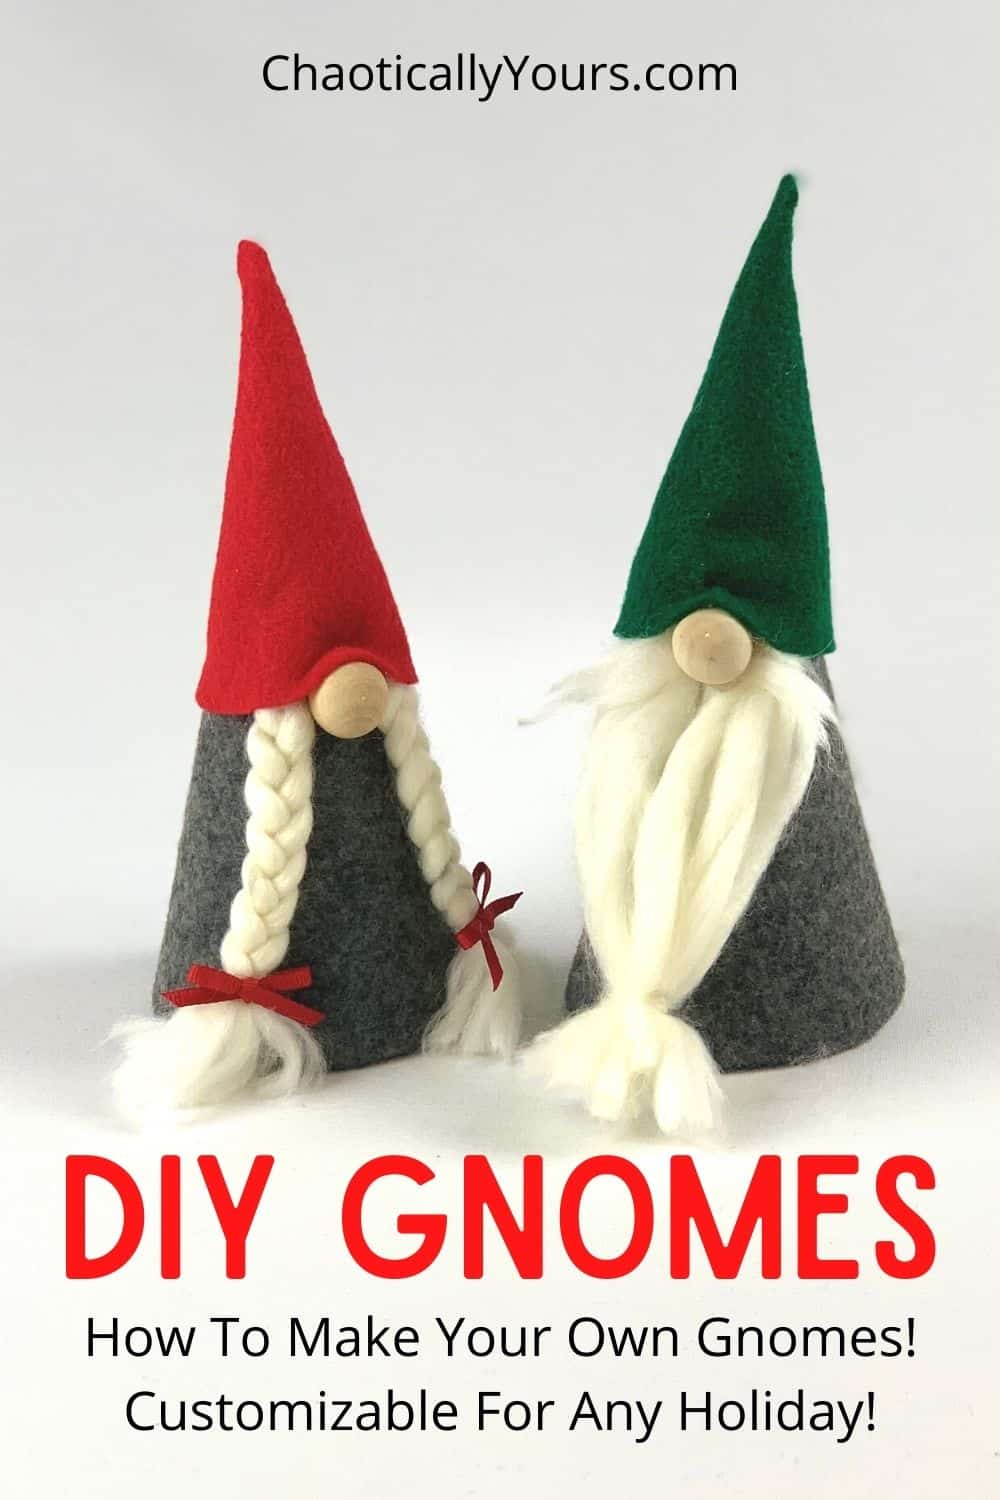
They make adorable decorations for just about any holiday, but Christmas gnomes are especially cute!
I’ve seen them in lots of gift shops lately, but the price tag is always pretty hefty.
I’ve been dying to figure out how to make a gnome, featuring the colors and fabrics I like best.
There are several gnomes DIY methods out there, but I think I’ve found the simplest (and cheapest) one around.
And the best part is? There’s no sewing involved!!
All you need are a few items you can find pretty inexpensively at your local craft store and a little bit of time, and you can create these yourself.
I’m truly excited to share with you my DIY gnomes process so you can do it too, and I’ve made the instructions printable for you!
Just remember, it’s always best to read the full article before you start any of my projects, since I offer all my exclusive tips and tricks in the post, and just the basics in the printable.
Gnomes DIY: What You’ll Need
When attempting this project, I knew I wanted to make a set, with both a boy and a girl gnome, so I made sure I got enough supplies to complete them both.
Supplies for this project are pretty easy to find. I was able to find everything I needed at my local Michaels store.
Here’s what I picked up:
- Poster Board
- Felt
- Wool Yarn
- Wooden Beads
- Rubber Bands (optional)
- Small Ribbon (optional)
- Tape
- Scissors
- Hot Glue Gun
For this project, I’m using a cone shaped base.
You can buy foam cones or paper mache cones in the floral section of your store, but I didn’t want to pay the hefty price tag on them.
I decided to make my own cones using some simple poster board, which runs about $0.50 a sheet for the big ones.
As for the felt, you can choose any color your want.
I went with a gray for the bases for my matching set of boy and girl gnomes, and they got one sheet of red and one of green to make coordinating hats.
You just need the small inexpensive 8×10 sheets that run around $0.25 to $0.40 each.
The next supply is the most important one: the yarn.

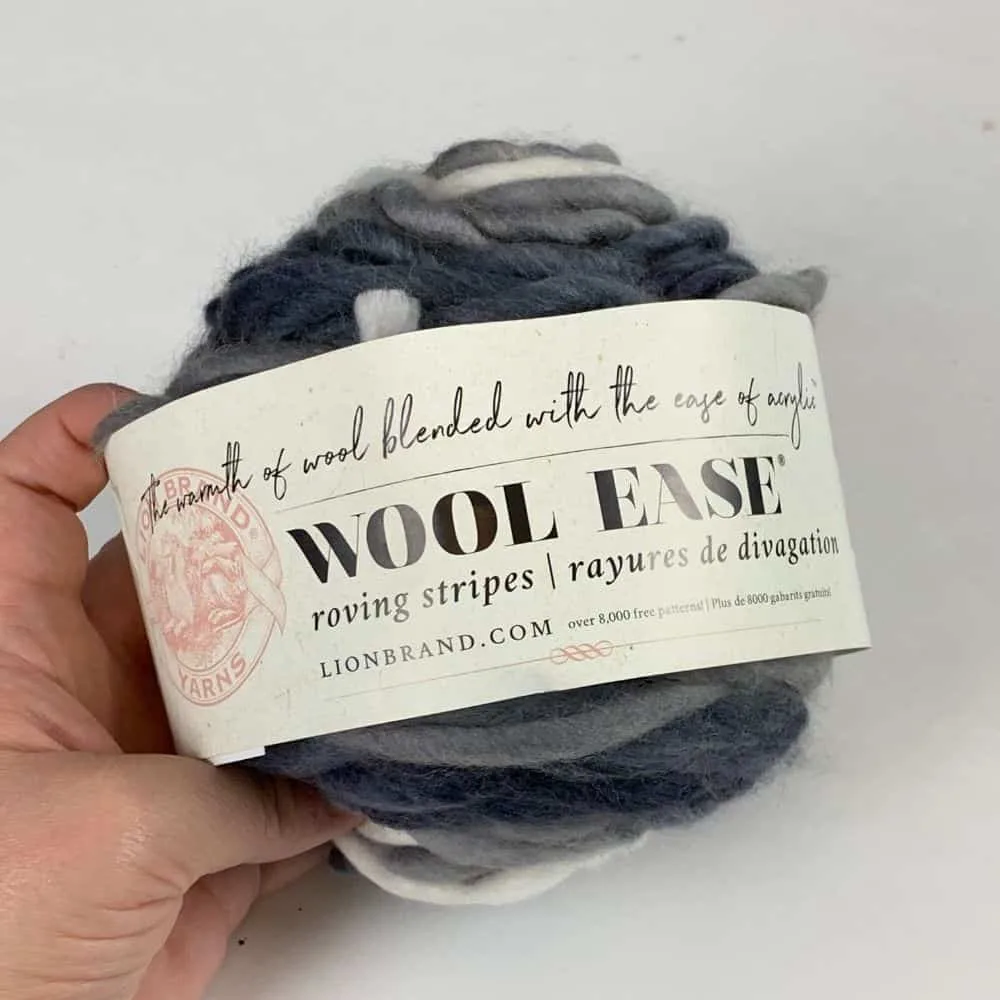
Lots of tutorials use faux fur or Merino wool, but I choose this chunky wool yarn. I picked it up at Michaels for around $5 for the entire skein.
Also, faux fur and wool weren’t available at my local craft store, and were pretty pricey to order.
I loved the look of this yarn because not only did it have plenty of white, it had all sorts of shades of gray as well, to use for a little variety for other gnomes in the future.
This yarn was also quite thick, but had strands that were easy to separate and become quite hair-like.
For the noses, I was actually looking for wooden beads, but what I found were these little wooden “doll heads” for about $2 for the whole bag.
They were the perfect size and have a flat side, which made them SUPER easy to glue.

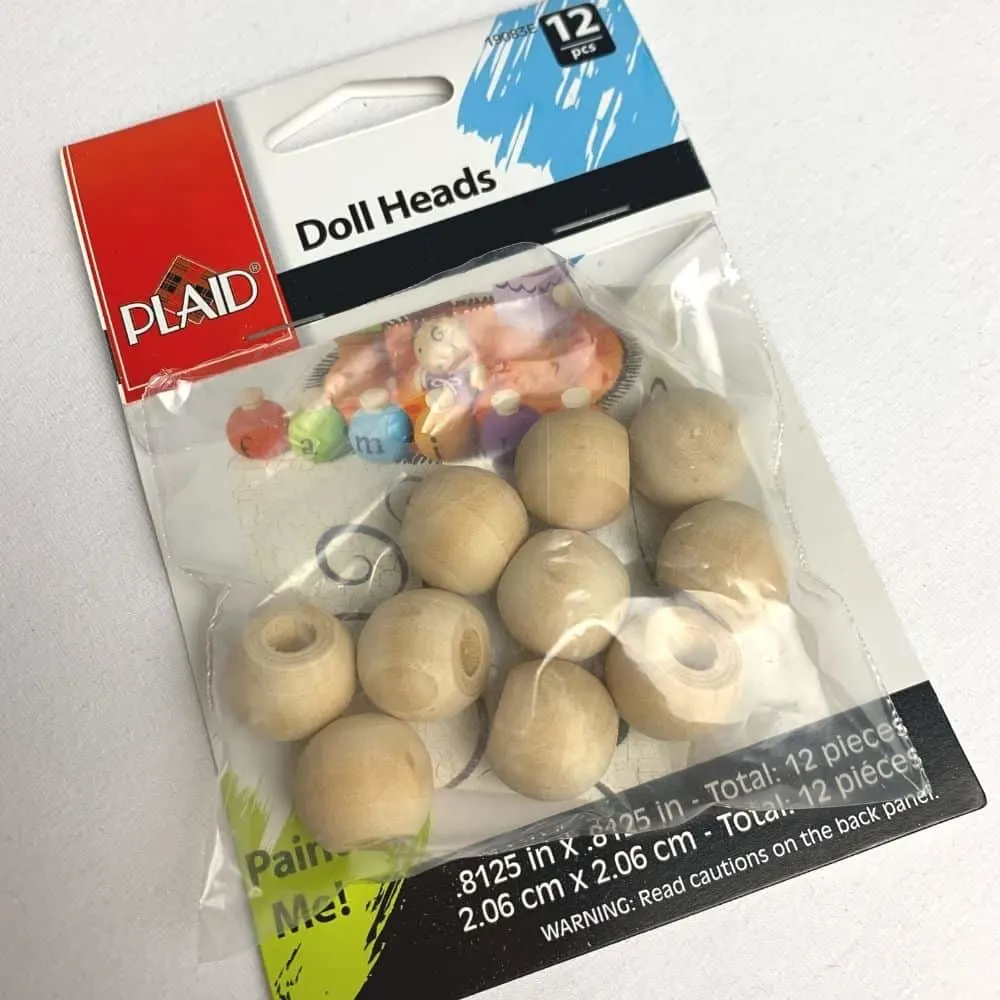
I’m assuming that these might not be readily available everywhere, so wooden beads work fine. You could also make your own nose shapes out of clay or maybe even use a nice smooth rock.
As long as you can get a good round shape for this piece, it will work great.
I also used some tiny, clear rubber bands and a little bit of small red ribbon for styling the beard and the braids in my gnomes DIY project. You can do this project with or without those items.
How To Make A Gnome Base
As I said earlier, I used a cone shaped base to make this DIY gnomes project.Making the cones out of poster board was surprisingly easy. It really didn’t take too much know-how to get it done.
I basically took the corner of the posterboard and used the holes of a ruler to create an even quarter circle that I then cut out. I demonstrated this method in the video for this post.
The sides of the cone measured about 6 inches from the corner.
Once I cut out the the shape, I then rolled the to corners towards each other to create the cone, and secured it with some tape.

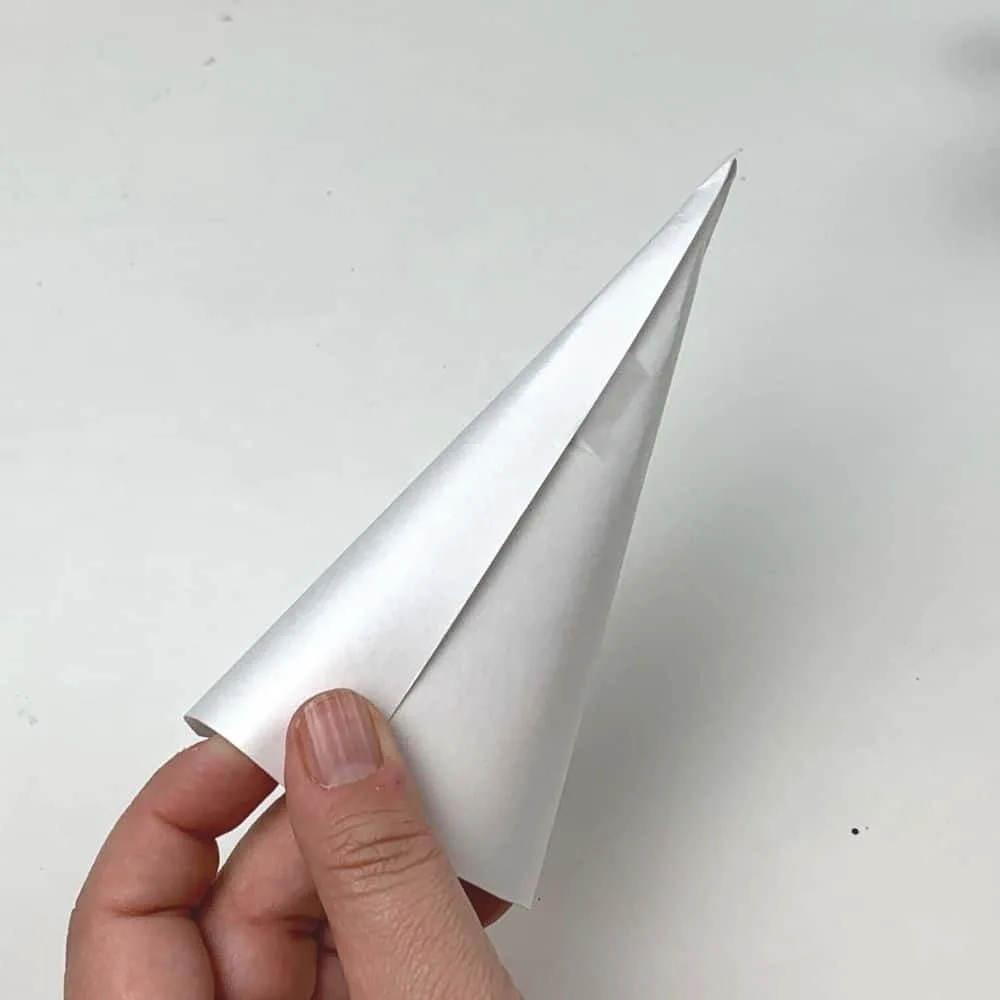
It’s a little tricky to the the top to connect evenly, but the beauty of this project is that you don’t have to do that!
The cone is completely covered by felt when this project is done, so you don’t have to worry if the cone isn’t perfect. You just want that basic shape to make your DIY gnome stand up properly.
Dressing Your Gnome
Once I made my cone, then I got to work creating the clothes for my gnomes DIY project.
I created and cut out another pie piece shape on my gray felt, this time making it about 7 inches long. You want this piece of felt to be a bit bigger so you can completely cover the poster board cone.
I lined the edge of the cone up with the edge of the felt and ran a line of hot glue down the edge. I then placed the cone on top of the hot glue, securing the felt to the poster board cone.
Then I rolled the felt tightly around the cone, and secured the opposite side with more hot glue, making sure the bottom 3/4 of the cone were completely covered by the felt.
It’s completely ok if the felt gaps a little at the top. That area is going to be covered by the hat your about to make.
I purposely made the felt about an inch longer than the cone so it would hang over the end to cover it.
I cut slits into the the overhanging part of the felt, taking care not to cut quite all the way to the poster board, about an inch or so apart.
I folded each new tab over the poster board, into the middle of the cone, and secured it with a dab of hot glue.

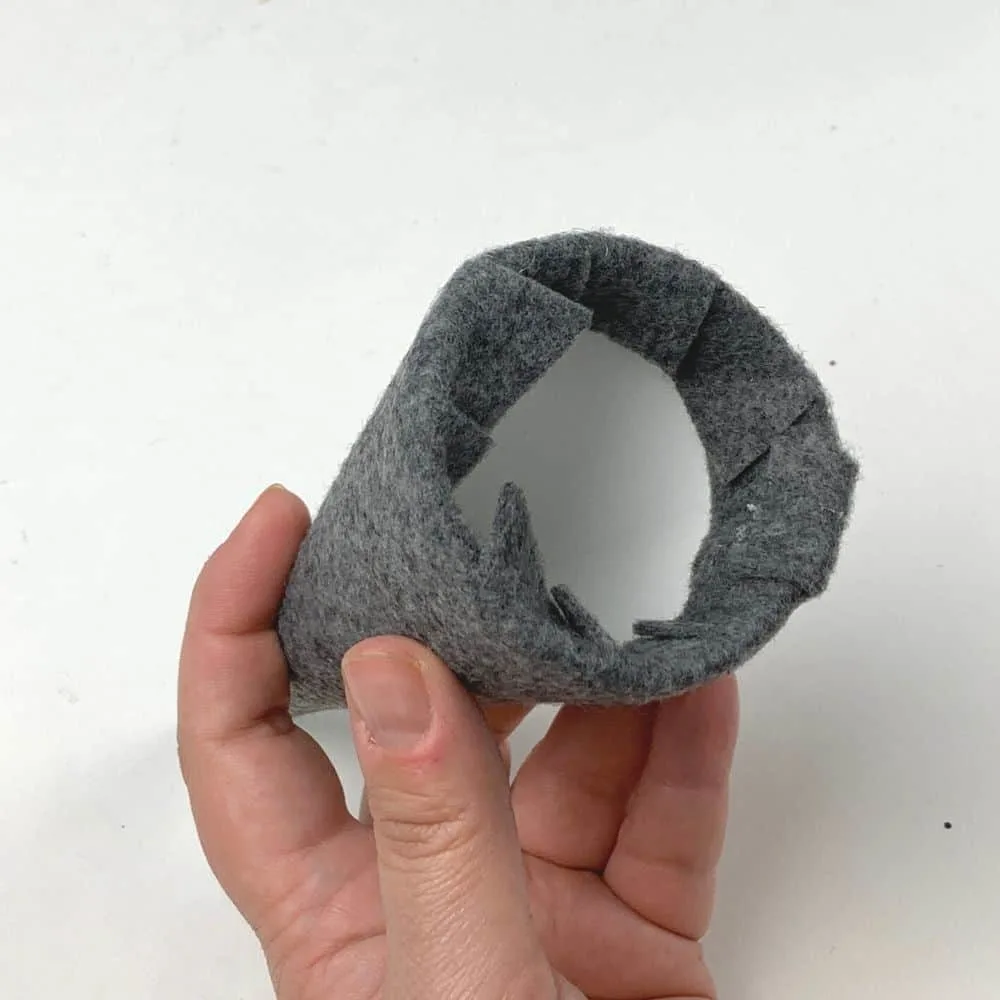
This covered the bottom of the cone nicely, giving it a uniform look.
The next step was to cut out ANOTHER pie piece shape quarter circle of my complimentary colored felt. This one is a bit smaller at only 4 inches.
Once I had it cut, I ran a bead of hot glue down one side and wrapped the other side around to create yet another cone shape. This is your most important cone by far, as it will be fully visible as the hat of your gnome.
It’s totally fine for it to be a little bit crooked, or bent. I think that adds character to your DIY gnome. You just don’t want your glue to be visible when you finish making the hat.
Gnome Hair: The Crucial Element
Now that I had the body and the hat all worked out for my gnome DIY project, it was time to move on to the most important part of this project: the hair!
I wouldn’t be writing a good How To Make A Gnome tutorial if I didn’t emphasize how important the hair of your gnome is.
These gnomes wouldn’t be the same without some sort of hair, and personally, I really think the hair is what makes these so cute!
Before I got started making the hair, I found that it was really helpful to mark where you wanted your hair to be secured to your gnome body.
I was able to determine this by placing the hat on the body, and then marking about 1/4 to 1/2 inch above where the lowest part of the hat hit the body.
This mark was 100% covered by the hat when the hat was placed on the body, but it gave me an idea of where to place the hair once I got started on that step.
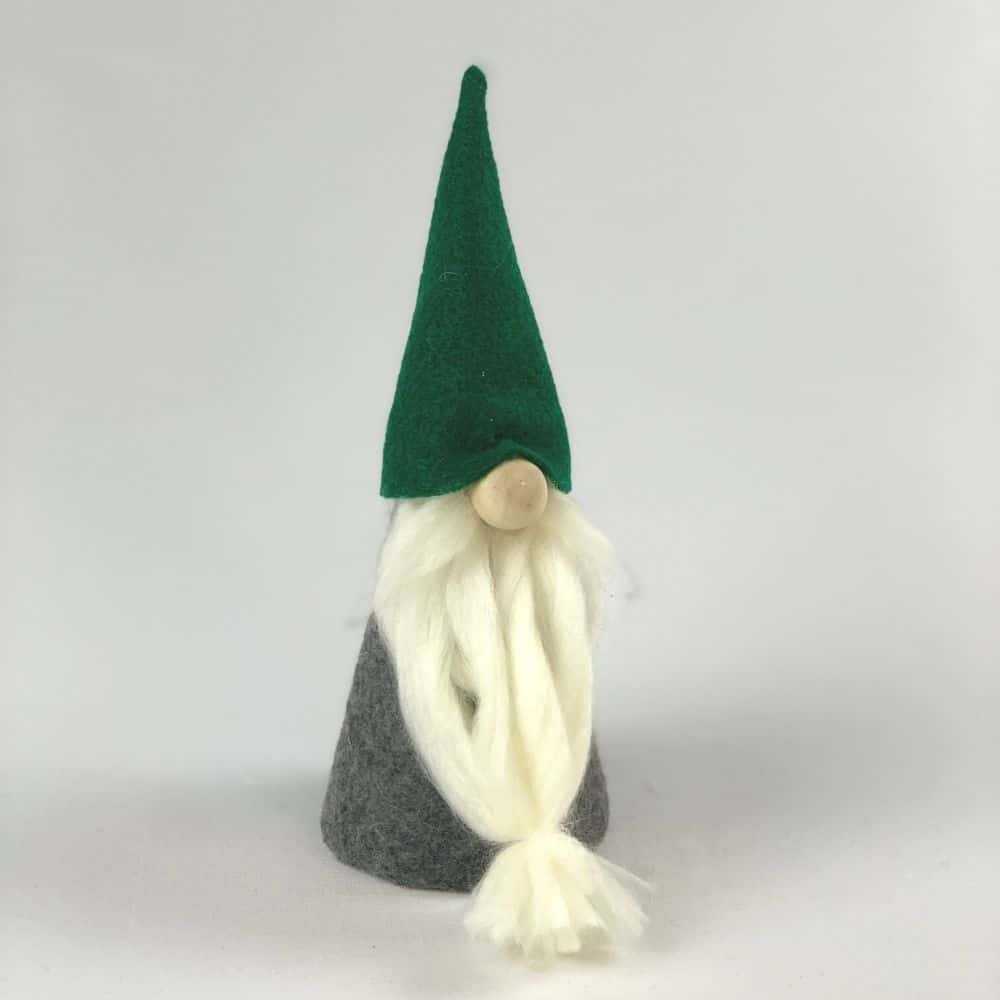
Gnome Beards & Mustaches
For my boy gnome, I started by cutting seven equally sized lengths of my yarn. Since the yarn was so chunky, I didn’t really need a ton of it.
Each strand was about six inches long. It’s important to make these strands long because you really want a nice length to the beard.
I then hot glued one end of each strand tightly together on a piece of felt that matched the gnome body I’d made. I secured another piece of felt on top to make sure they were all secure.
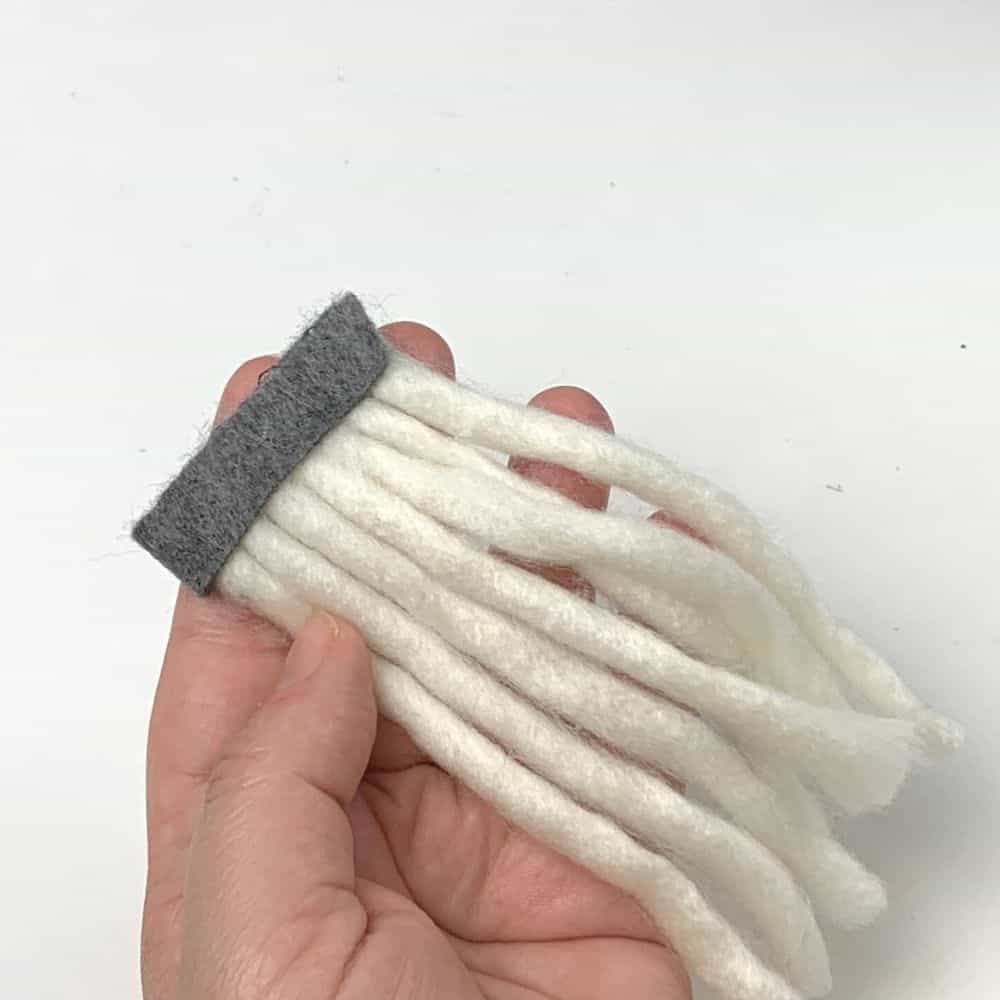
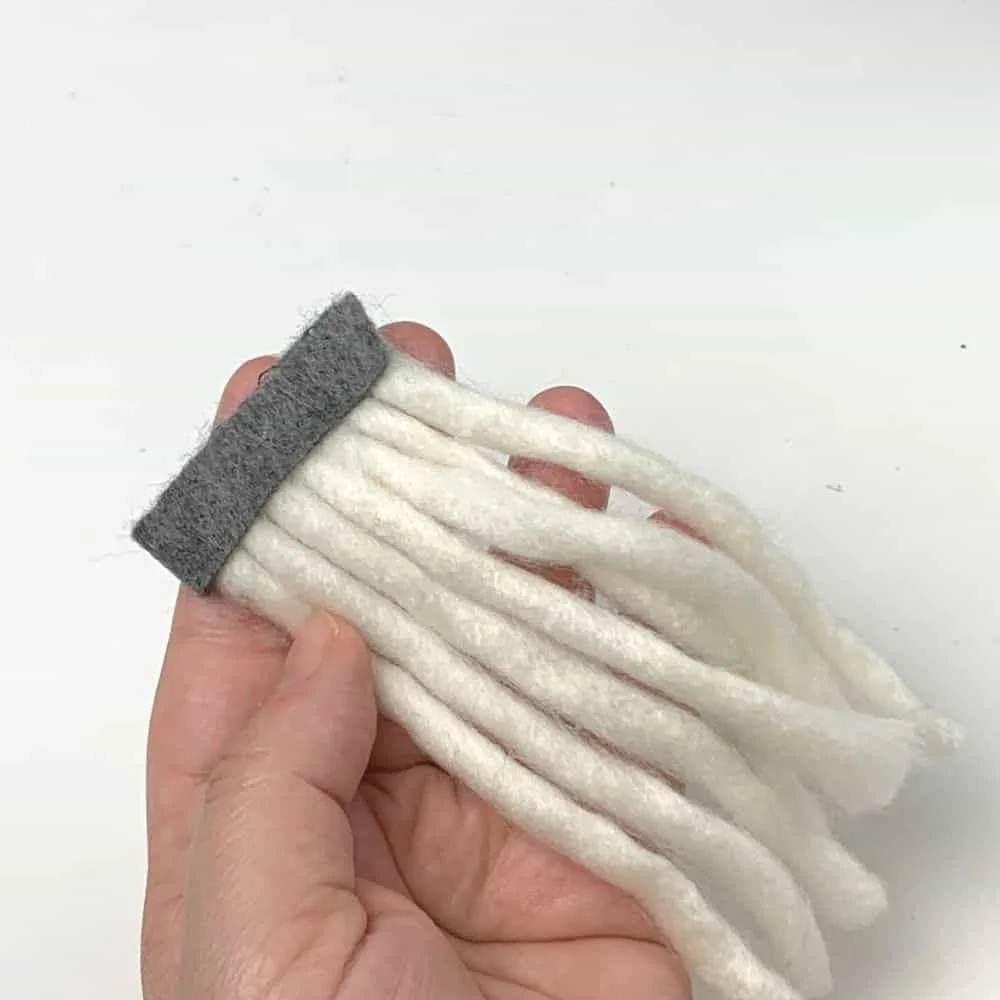
After they were glued together, I took each strand and untwisted it a bit. I wanted to loosen up with yarn to make it look more hairlike.
The easiest way to do this was to just split each strand in half.
Next I decided I wanted to gather the beard of my gnome at the bottom, just to make it a little more whimsical. This step is completely optional, but I love the way it looked when it was done!
To do this, I used one of those tiny clear elastics that I mentioned earlier.
I carefully gathered up the bottom of the beard, and wrapped the elastic around it until it was tight. The elastic was so tiny, your really can’t see it at all when it was done.
I just was very careful not to tangle it in the beard.
After the beard was secure, it needed a little trimming to tame the ends.
I didn’t cut straight across, since that seemed to make it WAY to uniform, but I used more of a vertical snipping method to take off some of the too long strands.
Then I moved onto the mustache.
The mustache is totally optional for this gnomes DIY project. If you don’t want one, it’s totally fine to leave it off.
To make the mustache, I took a four inch piece of the yarn and separated the strands as much as I possibly could, working to make the ends a bit uneven.
Then I put another clear elastic right in the middle of of the gnome mustache, to hold it tight.
I hot glued the mustache right to the back center of my nose bead.
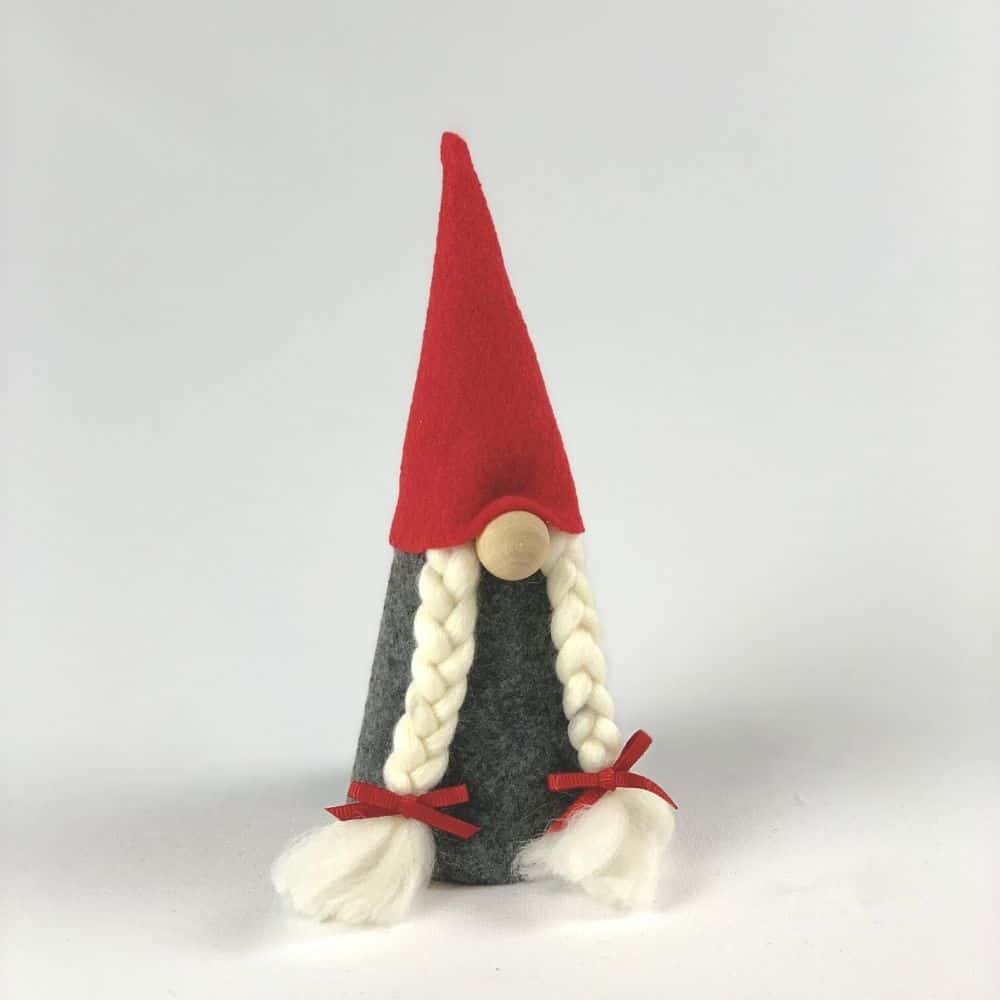
Then Gnome Braids
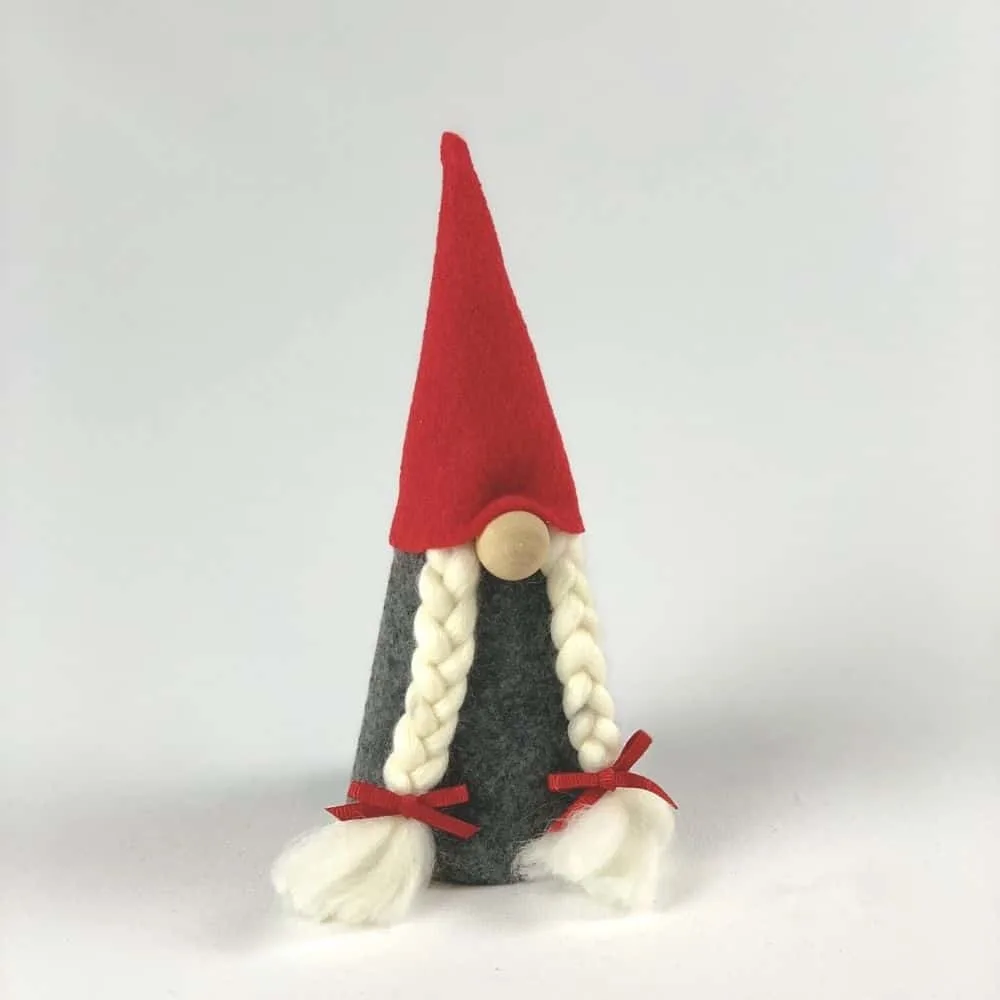
For my girl gnome, I decided long braids would be cute.
To do this, I got six pieces of yarn, about seven inches long each.
I secured three strands together at one end with a piece of tape.
I then tapped the connected end of the strands to the table so I could easily and evenly braid them.
I secured the ends with another clear rubber band once I got about six inches down the strands, leaving a nice shaggy end.
I did this twice to create two braids, making sure they were even in length.
I also added the bows at the ends, just for a feminine touch to the girl gnome.
Placement Is Everything
After I’d created the all important gnome hair, I got to work placing everything.
This was the most important step in this whole how to make a gnome process because if the items were glued together wrong, the whole project would look “off.”
For both my gnomes, I took a good amount of time, playing with placement before I glued anything.
I wanted to make sure the hat would have to crinkle a little for the nose to stick out, and that the beard and the braids looked good where I planned to put them.
Making sure the hat was exactly where I wanted it, and that the hair touched the table perfectly really helped me be sure of what I was doing before I made it permanent.
After I was certain what I wanted to do, I started gluing.
For my boy gnome, I glued the felt piece at the top of the beard directly onto the gnome body, making sure that I secured it above the line I made that marked where the hat would cover.
Then I glued the nose directly onto the gnome body right below the line.
I then secured the hat onto the gnome body, making sure to cover all the spots where I secured everything else.
For the girl gnome, I removed the braids from where I had taped them the table, and then hot glued the taped end onto the body of the gnome, making sure the taped pieces were above the line I had marked to show where the hat would be covering it.
I made sure to leave just enough space for the nose bead between the braids.
When the braids were secure, I glued on the nose, just below the line I marked earlier.
After that was done, I again glued the hat in place, making sure to crinkle the felt just a little over the nose.
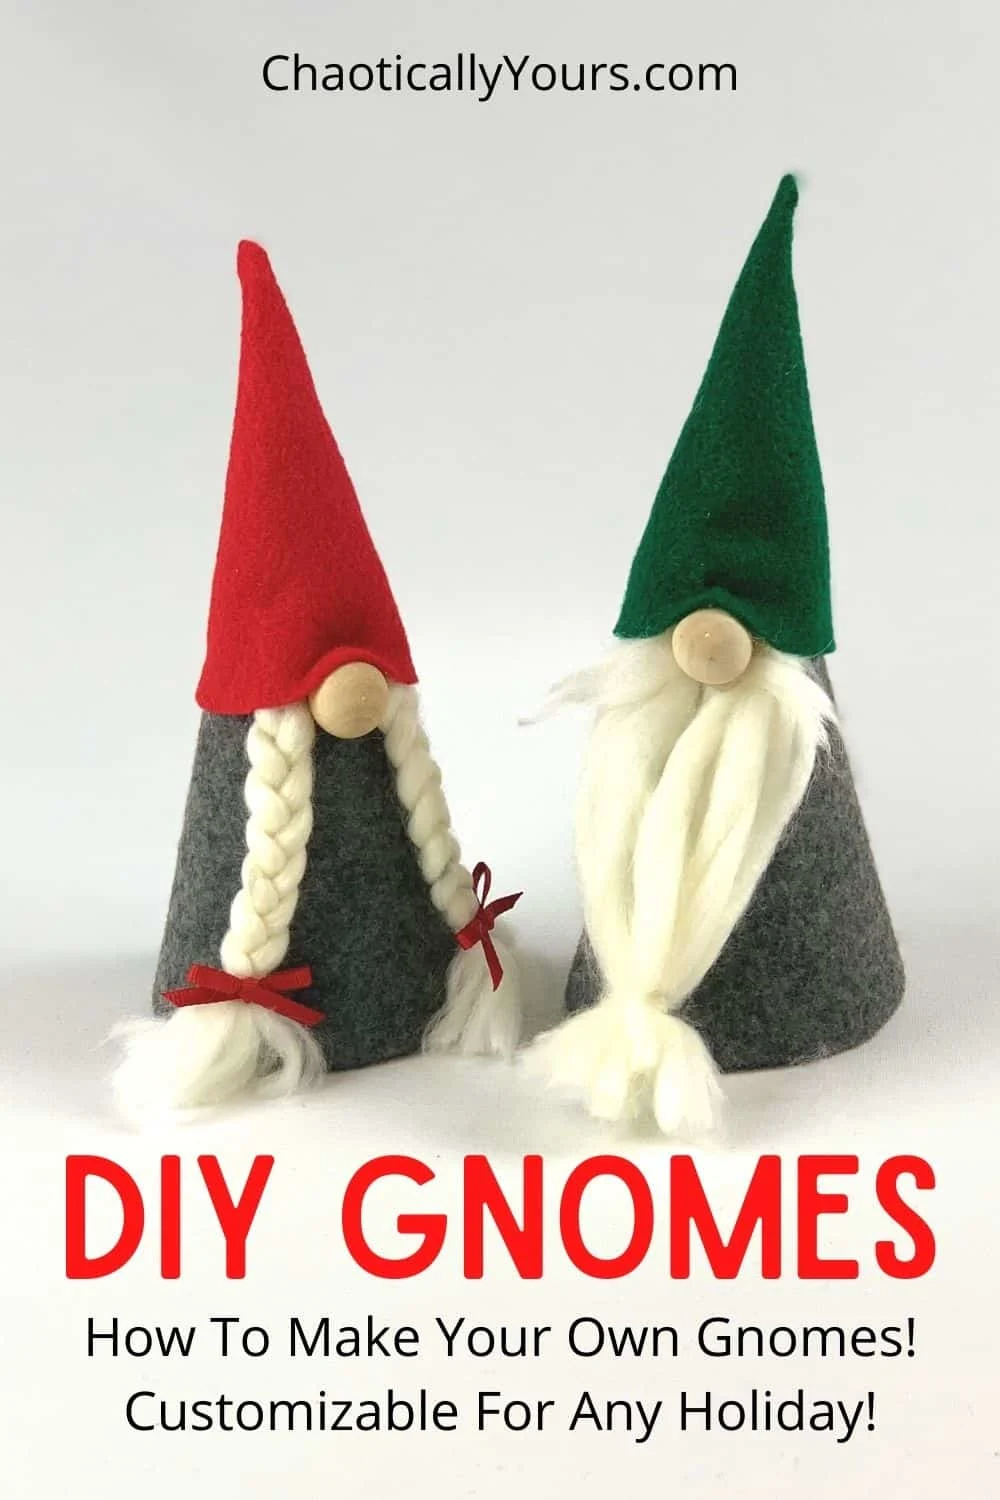
Finished Gnomes
And now my gnomes were finished!
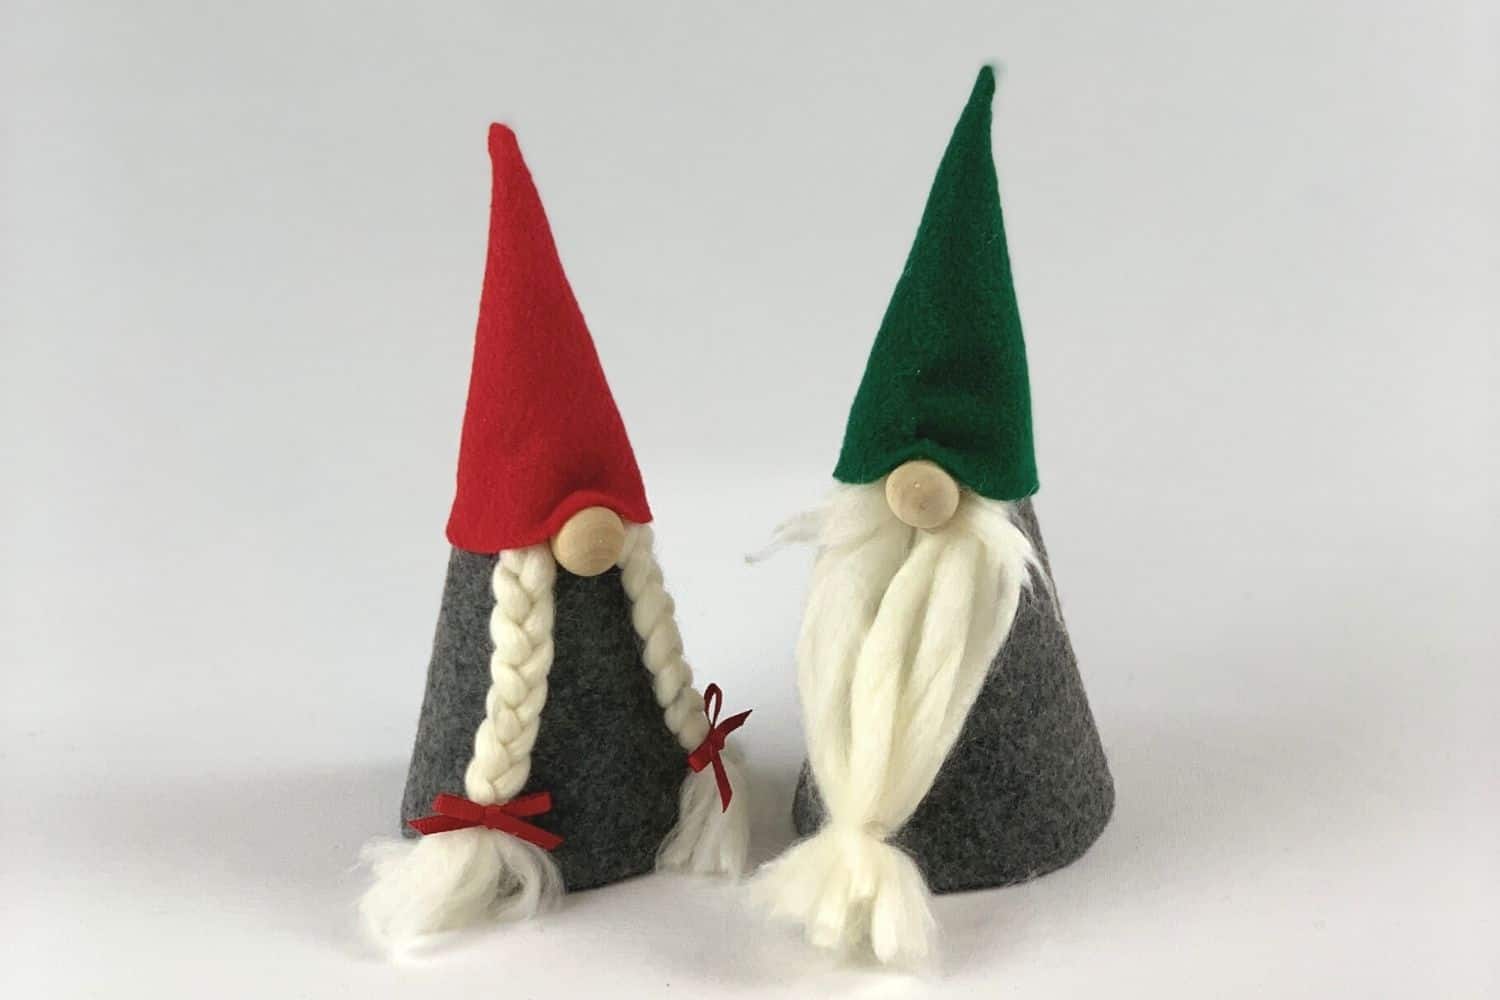

What do you think? I LOVE how they turned out!
While they do look Christmasy, this craft could VERY easily be modified to fit any holiday.

Use pink and red for Valentines day. Make a leprechaun gnome with green felt and orange yarn. Make Easter gnomes with pastel colors.
It’s really up to whatever you want to do.
Have you made these gnomes? I’d love to hear about it in the comments!
Learn how to make a gnome with this easy tutorial! NOTE: Make sure to read the original post for all my detailed tips and tricks for making this gnome. These are just the basic instructions for reference. CAUTION: Hot glue guns can cause burns. Use extreme caution while working with one. Gnomes DIY: How To Make A Gnome


Materials
Tools
Instructions
For a beard and mustache.
For braids
Finishing your gnome
Notes
Gnomes DIY: How To Make A Gnome