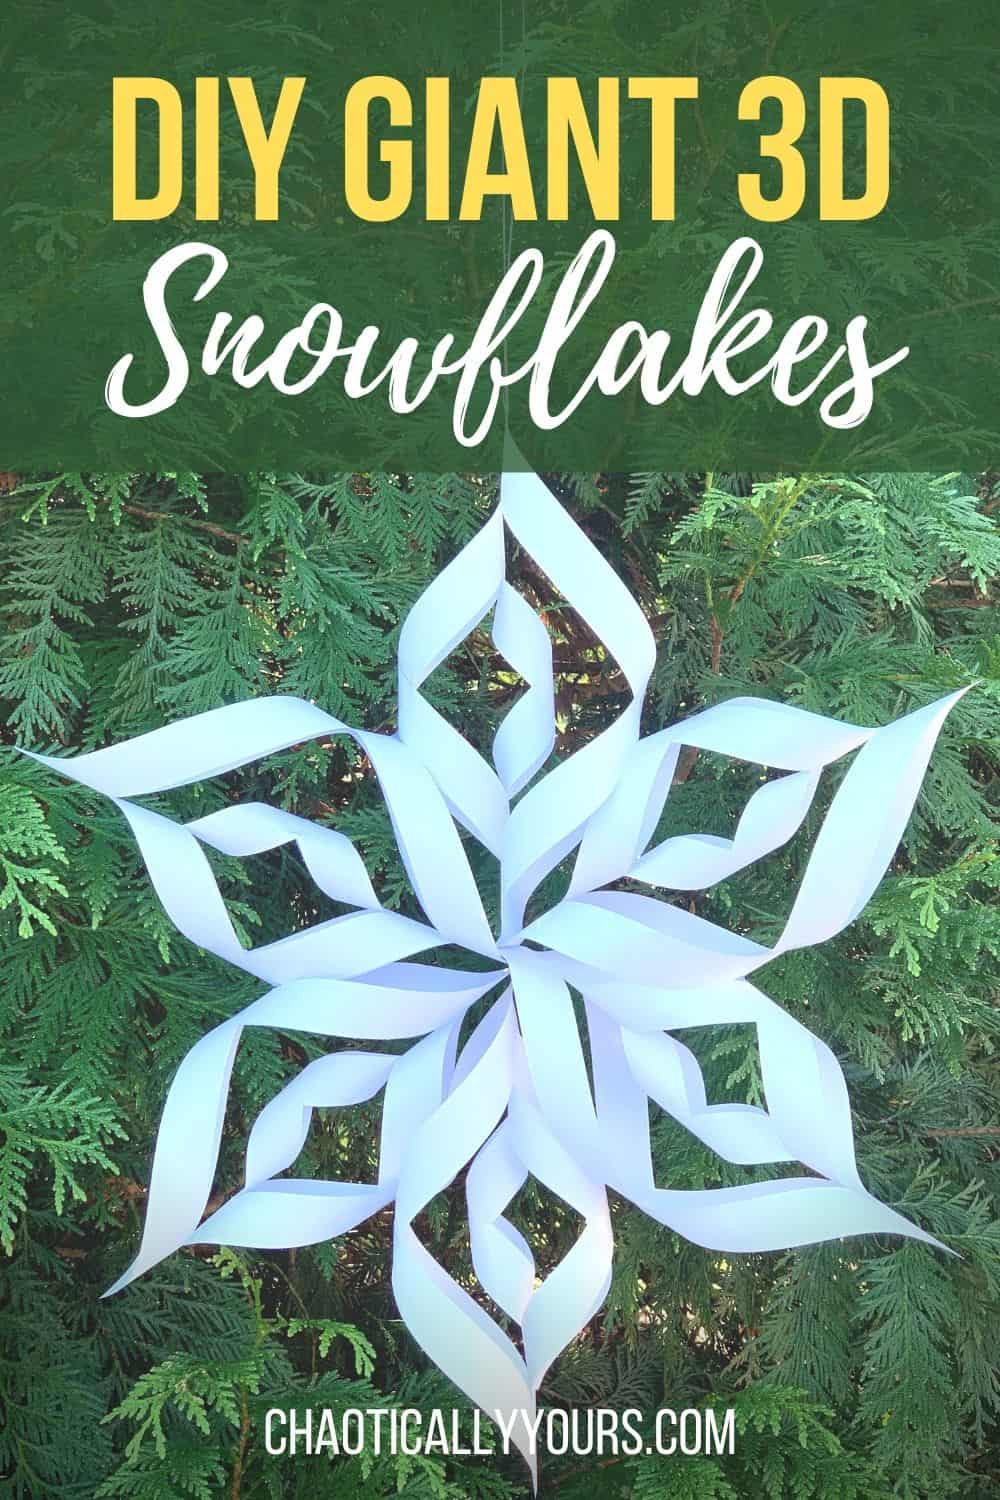
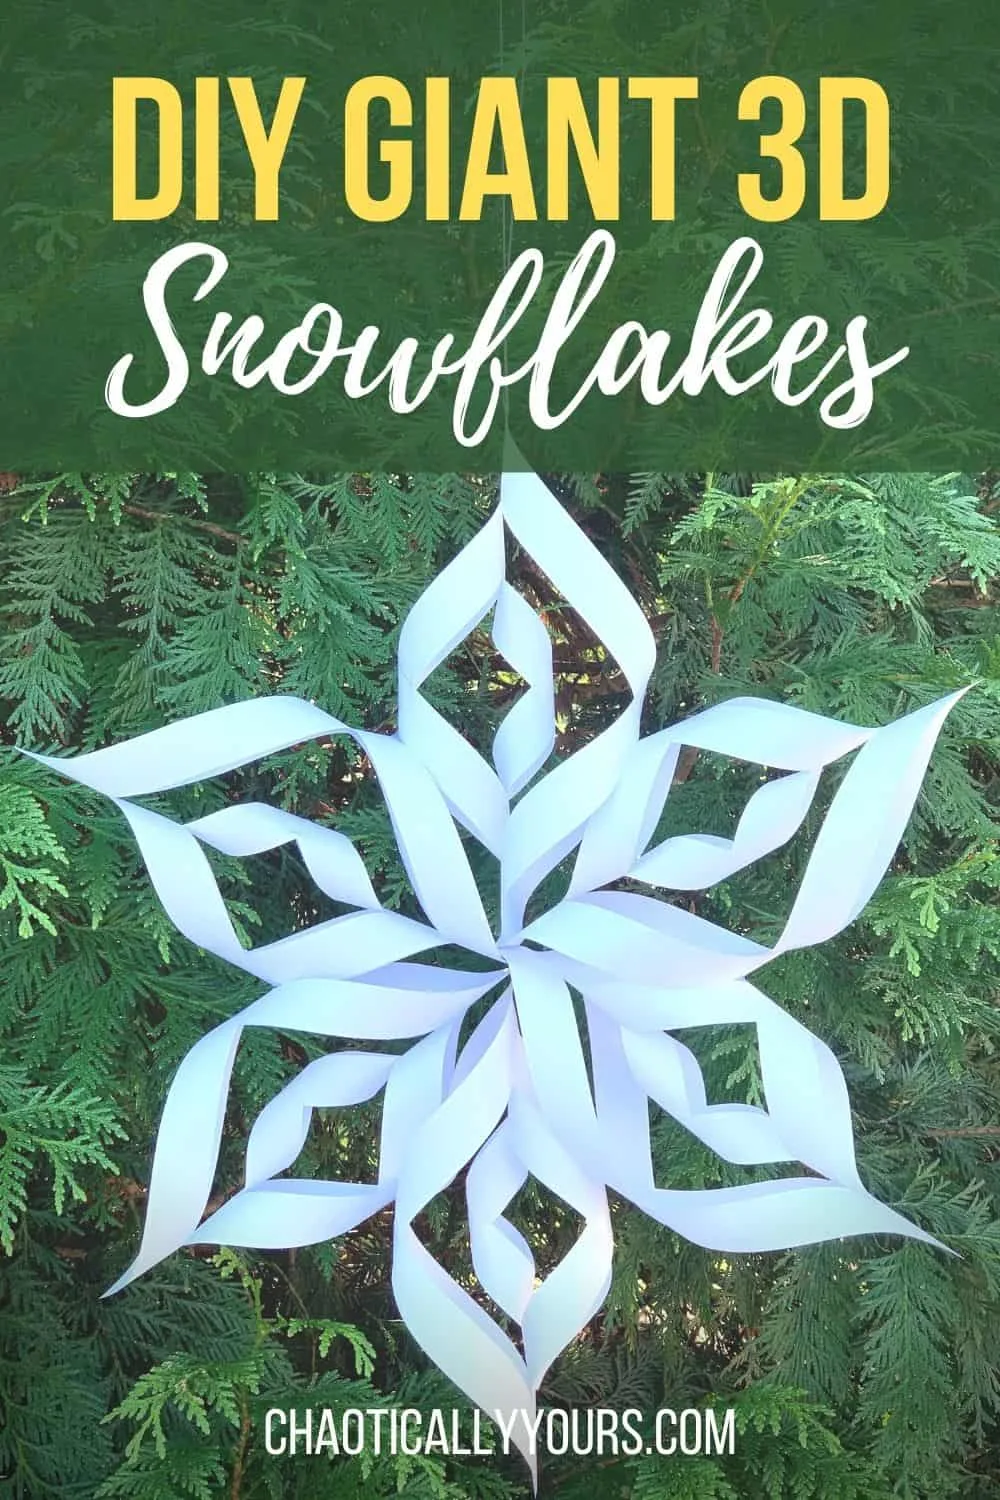
In today’s post, I’m going to teach you how to make huge 3D snowflakes!
I love Christmas decorations, especially homemade ones!
I especially love something that’s easy to put together but looks super impressive. I think these 3d snowflakes accomplish that goal!
They’re ridiculously simple and cheap to make, but really pack a punch visually.
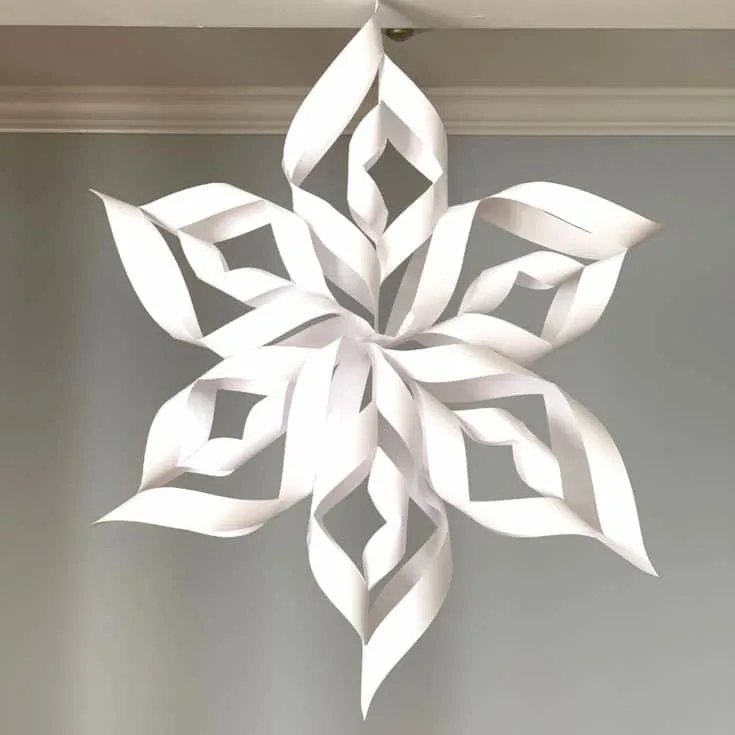
It’s hard to tell in the picture, but the finished product is almost two feet wide!
The best part is, you probably already have every single supply you need for these huge paper snowflakes already laying around your house!
If you don’t have them at home, you can definitely find them all at your local Dollar Tree!
Making these 3D snowflakes is super easy, and I’m going to outline all the steps for you in detail.
Plus, I’m even including printable instructions for you at the bottom of this post!
What You’ll Need:

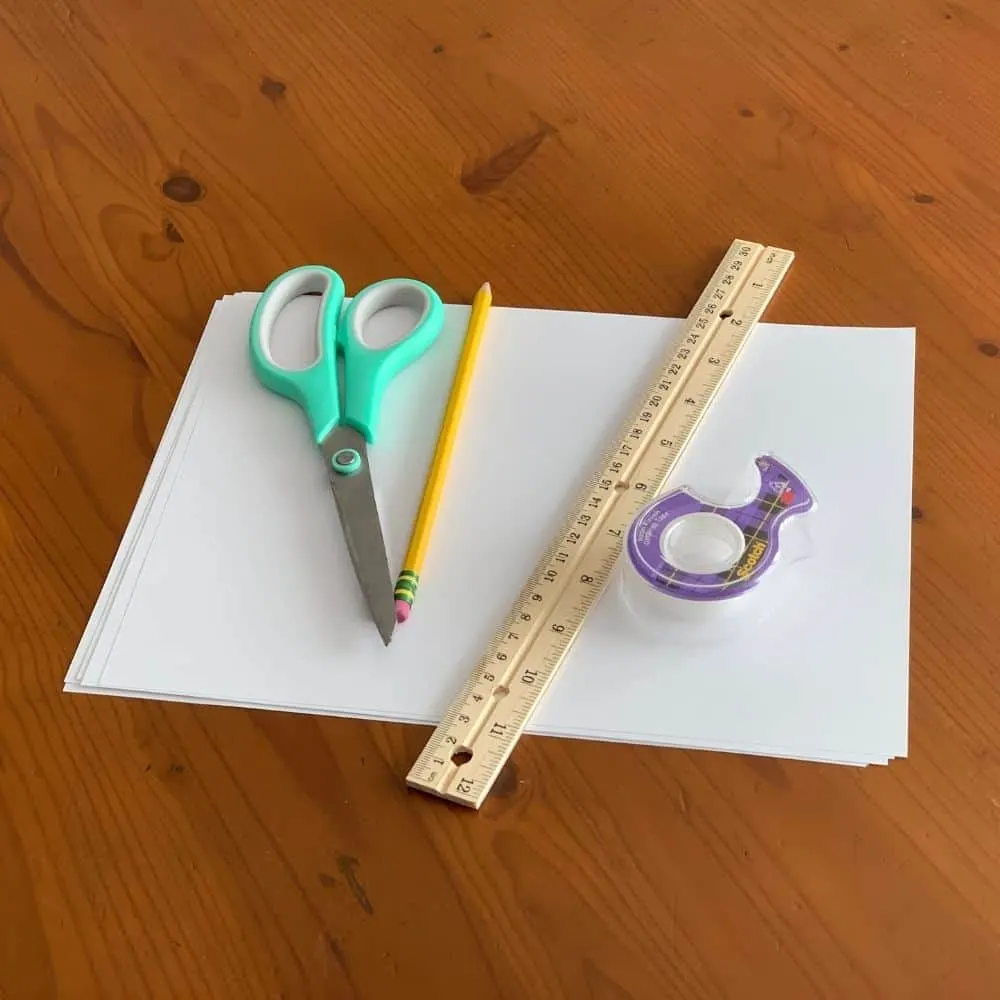
The supplies for this project couldn’t be any simpler.
You’ll need:
- Paper
- Clear tape
- Scissors
- A ruler
- A pencil
Seriously.
That’s it!
For this project, I just used some regular printer paper.
But I guess you could make it fancy and use some patterned or sparkly paper.
It’s really all up to your personal preference.
As far as the tape goes, I just went with regular old scotch tape I found in the kitchen drawer.
Some people think you need a snowflake template to make these, but you actually don’t.
Once you understand how to use a ruler to evenly measure out your pattern, the whole process is it super easy.
How Prep The Paper For Your 3D Snowflakes
Once you have your supplies assembled, it’s really easy to get started!
Folding
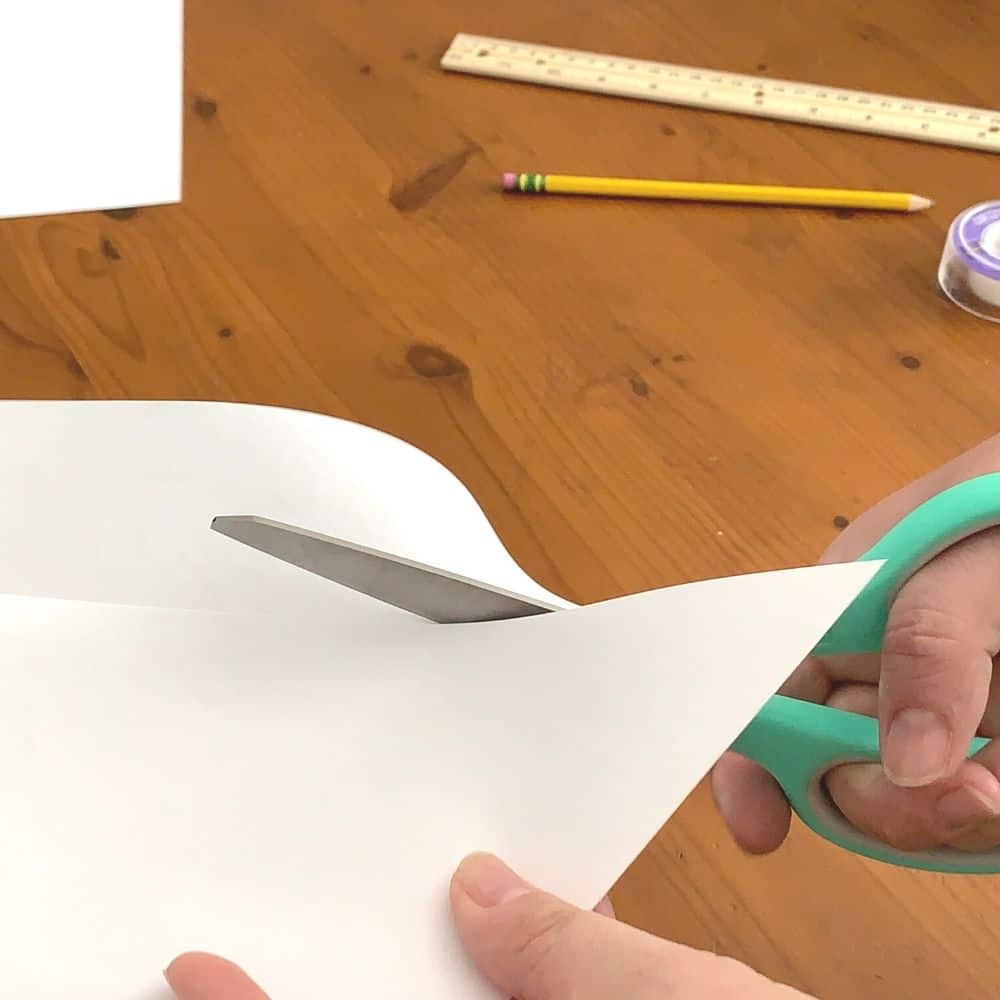
The first step to making your 3D paper snowflakes is to create a square out of your paper.
If you’re using regular printer paper, like I did, you’ll simply fold the top, shorter edge over to meet the longer, perpendicular edge of the paper.
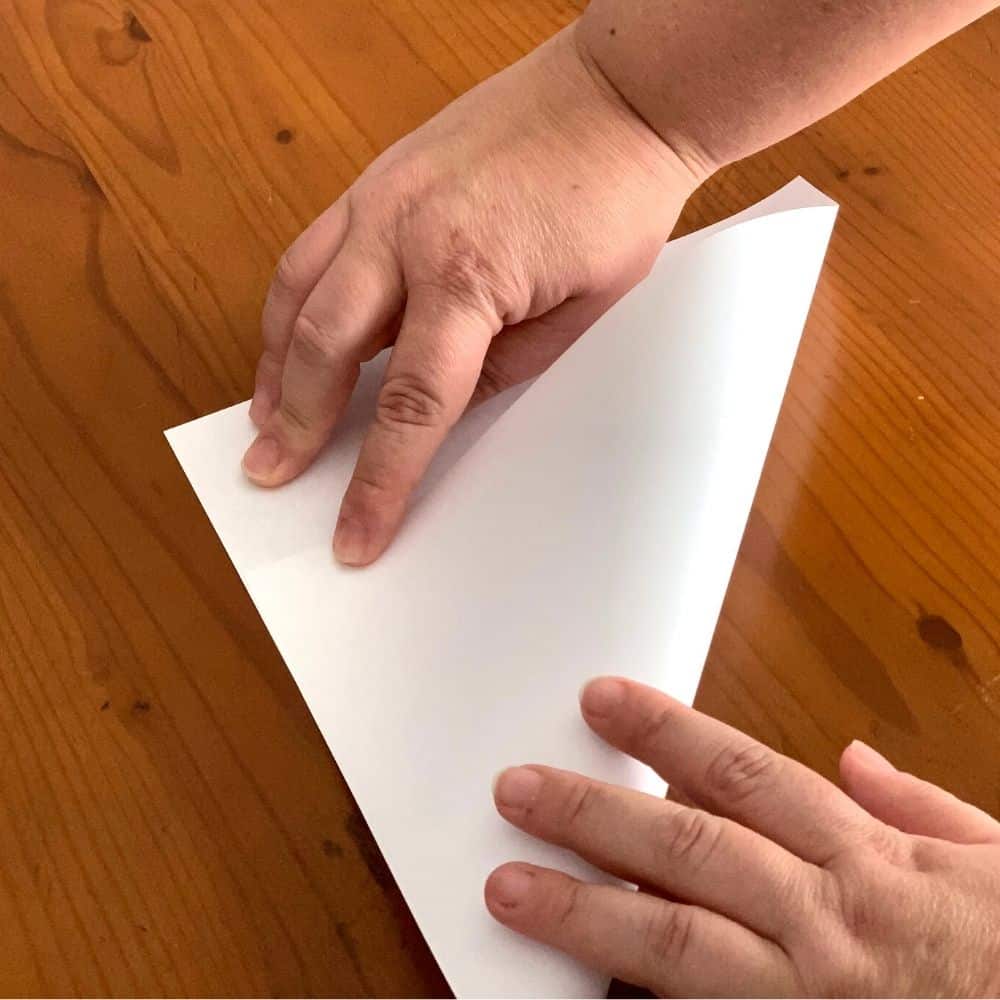

This creates a nice, even triangle at the top of the page.
Now you’ll want to trim off the excess paper at the bottom of your page.
If you’re using a square piece of paper already, this step won’t be necessary.

Now that you have a nice triangle (or a square folded in half diagonally), you’ll want to mark the places for your cuts.
Marking Your 3D Snowflake
You’ll want to start by lining your ruler up with the top corner of the triangle.
Then mark a one inch wide strip down the center of the triangle, starting at the point and ending in the middle of the fold.

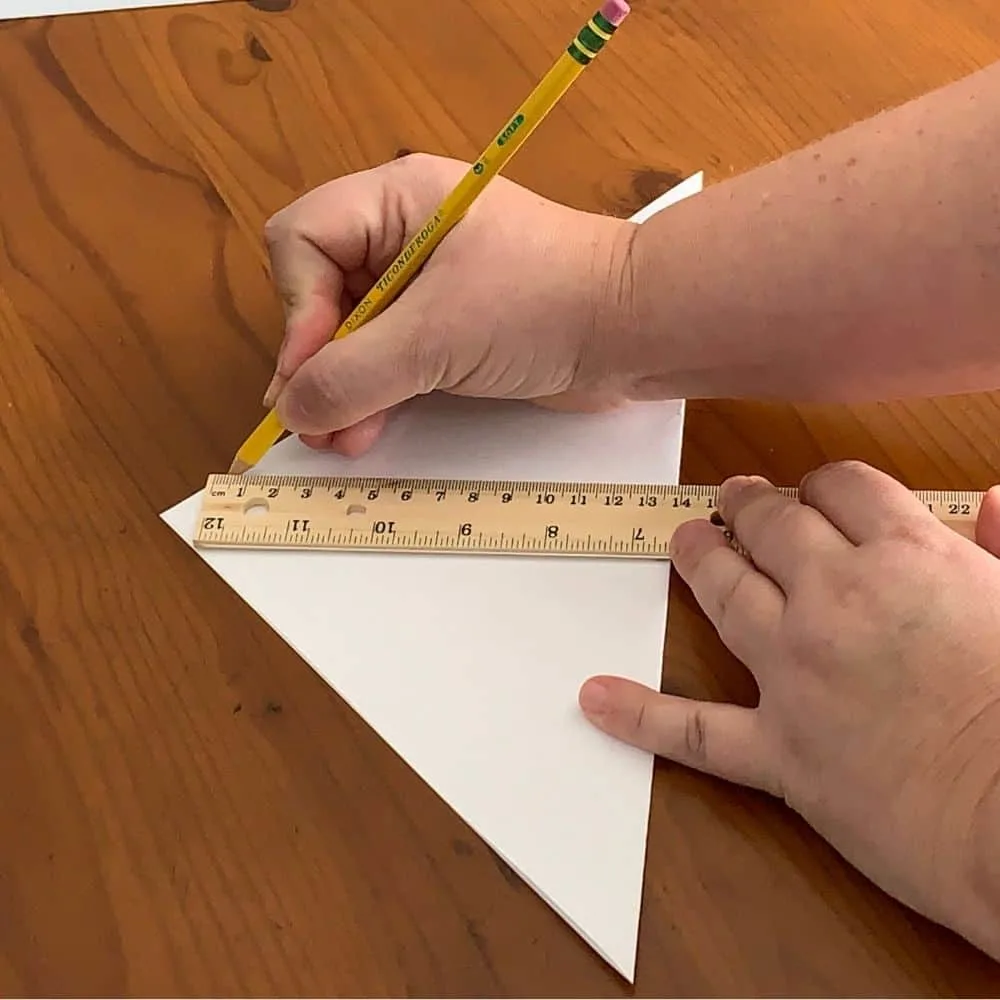
After you have the middle marked, line your ruler up along one short, non folded edge of the triangle.
Mark the paper from the folded edge to your center mark about one inch wide.
This was super easy for me, since my ruler was about the width I needed to mark.
Then line your ruler up with the mark you just made and make another line from the middle to the fold one inch away.
Draw a third line, another inch down, close to the middle of the page, but this time bring your line all the way to the center.
Then repeat the process along the opposite edge.

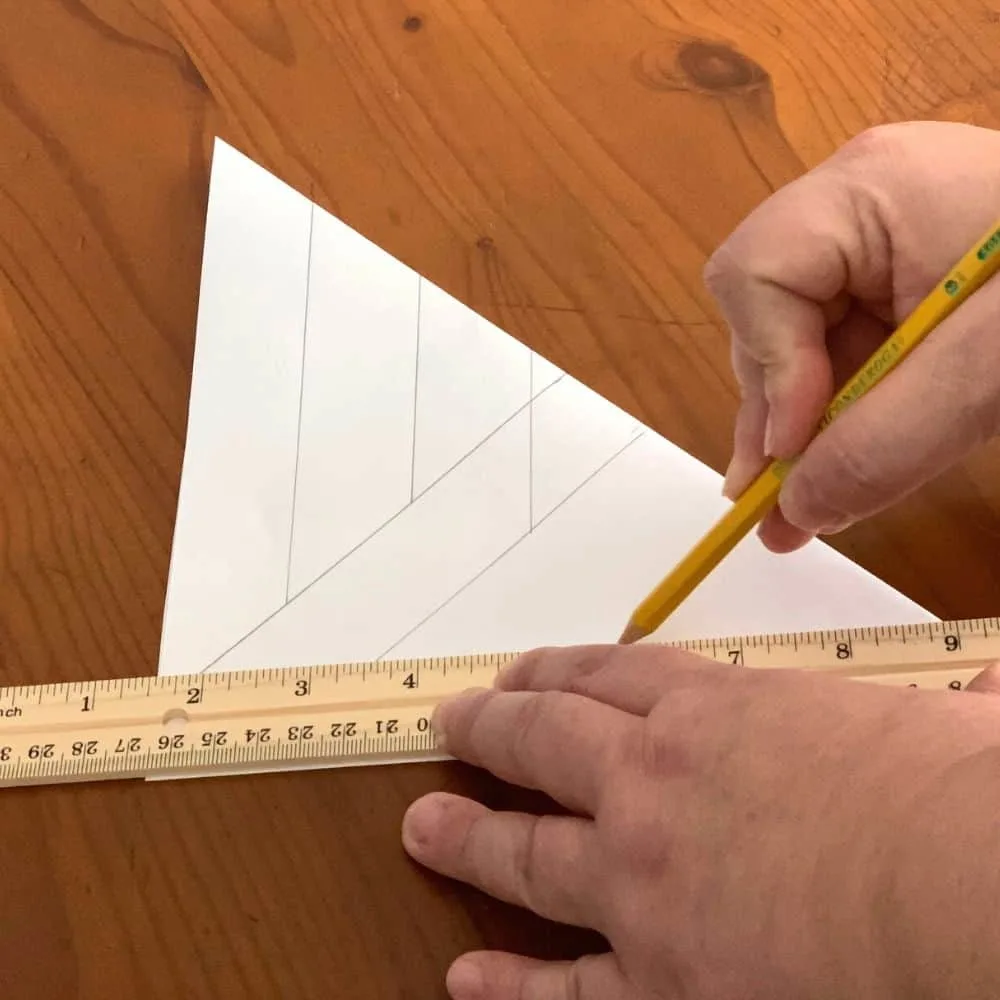
Once you have your lines marked on both sides, you can move on to cutting the meaningful designs in your 3D snowflake.
Cutting Your 3D Paper Snowflakes
For this portion, you’ll still want to keep your paper folded while you cut.
Starting with the lines closest to the center, cut your paper along the lines, removing a square from the center of the page.
This is the only cut you will make that will remove any of the paper from now on.

After you’ve removed the small square, cut along the other four lines that you’ve marked.
DO NOT cut all the way through the paper!
You want to stop cutting when you reach the line you marked in the center of the triangle.
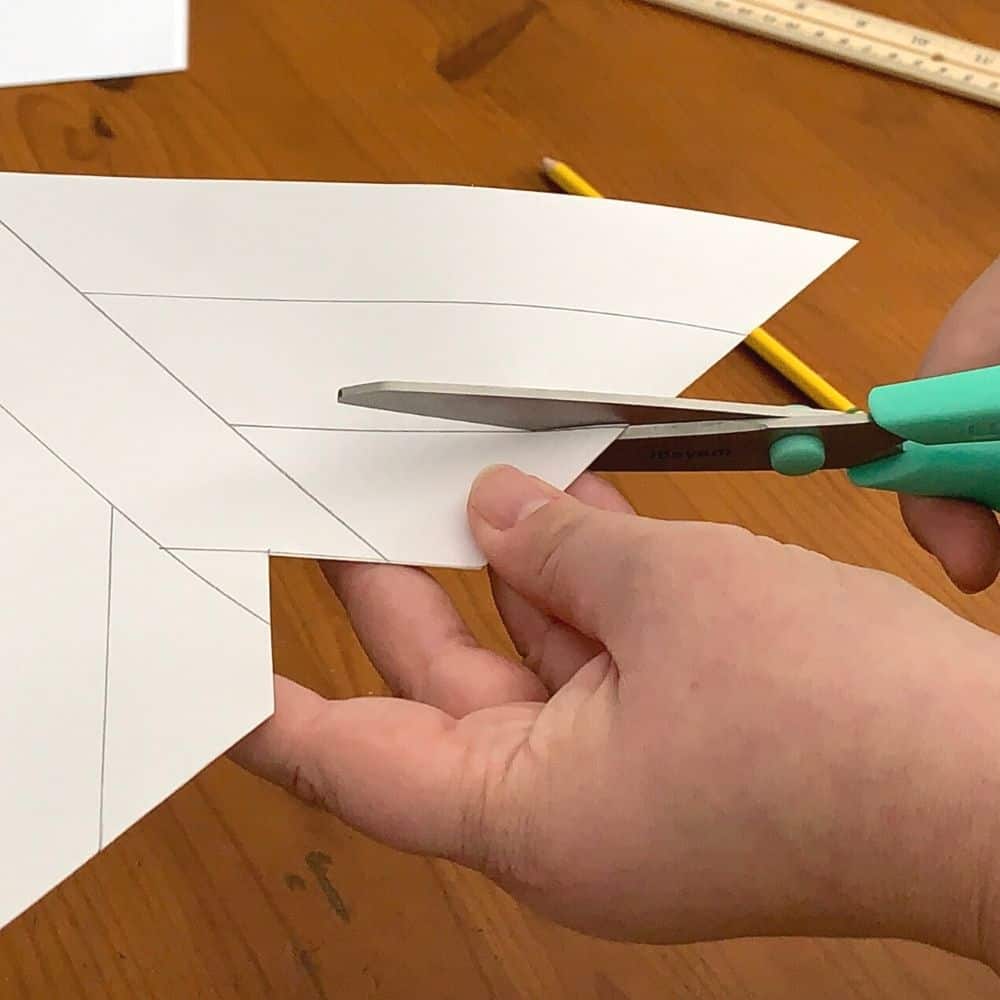
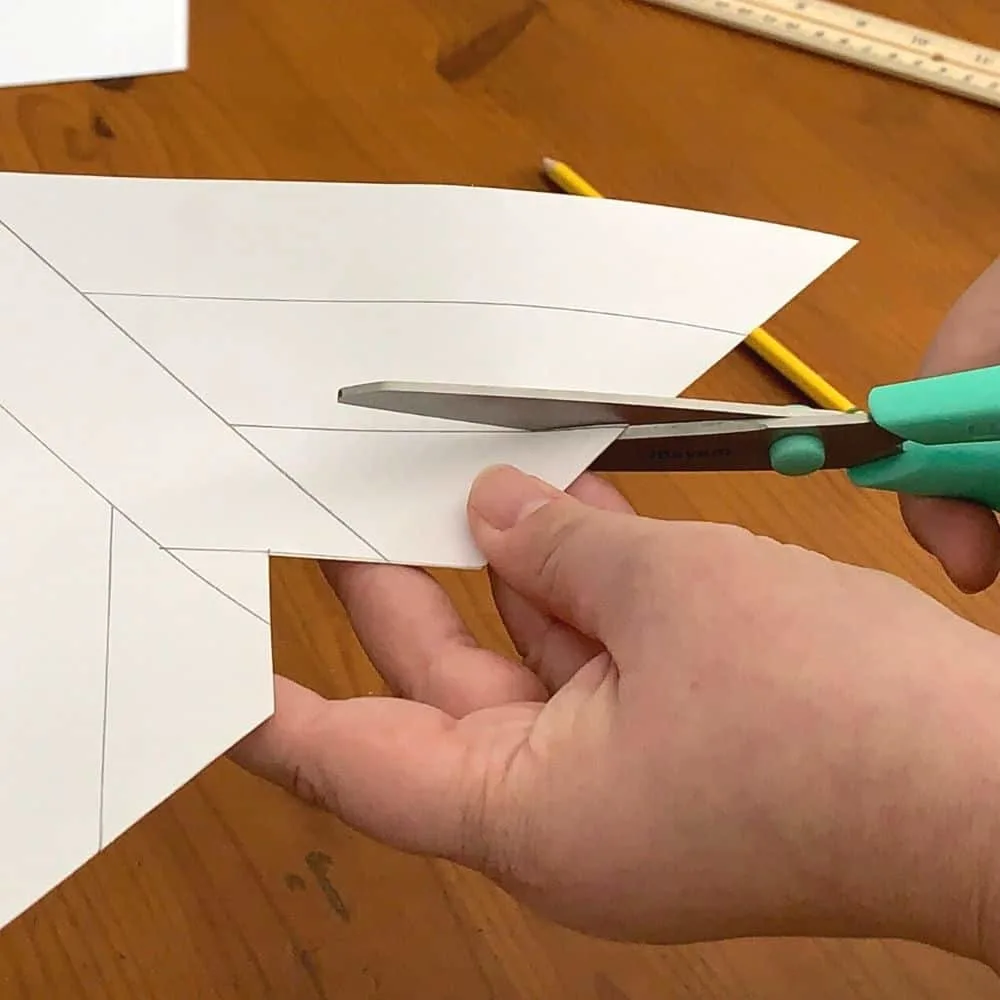
Leaving this strip of paper in the middle is what gives structure to the entire project.
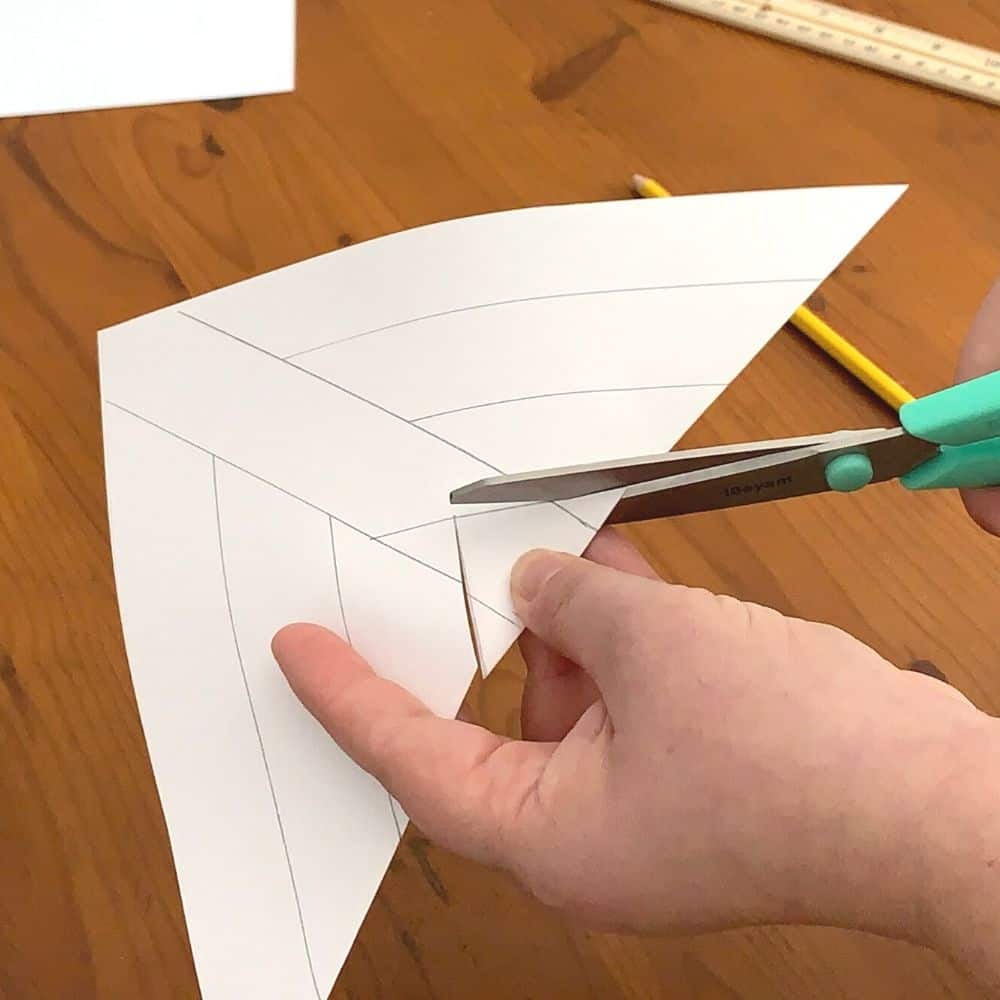
Unfold your paper, and it should look like this:

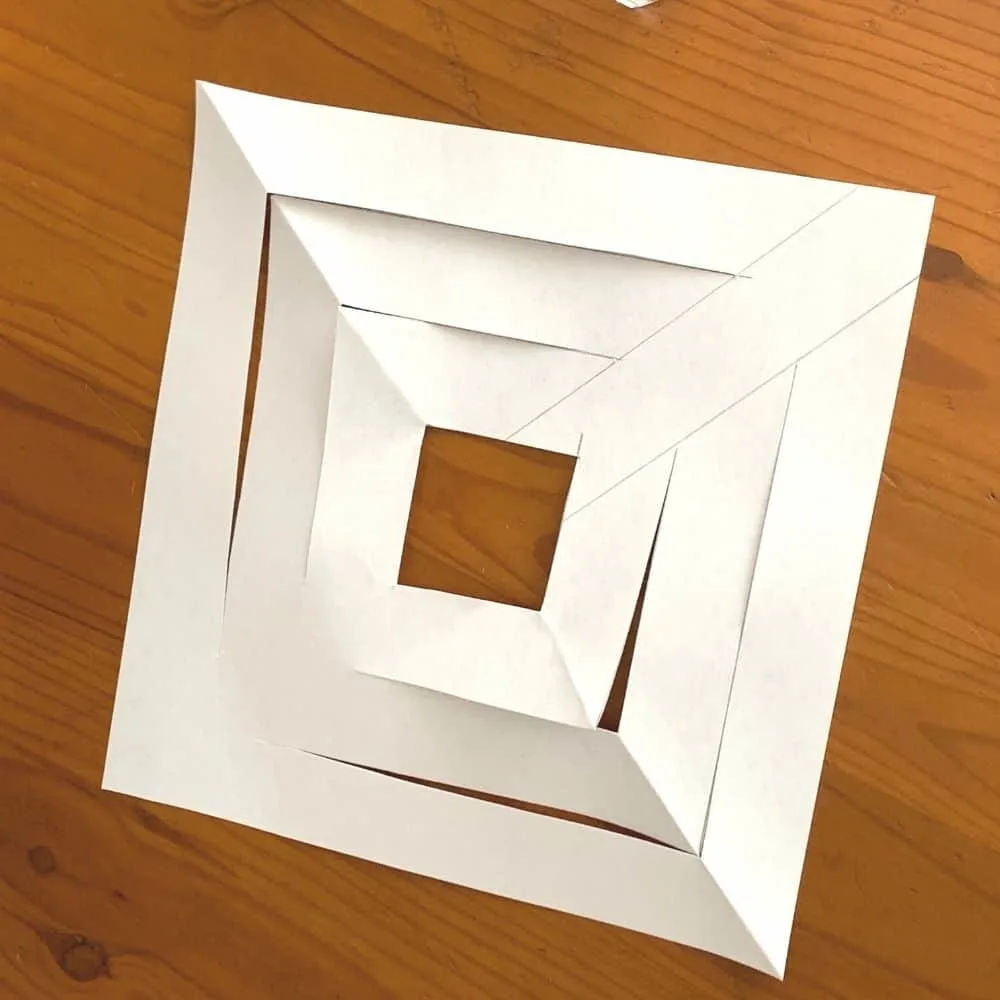
As you can see, you now basically have three squares cut into the paper, ready to be made into a 3D snowflake.
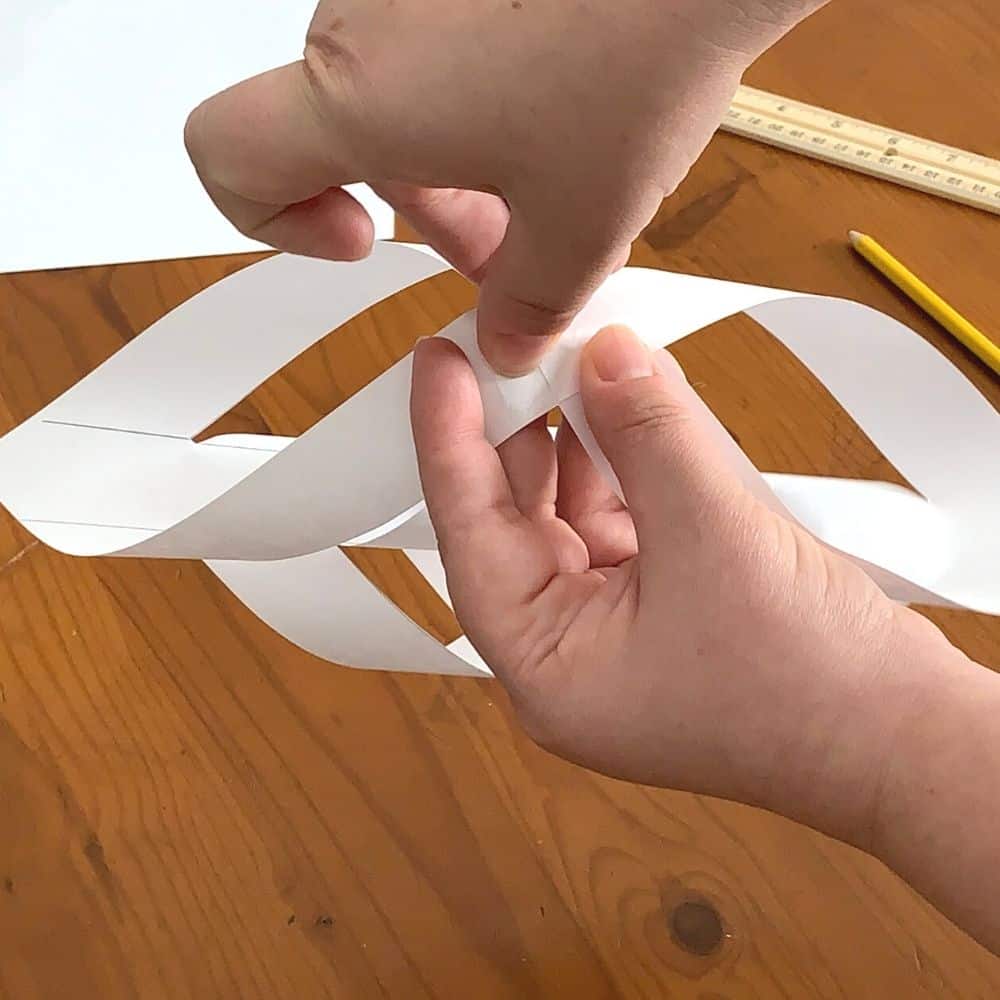
Constructing the “Petals”
Starting with the center most square, roll the paper inward.
Overlap the points fully, and place a piece of take there to hold the roll together.
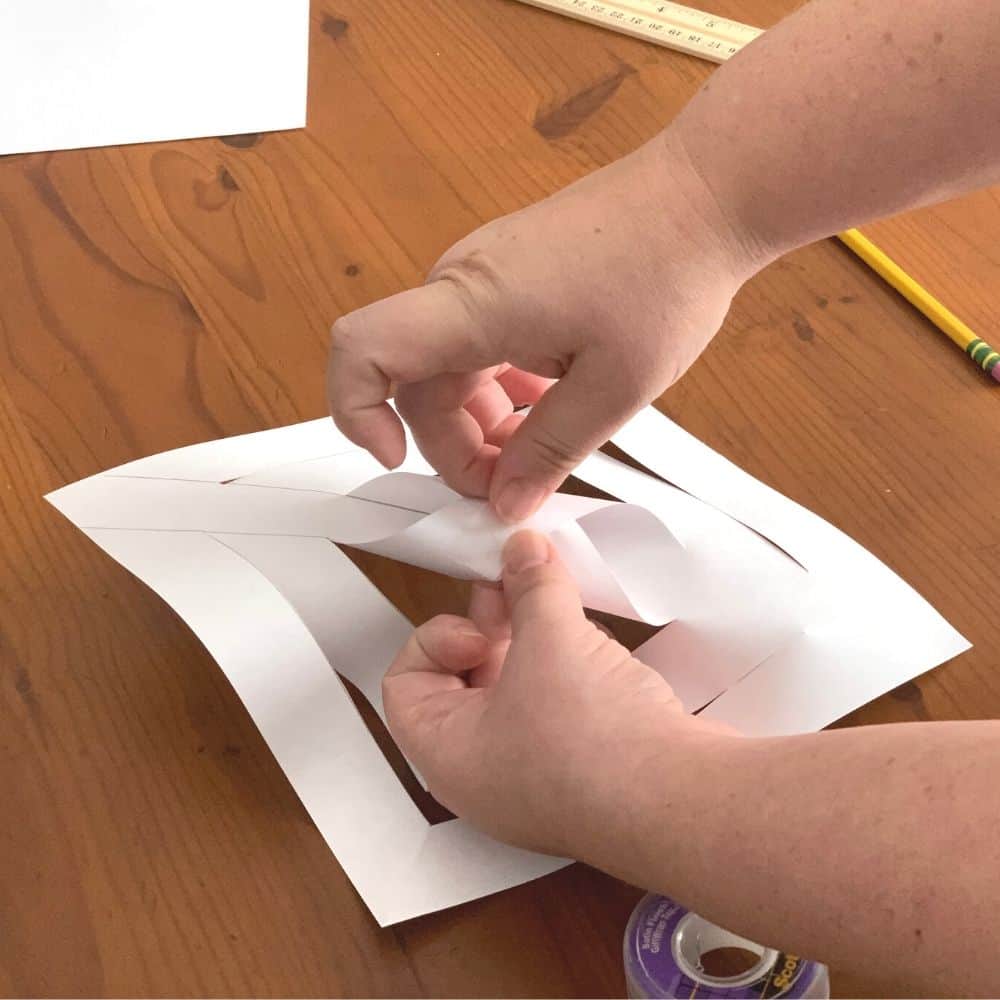

THIS IS IMPORTANT: Now flip the entire paper over, placing your newly made roll facing down, being sure not to squish it.
Roll the points of the next inner square, overlapping them and securing them with tape as well.
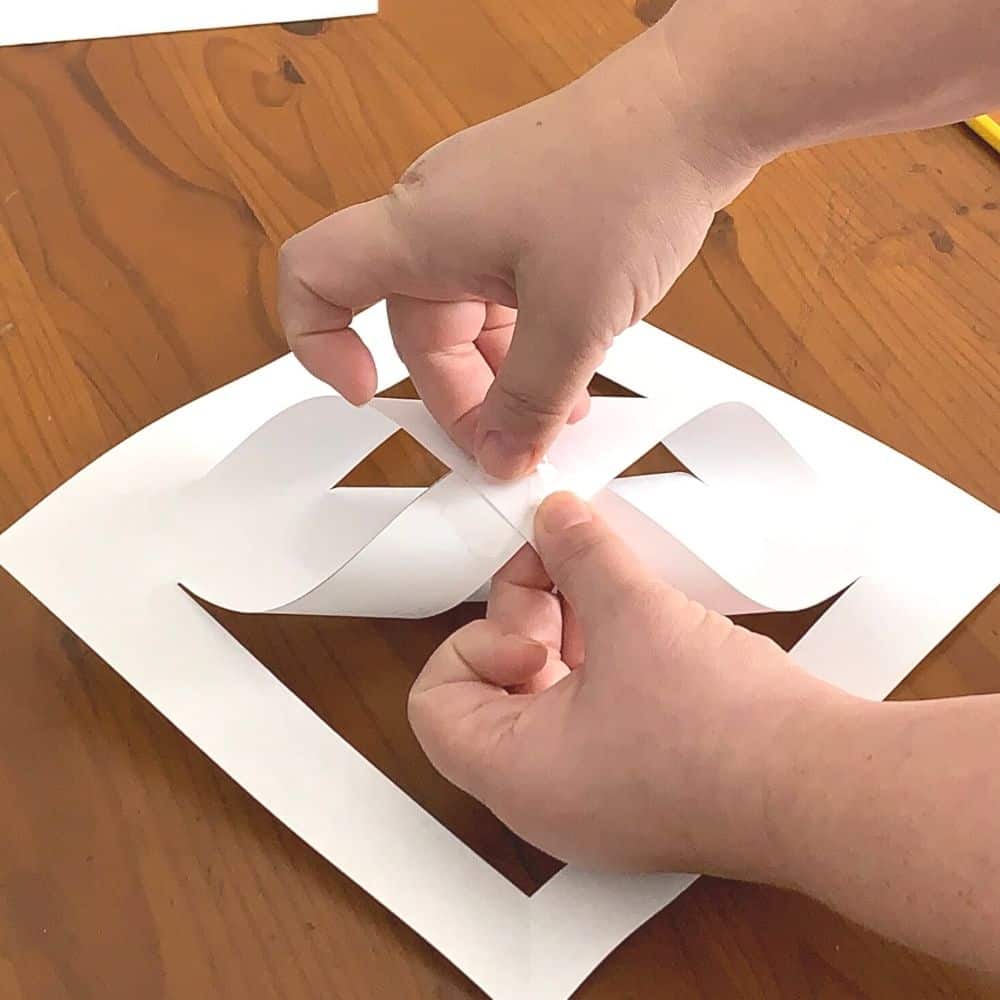

IMPORTANT AGAIN: Flip your paper one more time, so that the original roll is facing up again, and be mindful not to squish your second roll.
Roll the final two points of the remaining square together over the top of the small roll. Overlap the points and secure them with tape.
Your finished piece should look like this:
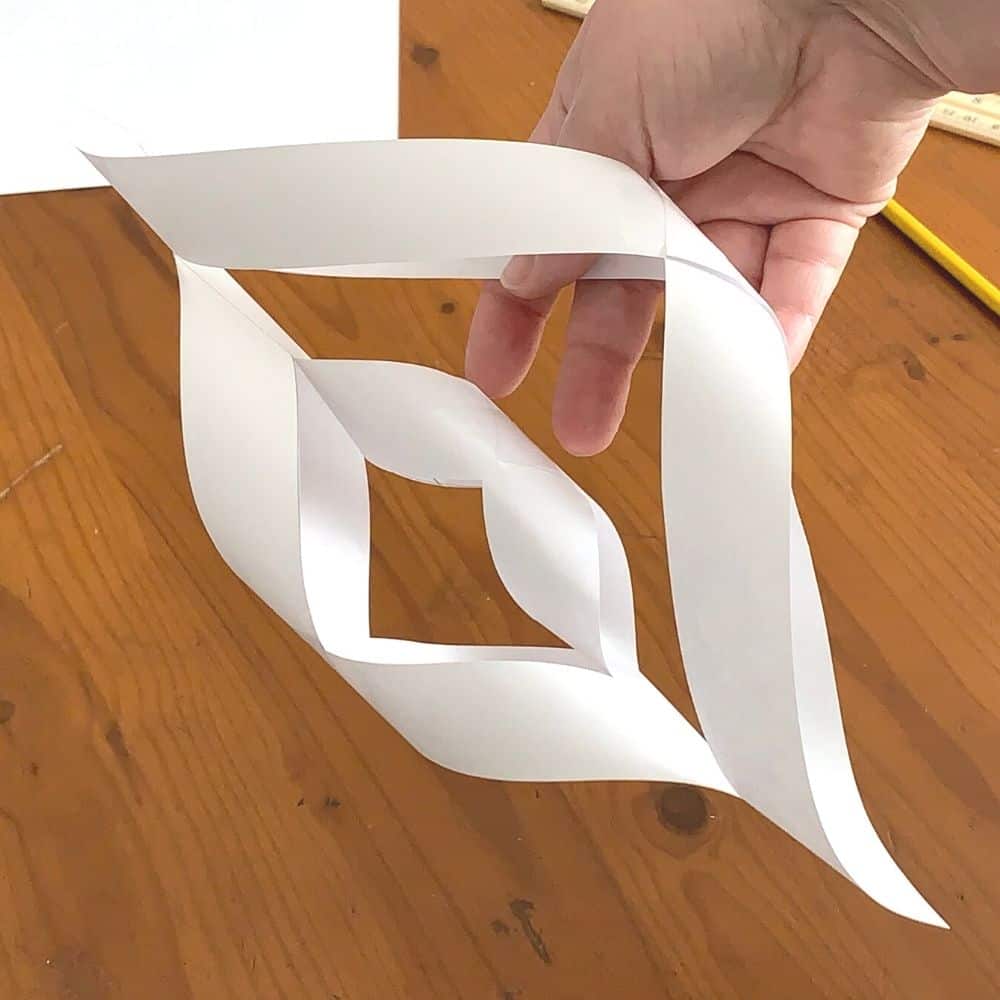

Now repeat this entire process five more times, so you create six “petals” for your paper 3D snowflakes.
Once you’ve created six of these petals, line them up, all facing the same direction.
Secure the bottom points together with tape.
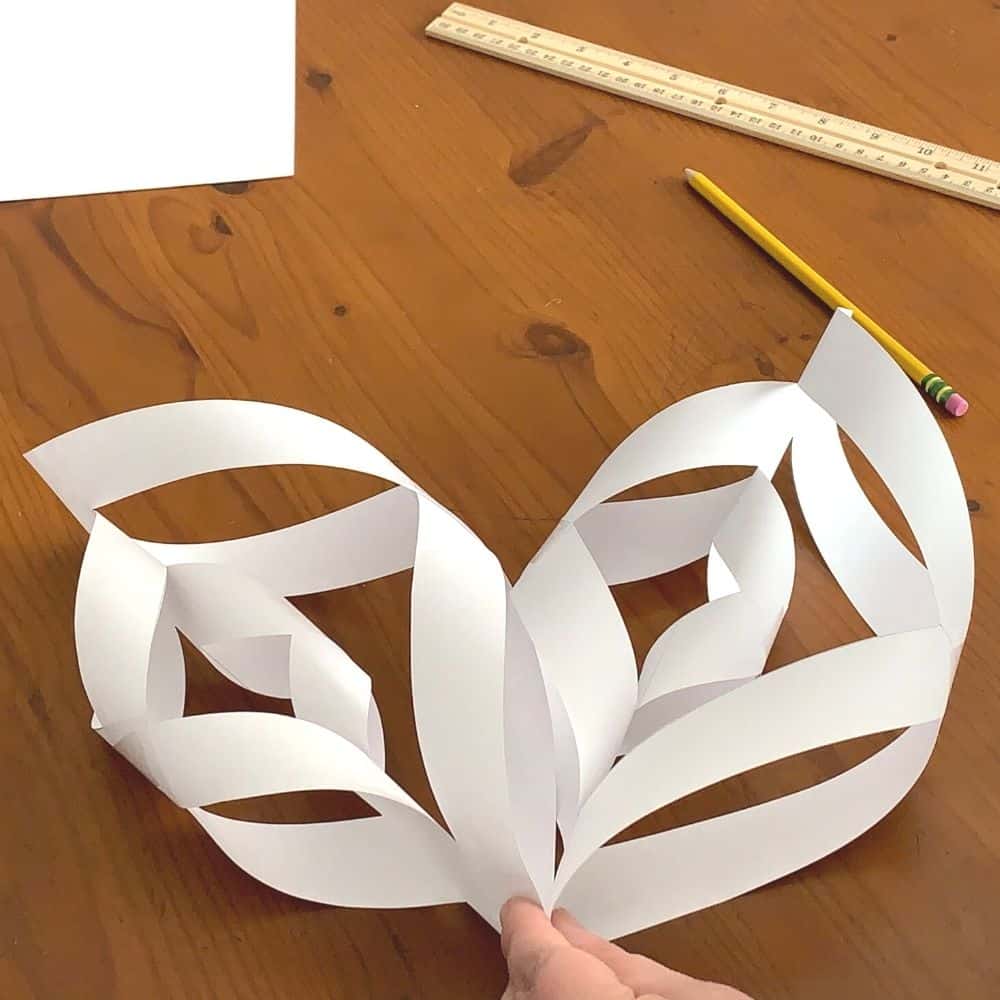
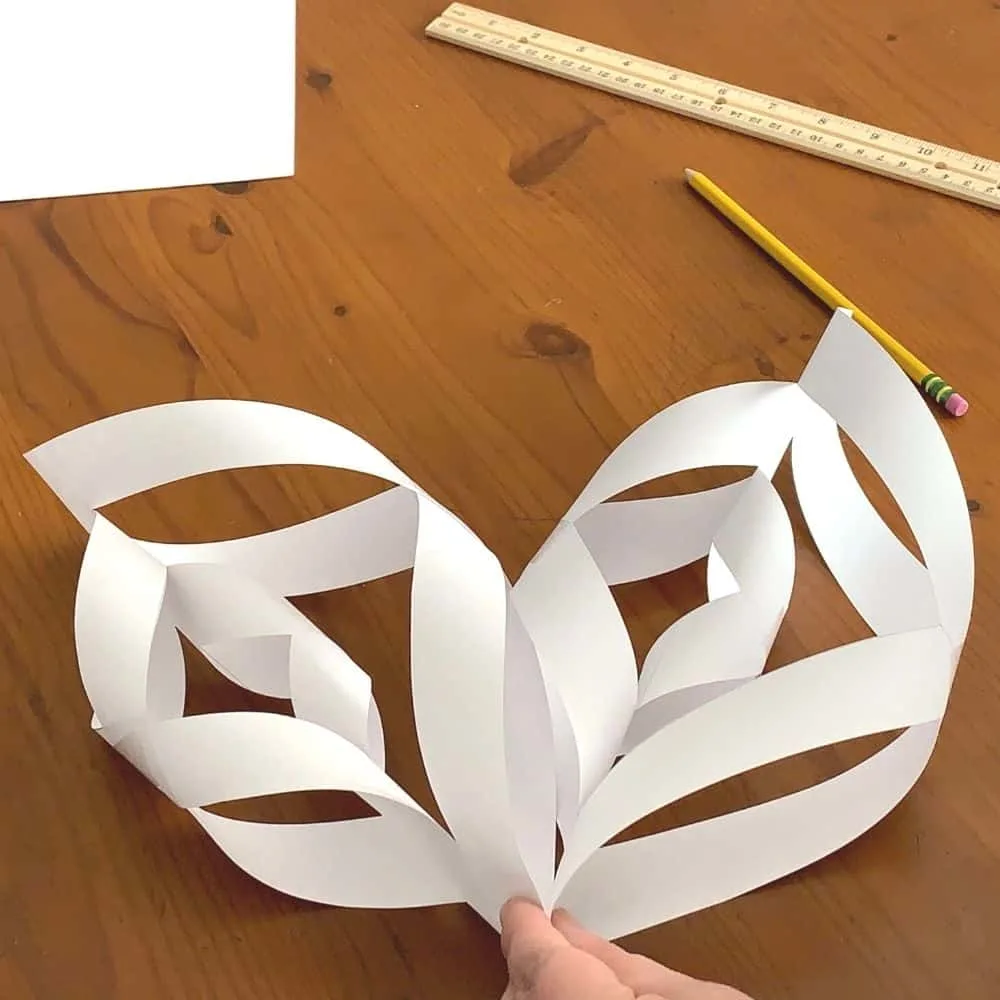
I did this by making two halfs, and then connected those halves together with an eye for making the spacing even between all the petals.
Once you’ve taped them all together, it’s done! You’ve made a paper 3D snowflake


Other Things You Should Know About 3D Snowflakes
These paper snowflakes are SOOO pretty in person.
I’ve seen them hung in such a way so that they kinda spin, and it’s just beautiful!
If you use the 8.5 x 11 inch standard pages to make your 3D snowflakes, they should be about 2 feet tall when you’re finished.
You can easily make these bigger or smaller, just depending on how large the paper your using is.
These 3D snowflakes are super inexpensive to make and for just a few dollars, you could decorate an entire room with these!
This project would be great to use in a classroom! Since these are so simple to make, kids pick the process up very easily.
You could also make these as an outside decoration, but you’d need to make sure you’re using a waterproof material instead of paper.
Laminated paper would work, or even some sort of plastic. You’d just need to make sure whatever your using is pliable enough to work with.
Looking for other Christmas projects to work on? Check out my tutorial for these adorable Snow Ski Ornaments!
Got strands of burnt out bulbs sitting around? Learn how to fix those broken Christmas lights!
How To Make Paper 3D Snowflakes

Make giant 3d snowflakes from just paper and tape.
Materials
- 6 sheets of 8.5 x 11 inch paper
- clear tape
Tools
- scissors
- pencil
Instructions
- Fold paper diagonally, lining up the edges and creating a triangle.
- Trim off the excess paper outside of the folded triangle so that you now have a square.
- While still folded, mark a one inch wide strip in the center of the square, from the point to the center of the fold.
- Again, keeping the paper folded diagonally in half, mark three lines, 1 inch apart parallel to the side of the paper. Repeat this process on the other side.
- With the page still folded, starting with the smallest line, closest to the center of the page, cut along the line until you reach the center on both sides. You should end up with a square shape cut out of the paper.
- Now cut the other two lines on both sides, but DO NOT cut them completely through. Stop cutting at the one inch line you marked in step 3.
- Now open your folded paper and it should look like this:
- Staring with the center most flaps, roll them in towards each other, overlapping at the points. Secure it together with tape.
- Flip the paper over and repeat the rolling and taping with the next flaps.
- Now flip the paper again, then roll and tape the final flaps.

- Repeat this process five more times to create six "petals" for your snowflake.
- Making sure all flakes are facing the same direction, secure the ends of the papers together in a circle with tape. Also secure the "petals" where they meet at the sides with tape.
- Your snowflake it complete!
Freddie Oaklley
Sunday 22nd of January 2023
I love these snowflakes and they are soooo easy
Molly
Sunday 19th of June 2022
I love snowflakes ❄️
Jialin Wang
Tuesday 14th of December 2021
Love the 3 D snow flakes, easy to make and beautiful
Jamal
Wednesday 1st of December 2021
Hi, cool snowflake
Fran
Monday 13th of September 2021
Love the 3 D snow flakes, easy to make and beautiful