In today’s post, I’m going to share with you how to complete a doll makeover!
A few years back, when my daughter was little, she was really into Barbies.
She loved to dress them up and act out little scenarios with them. It was adorable.
Back then Bratz dolls were SUPER popular.
You know the ones, right? Dolls with extremely heavy makeup, wearing very grown up clothes.
Today, you see this look more in brands like Rainbow High, Hairdoables and LOL Surprise.
While some of these dolls are imaginative and fun, my daughter started asking for a fashion doll that looked like her, and was relatable to the world she lived in.
So we decided to try a doll makeover!
The project was super successful and she absolutely loved the doll. Now that she’s older, she likes making over the dolls herself and it’s something we can do together.
I’ve been asked for these instructions a lot, and I’m super excited to finally write them up and share them with you!

Links in this post may be affiliate links, which means I may earn a commission if you make a purchase from any of them, at no additional cost to you. You can find out more information by reading my full disclaimer.
Where To Find Dolls To Makeover
Over the years, we’d been gifted with a few Bratz dolls and other brands but we had returned them to the store by the time we came across this project.
I also really liked the idea of recycling a doll and giving it new life. So I set out on the hunt to find a suitable candidate for a doll makeover.
I was looking for dolls that were still pretty much intact with no major damage to them.
I wanted no markings on them (you’d be surprised how many I found that had sharpie marker all over them).
Most importantly, I wanted dolls with salvageable hair for my doll makeover process.
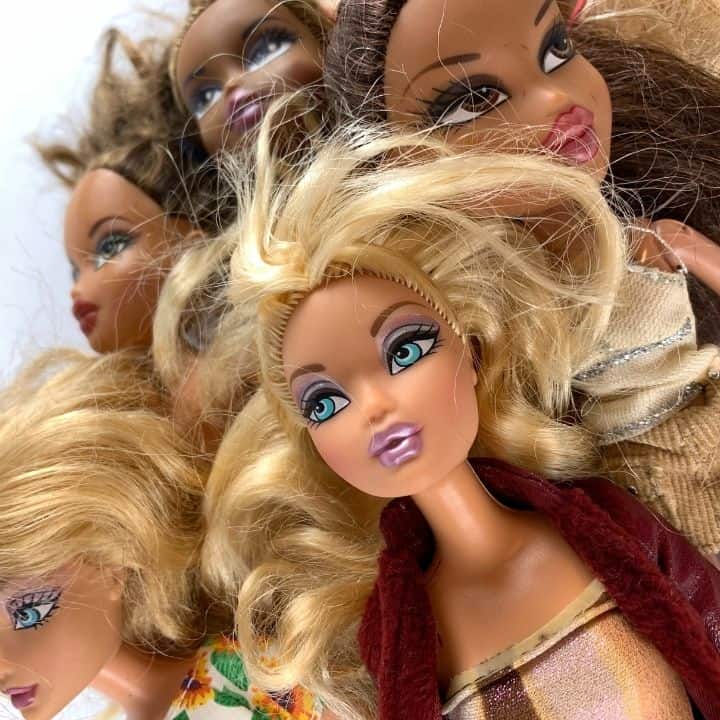

If the hair was beyond tangled or had been given an unfortunate haircut, it wasn’t what I was looking for.
The first place I looked was our local thrift store. They actually had a good assortment of toys that day, and I was able to pick up a few sad looking dolls there.
I also found a few at garage sales and estate sales.
The local buy/sell/trade pages might also be a good place to find some dolls that need makeovers.
I picked up several dolls to makeover, but you only really need one to start this project.
How To Complete A Doll Makeover
Completing a doll makeover is a process that requires several steps and a few specialized supplies.
Supplies for Your Doll Makeover
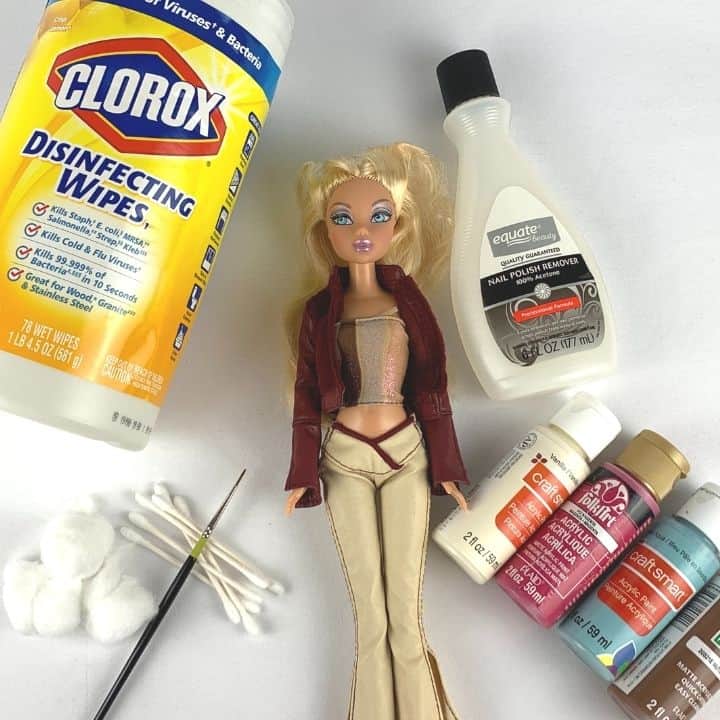

Here’s what you should have on hand to complete this process start to finish:
For the Doll:
- A fashion doll to makeover
- Clorox wipes
- 100% Acetone Nail Polish Remover
- Cotton Balls
- Q tips
- Acrylic paints
- Small paint brushes
- Pencils
- Scrap rag
- Water jar to clean brushes
- Polyurethane Spray (optional)
For the hair:
- Small, sturdy hairbrush or comb
- Doll detangler spray (more on this later)
- Tiny hair bands
Step 1: Cleaning the Doll and Removing the Paint
The first thing I always do when I’m about to give a doll makeover is to clean the doll thoroughly.
I love thrifting, but this is something that is important to do when you buy an item second hand.
For the dolls, I give them a good wipedown with a Clorox wipe. I let them air dry and then I’m ready to get to work.
The first real step to completing a doll makeover is to remove all the paint from the face.
The best method I’ve found for doing this is to use a 100% Acetone nail polish remover.
I DO NOT recommend letting children complete this step, since Acetone is a toxic chemical that can be harmful.
While regular nail polish remover works ok for the most part, it usually leaves behind some remnants of what was originally painted on the face.

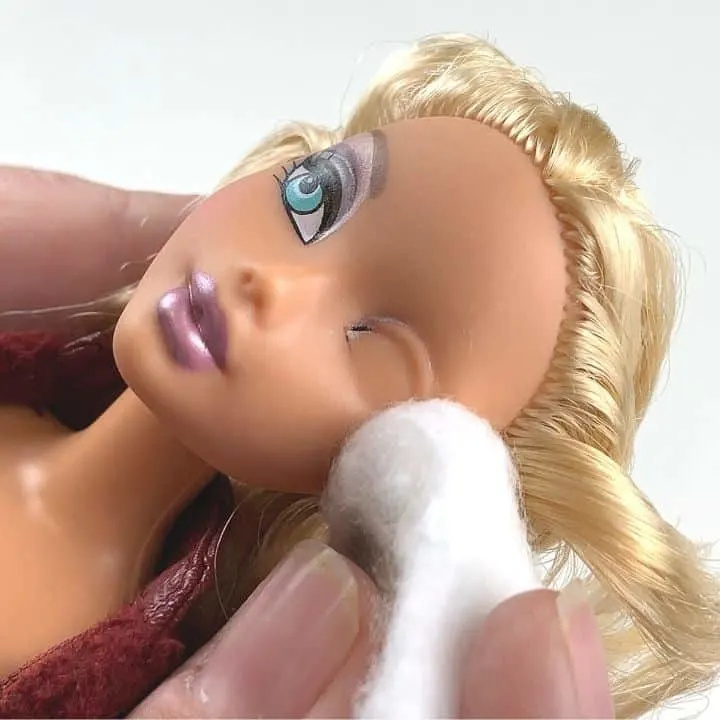
Before you get cleaning, pull the doll’s hair back and secure it with a rubber band.
I put some of the Acetone on a cotton ball and just wipe firmly. I also use some q-tips to get into the corners of the eyes or any other difficult spots.
You can also use the Acetone to correct mistakes when repainting the doll face. It works like magic!
Acetone is a strong chemical, so be cautious when using it and work in a well ventilated space.
Once you’ve removed all the face paint, wipe the face off thoroughly with a damp paper towel to remove any remnants of the acetone.
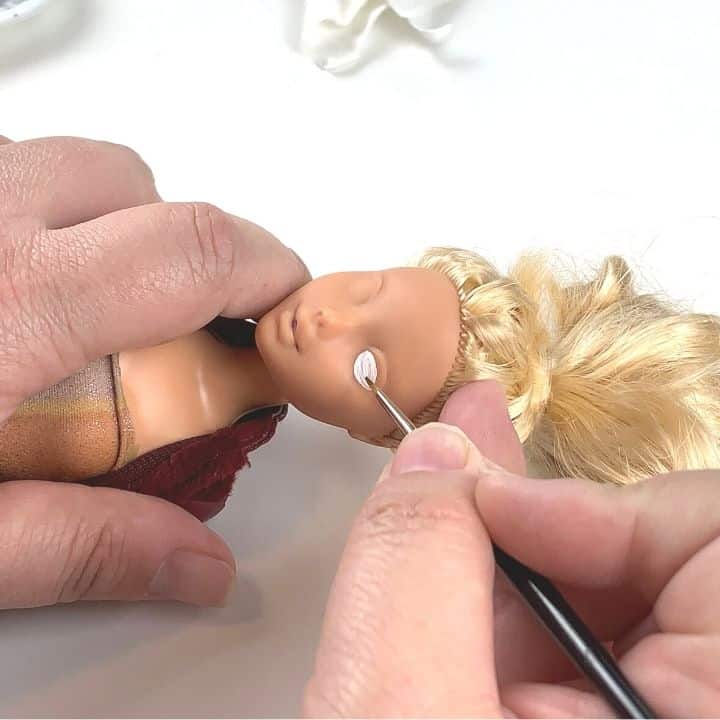
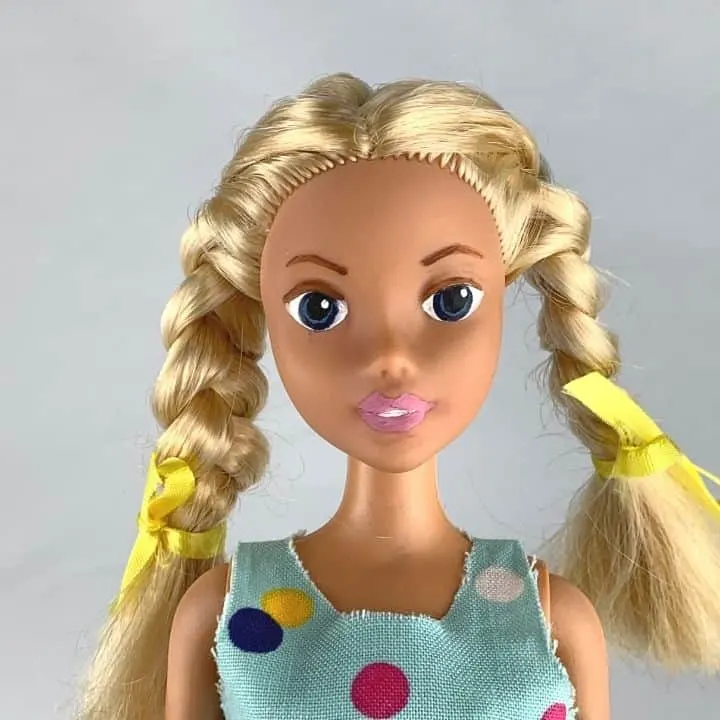
Step 2: Repainting the Face
This is where the fun and creativity really comes in. It’s the most fun step but also the most difficult in the doll makeover process.
To get started, it’s always a good idea to lightly sketch out what shapes you want to paint on the face with a pencil before you begin painting.
Be sure to mark where you want the eyes, eyebrows, and lips to go, and possibly even any details you want to add to the nose, like freckles.
This gives you a chance to really make the features even and balanced, and gives you some guidelines for when you start putting the paint on.

I also like to set up my painting station before getting started.
I always keep a jar of clean water and a damp rag nearby to help me clean my brush between steps.
I use the smallest paint brushes I can fine to really get the detail in the face.
I’ve found that paint brushes designed for painting miniatures work really well for this part of the process.
You’ll want to work slowly and carefully, making sure you get the face to look exactly how you want it.
I like to start with the eyes. When I was first doing this, I used a stark white for the eye, but now I add just a little beige to the white to soften the eyes up a bit.
To make the eyes look more realistic, include multiple shades of whatever color you make the irises, and add a hint of white to suggest that the eyes are reflecting some light.
It really helps to work in layers, letting each layer dry before moving on. For the blue eyes here, I painted the dark blue first, followed by the light blue. Then I added the pupil and the little speck of white.
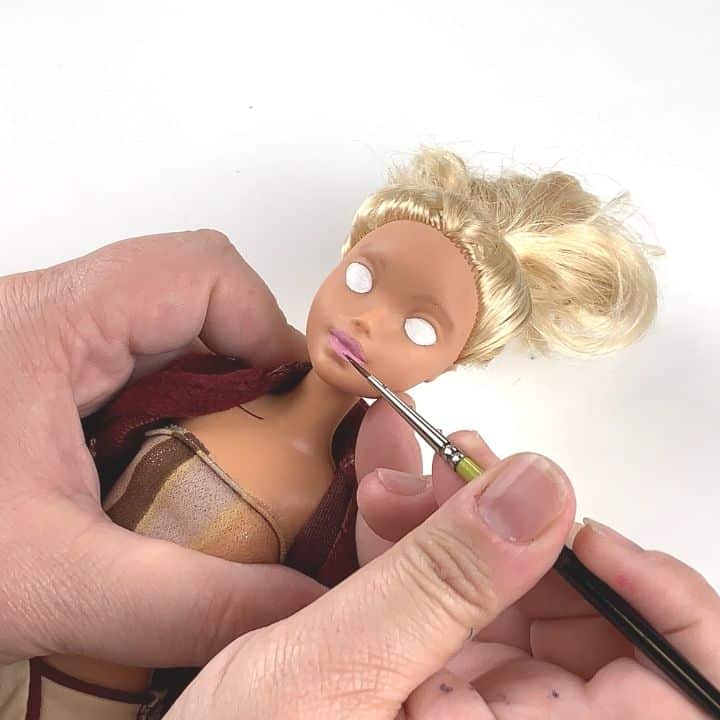

For the lips, go with more subtle shades to make them look more natural.
My daughter was ROUGH on dolls when she was little, so I really wanted to make sure the face I had just worked so hard to paint wasn’t going to just scratch right off if she got a little careless with it.
To keep it looking good, I put a couple of very, VERY LIGHT coats of polyurethane spray on the face.
I covered the doll’s hair and body with a couple of rags, and sprayed the lightest of coats from a full 12 inches away. Once it was thoroughly dry, I put another extremely light coat on it, just to be safe.
DO NOT OVERSPRAY!! I cannot say this enough!! Too much of the polyurethane spray can completely really ruin the face.
Again, do not let children complete this step. It really needs to be handled by an adult.
Step 3: Salvaging the Hair
A lot of the dolls that you find at thrift stores have hair that has seen better days.
While I recommend trying to find a doll whose hair isn’t too far gone, I have found a method for salvaging hair that is a bit worse for wear.
I used this recipe for doll hair detangler and it worked really well.
The process did take some time, but I was able to get my doll back to looking acceptable.
After working out all the knots, I styled the dolls hair in a more appropriate way that made it look more like my daughter.
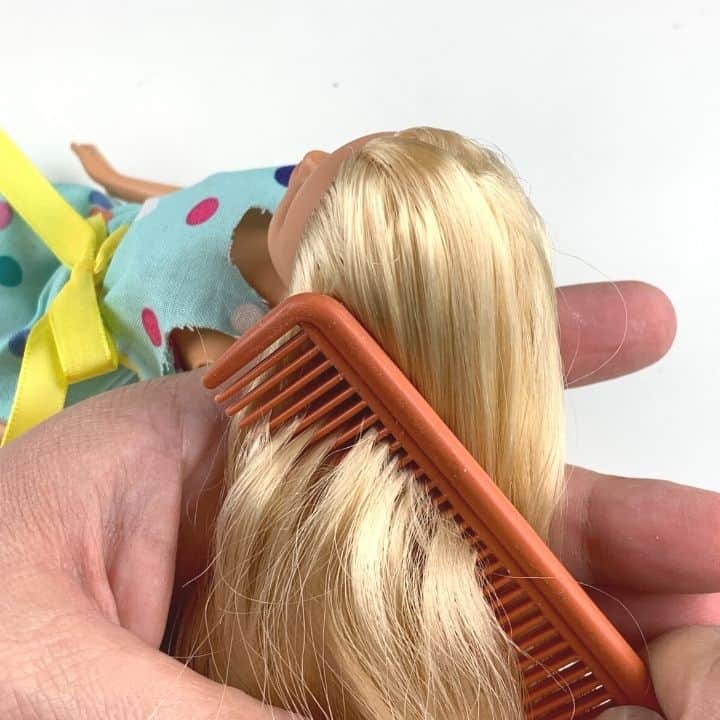

Braids or ponytails worked great for this.
I found some tiny hair bands at my local dollar store that were really helpful for this step.
Every once in a while you’ll come across a doll whose hair has been styled in such a way that it doesn’t look right in a ponytail or a braid.
If you plan to leave this look as a permanent hairstyle for the doll, don’t be afraid to trim the doll’s hair just a bit.
I had one doll that had been originally styled with the hair half pulled back. When I took it down to rework it into one ponytail, the ends were very uneven. We gave the doll a quick trim and it looked much nicer.
If you do decide to cut your doll’s hair, just be careful and only take a little off at a time. You’d hate to ruin all your hard work by giving the doll a bad haircut.
Step 4: New Clothes
Once we had the face and hair tackled, it was time to replace some of the crazy clothes this doll had come with.
We made no-sew clothes for our doll using a few small pieces of fabric, some ribbon and some glue.
I have a full tutorial on how to make doll clothes with NO SEWING that you can use to create your own. It even comes with free printable patterns!
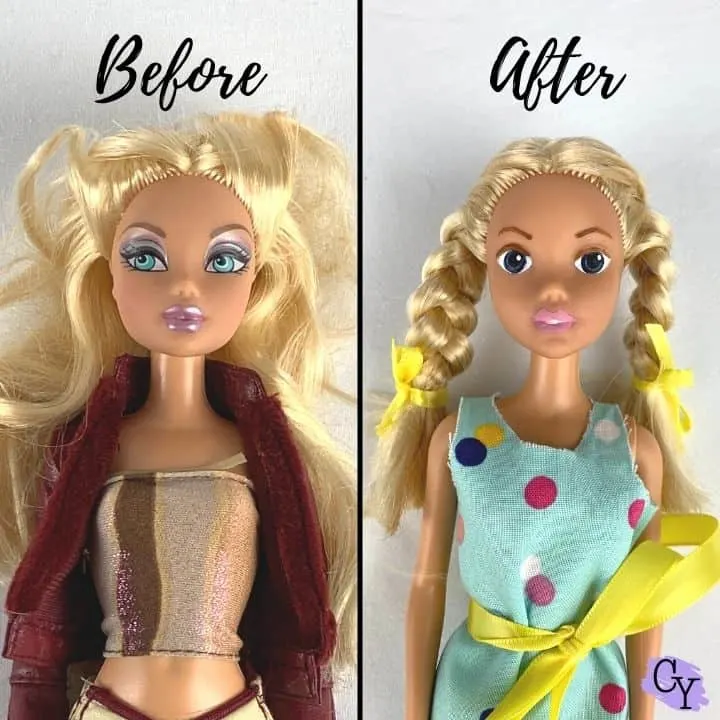
The Finished Doll Makeover
I found this process to be a lot of fun, and really felt like it breathed new life into the doll.
The before and after pictures are quite striking.
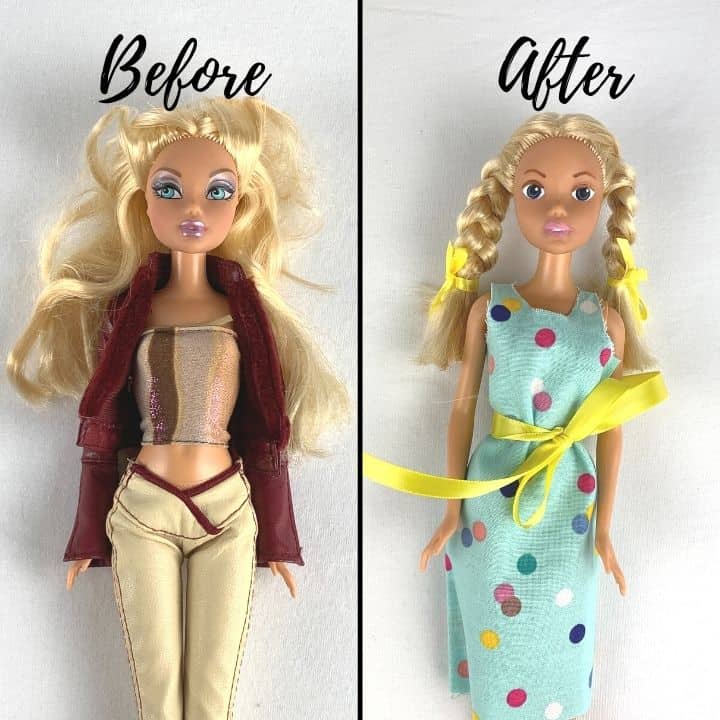

She’s not perfect, but I think she’s MUCH improved.
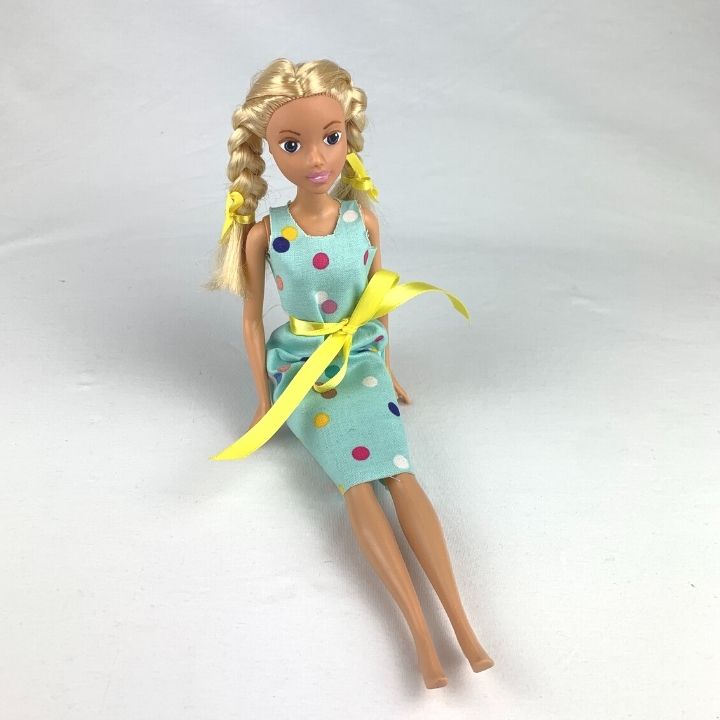


The first time I completed this process, my daughter was absolutely thrilled with the outcome, and it quickly became her favorite doll to play with.
I’ve completed several doll makeovers with this method now, and always find it to be extremely satisfying.
It’s also a great way to upcycle a doll that would probably end up in a landfill somewhere. The end result becomes a doll your child will cherish for years to come.
Have you attempted a doll makeover? What were your results? Tell me in the comments!
Looking for other fun projects to do with your kids? Try these DIY Shrinky Dinks or Make Your Own Mancala Game!
J.R
Sunday 19th of December 2021
If your having problems with tangled hair. 1) wash hair 2) soak hair in fabric softner. 1cup water/1/2 teaspoon of fabric softner. I let it sit overnight. Wash and comb out and you should be good to go.
Kel
Tuesday 9th of January 2024
@J.R, That is EXACTLY what she did to the doll hair. She explained it in detail in the articles link, “detangling doll hair”