Today’s post is a throwback to one of my favorite childhood crafts: DIY Shrinky Dinks!
Shrinky Dinks were one of my absolute favorite things to do as a kid.
If you don’t already know what Shrinky Dinks are, then your childhood wasn’t complete.
Shrinky Dinks were this fantastic craft that was hugely popular in the 80’s.
Kits came with pre-printed coloring sheets of your favorite characters (I was partial to the Care Bears or Rainbow Bright) and a set of colored pencils.
Once you’d decorated them, you’d cut them out and have your parents pop them into the oven where they magically shrunk down to these tiny little thick plastic charms.
They were seriously the coolest!
Just like with my other retro crafts projects (like my crumple tie dye shirts), when I heard I could DIY Shrinky Dinks, I was super excited to dig into it.
Nothing was more entertaining than coloring those rough plastic pages with the tiny little colored pencils and then watching them shrivel up into cute little charms.
It seemed like they were everywhere when I was a kid, but over the years have become harder and harder to find.
Recently I learned that the magic of Shrinky Dinks (Shrink E Dink or Shrink A Dink as they’re sometimes known) is that they use a special type of plastic for their special shrinking sheets, and that this type of plastic is also used for a lot of other of things.
I’m super excited to teach you where to find this special plastic and how to use it to make your own DIY Shrinky Dinks!
Links in this post may be affiliate links, which means I may earn a commission if you make a purchase from any of them, at no additional cost to you. You can find out more information by reading my full disclaimer.
The Special Plastic and Where To Find It
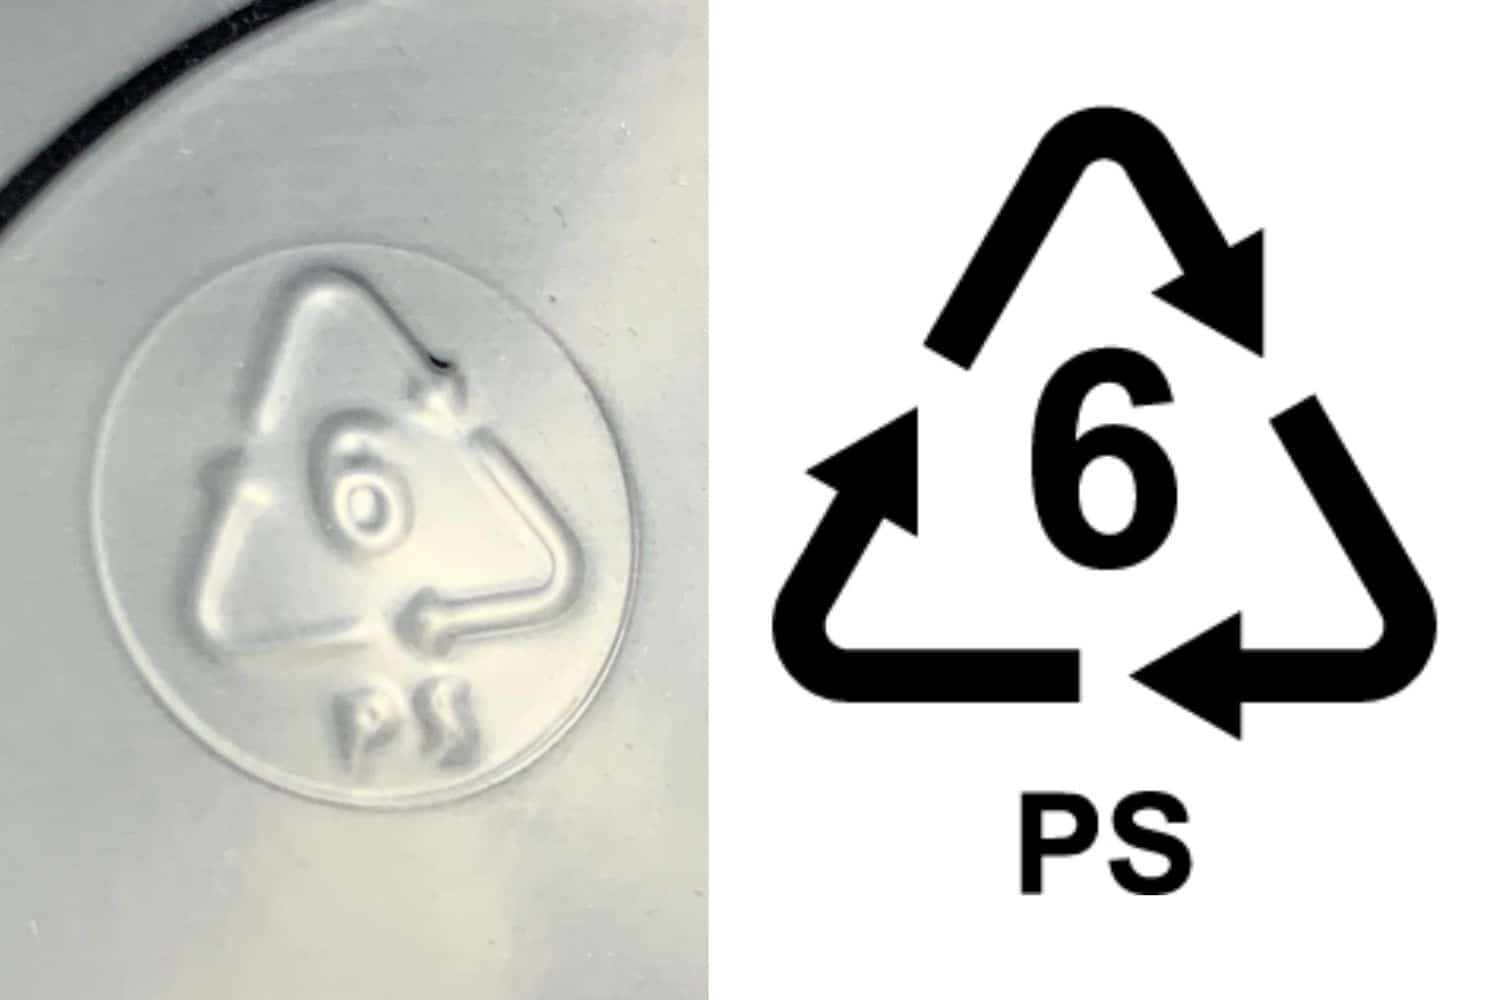
Shrinky Dinks can be made from #6 plastic. #6 plastic is the classification for Polystyrene (aka Styrofoam).
When you think Styrofoam you’re likely thinking of disposable cups or take out containers. This is NOT what you want to use for this project!
While Polystyrene is used to make the items I just mentioned, the same type of plastic is used to make clear containers that are cheap, lightweight, and easily formed into shapes.
You frequently see them as take out containers for salads or lids for pans made out of aluminum. These are types of plastic we want to use for this project.
Polystyrene is actually quite difficult to recycle, so reusing it for a project like this is a great way to keep it out of landfills!
How to Identify #6 Plastic for DIY Shrinky Dinks
It’s not hard to find items made from #6 plastic.
In fact, I bet you’ll start looking for it just about everywhere once you make this project.
While you can just order DIY Shrinky Dink sheets from Amazon, I prefer to find them among things I’m probably gonna just discard anyway.
If you want to order them online, you can find them here:
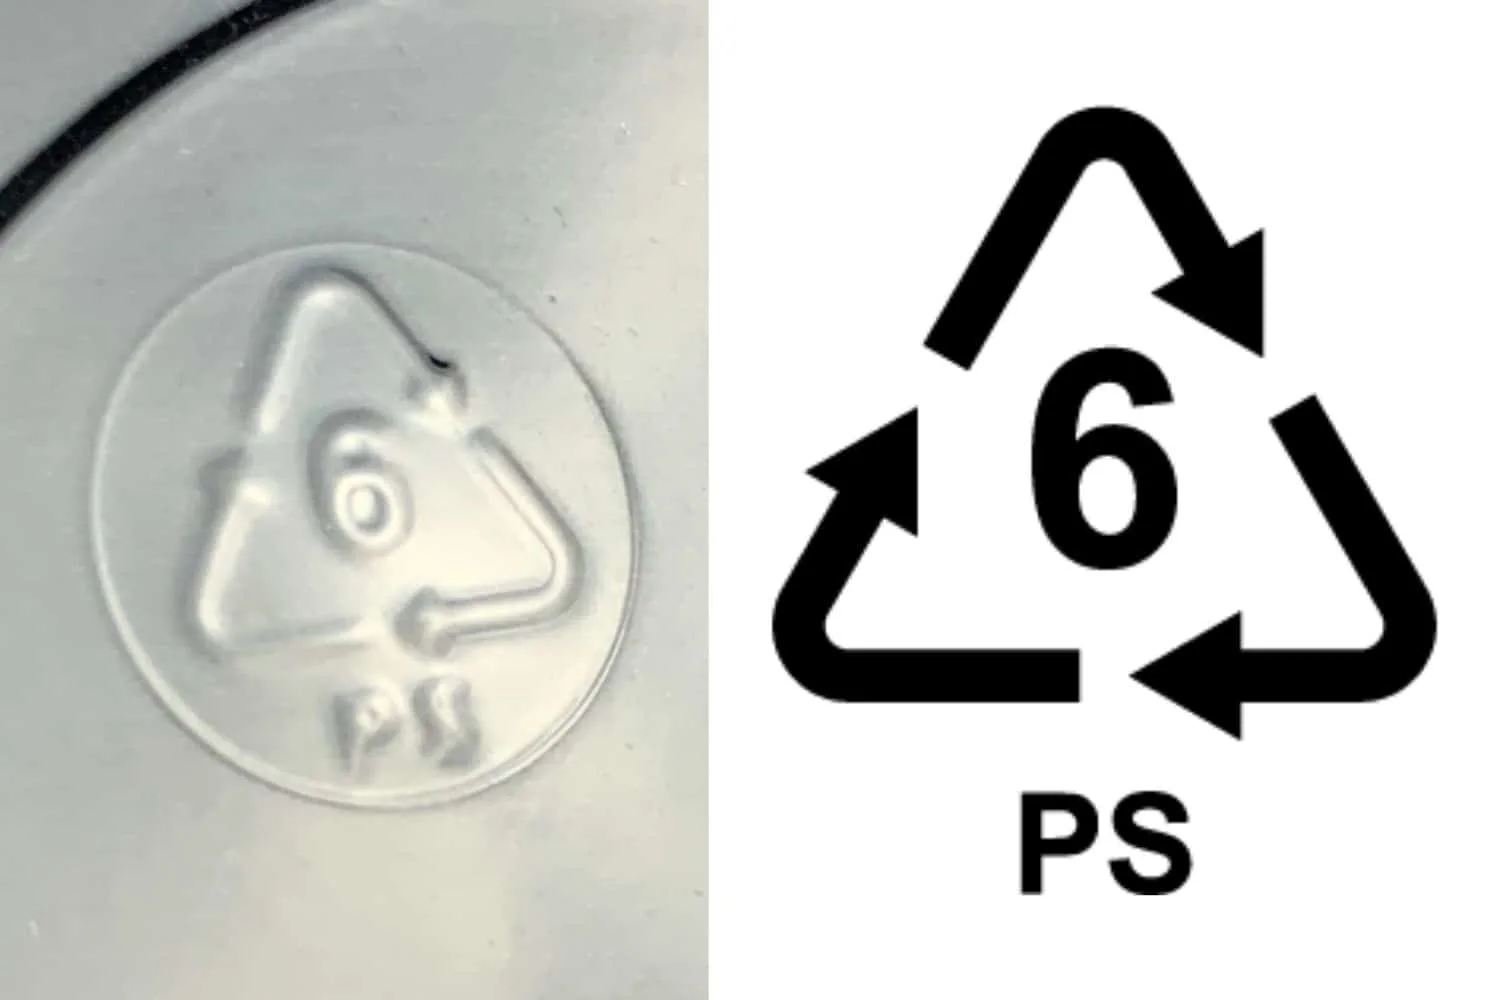
If you’re trying to identify #6 plastic in the wild, you’ll want to look for this symbol:
As I said above, you’re likely to find #6 plastic that can be used for DIY Shrinky Dinks in take out containers.
I found some at my local Dollar Tree, when I bought an aluminum pan to bake brownies in to bring to an event. The lid that came with it was mainly a nice, flat piece of #6 plastic.
It was perfect for this project!
How To Make DIY Shrinky Dinks
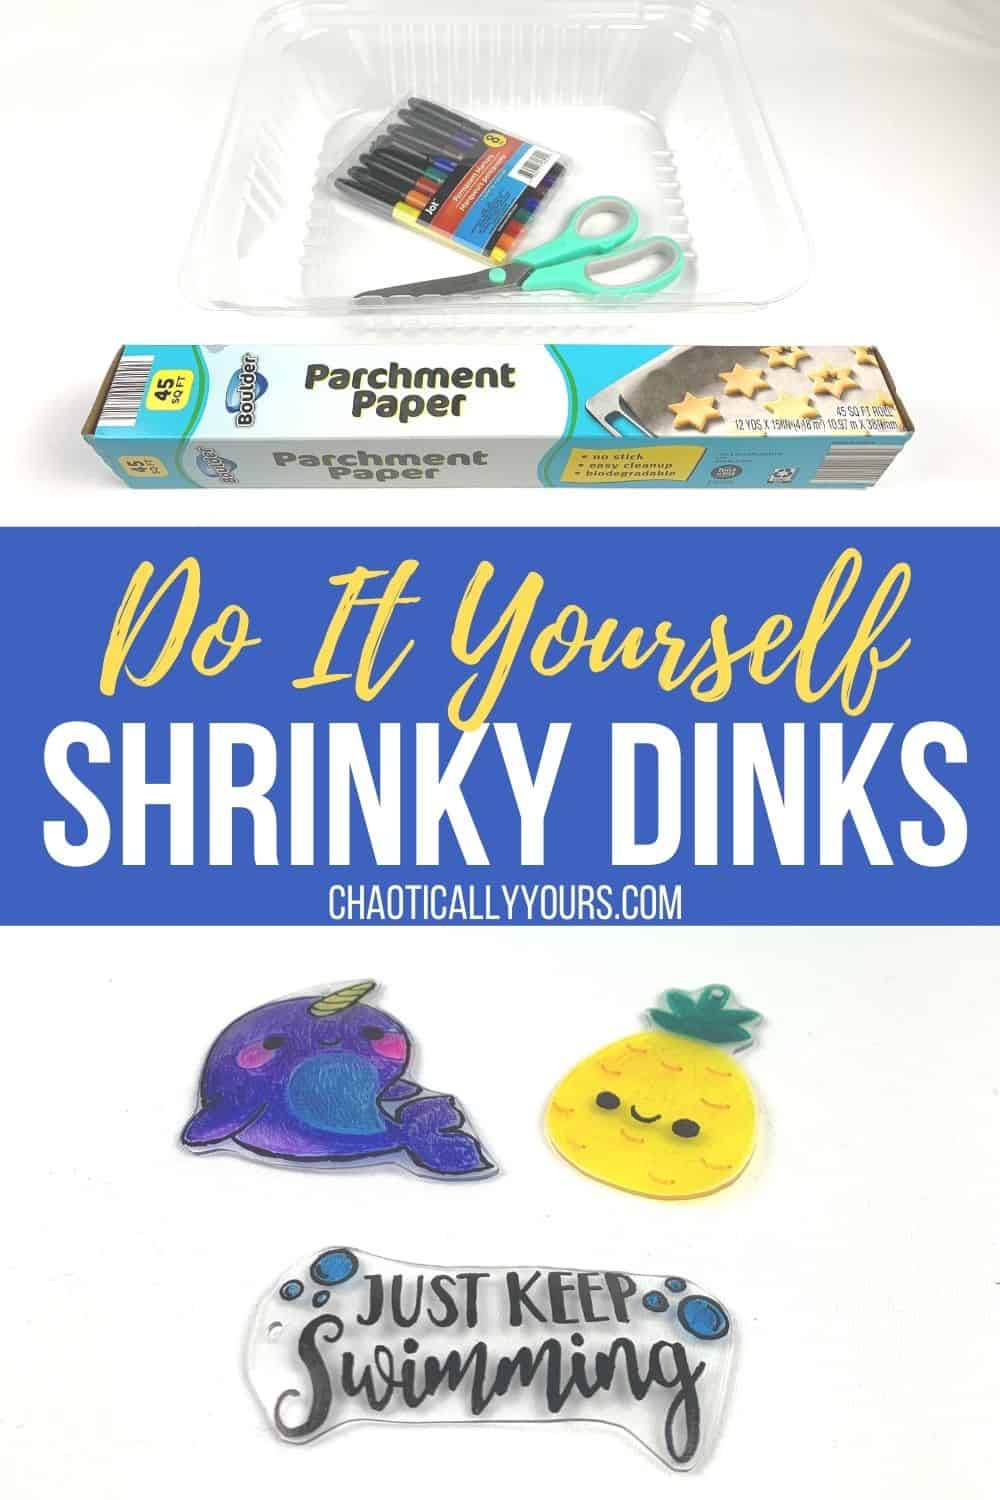
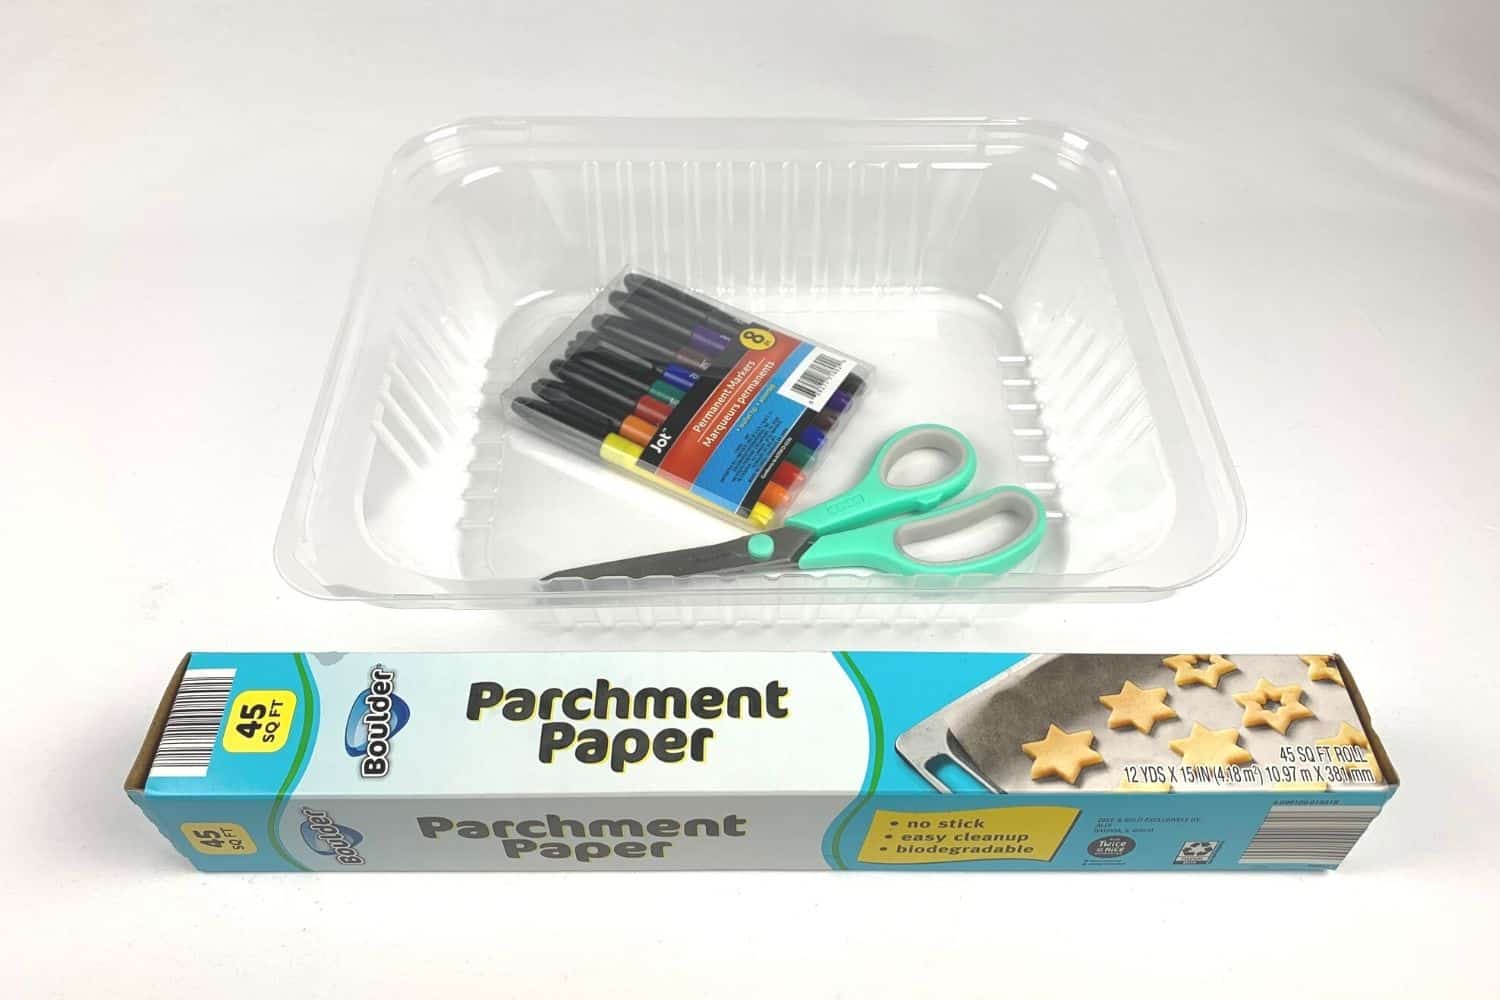
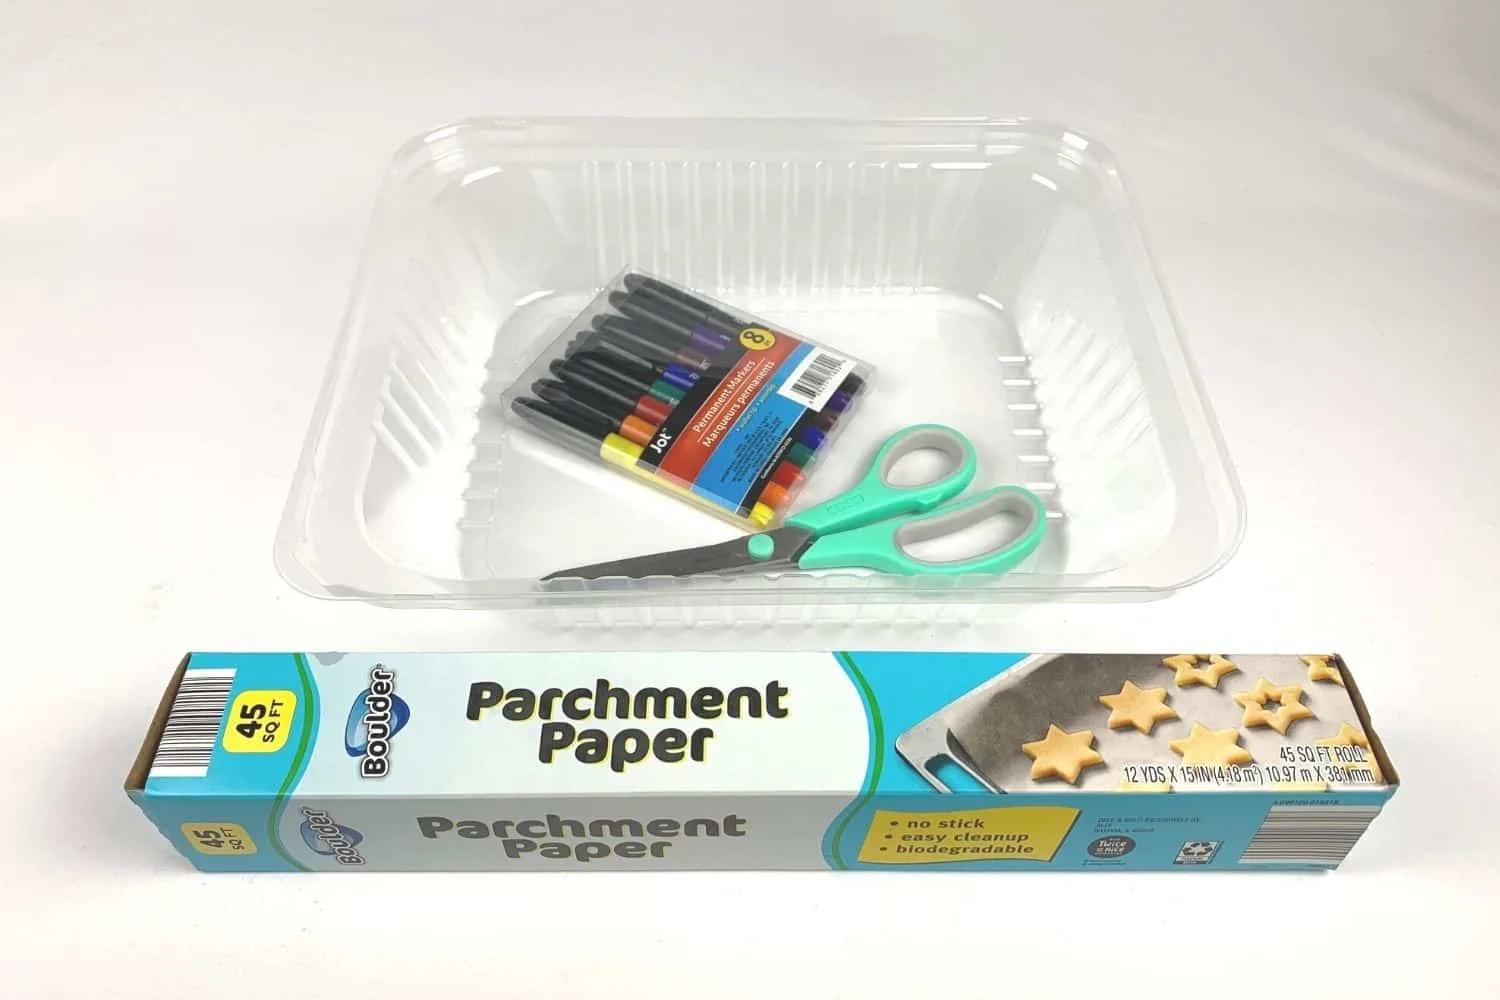
To make this project, you’ll need to gather together just a few supplies.
What You’ll Need:
To make DIY Shrinky Dinks, you’ll need:
- a flat piece of #6 plastic
- permanent markers
- scissors
- parchment paper
- a sheet pan
- a hole puncher (optional)
I’ve already told you where to find #6 plastic for DIY Shrinky Dinks, so that shouldn’t be a problem.
The kits we used to use as kids came with rough sided plastic that you could easily decorate with the included colored pencils.
When using recycled #6 plastic, you’re likely to only find smooth surfaces. That’s why you’ll need permanent markers for this project.
You’ll get a much better result using a permanent marker on the plastic than any other type of medium.
Make sure your plastic is really clean and dry before getting started, especially if you’re using old take out containers.
You can simply wash them with dish soap and water.
You’ll need a good pair of scissors to cut out your shapes and you can also use a hole puncher if you’re planning to make your DIY shrinky dinks into charms.
You’ll also need parchment paper so the plastic won’t stick to the sheet pan you’ll bake them on.
Prepping your designs
Now for the fun! You can draw whatever you want. You can even trace designs since the plastic is clear.
Keep in mind, colors will be more intense when the designs shrink up, so use that knowledge to your advantage.

Also remember that the plastic will shrink up to about 1/3 the original size of the designs.
And don’t make them too tiny, they might end up sticking together during the heating process (more on this later)
If you plan to make it into a charm, it’s a good idea to use a hole puncher to put a hole in the plastic before you shrink it.
It will be really hard to do once you’ve baked your DIY Shrinky Dink.
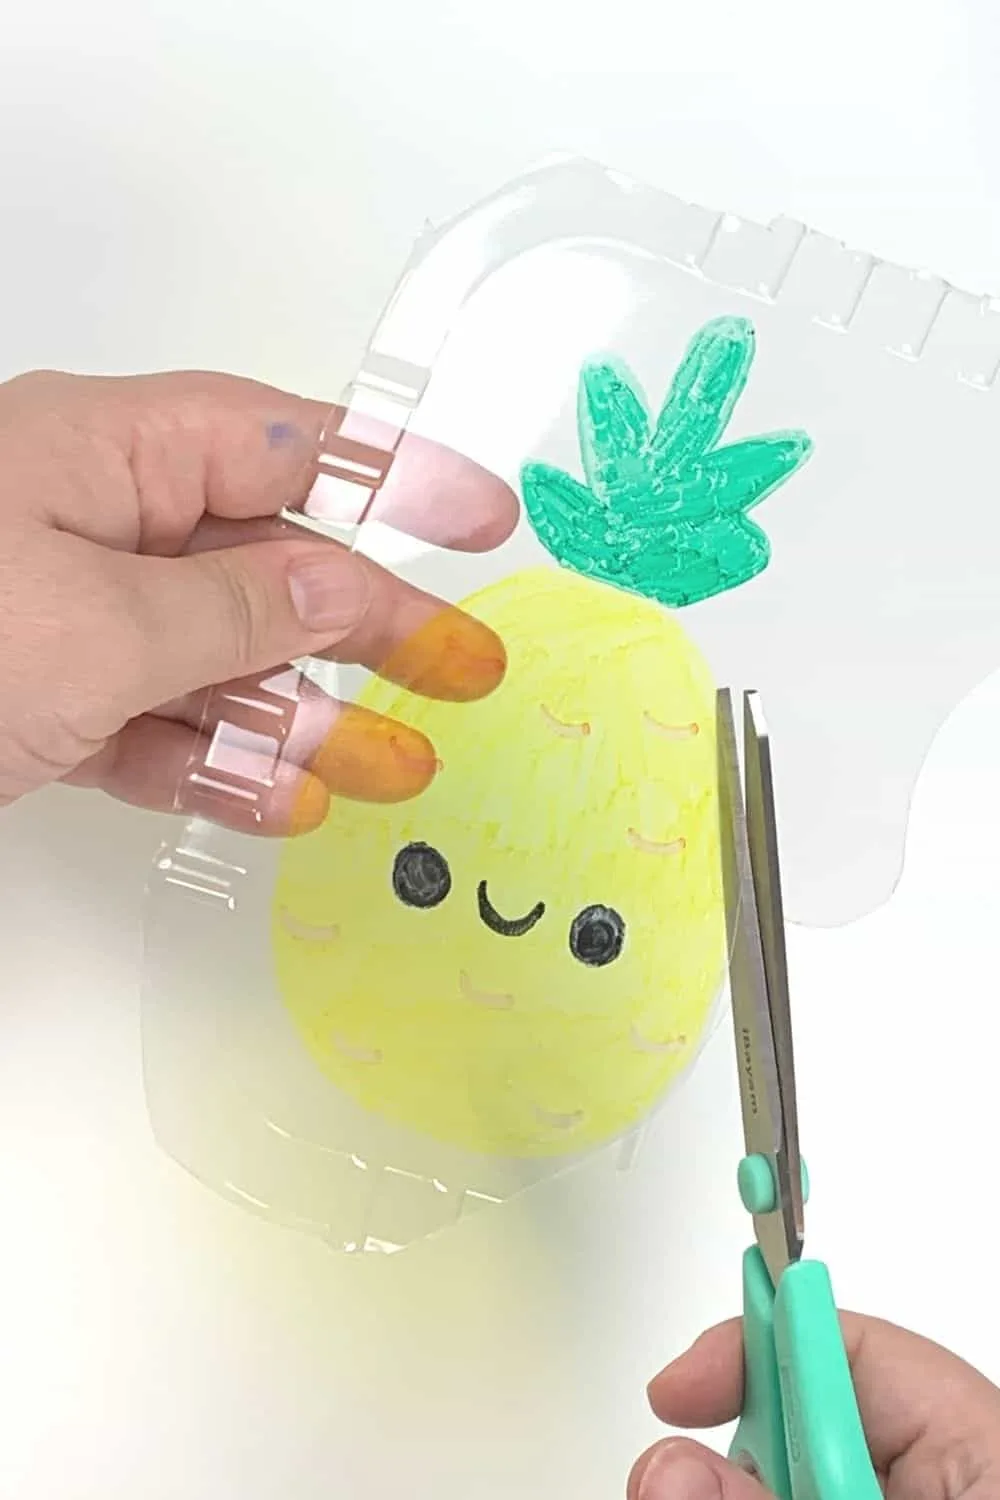
Once you’ve colored in your designs, cut them out.
Applying Heat

Now you’ll want to arrange your designs on a sheet pan, with a sheet of parchment paper underneath them.
This will keep your DIY shrinky dinks from sticking to your pan and ruining it.
You’ll need to preheat your oven to 350 degrees.
Once the oven reaches temperature, place your sheet pan on the middle rack.
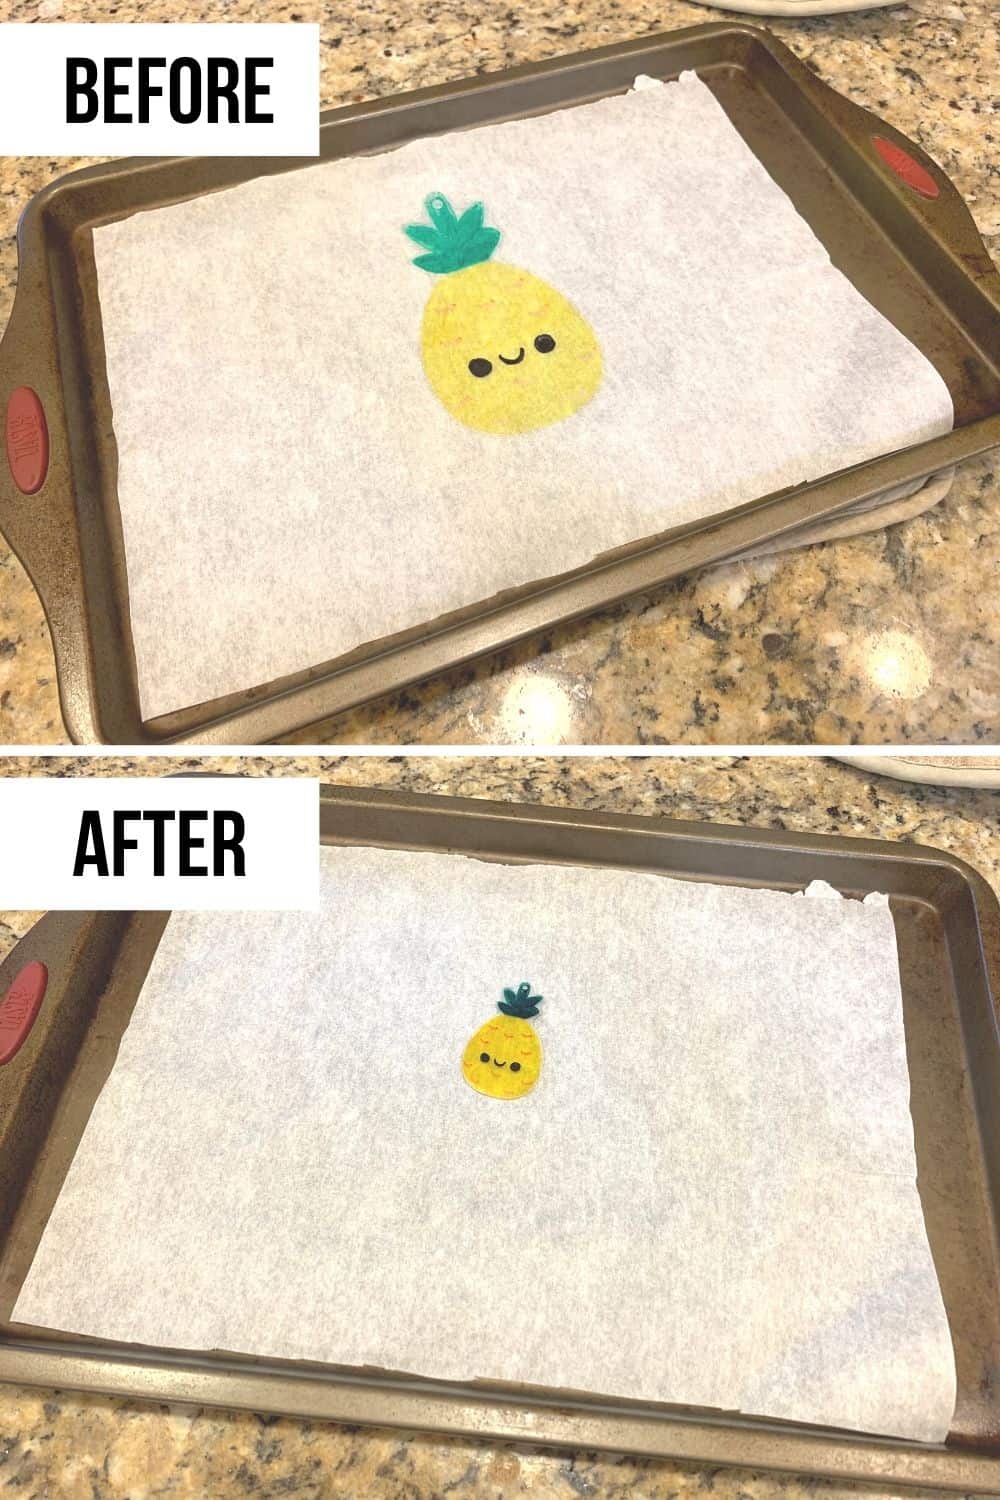
It won’t take very long for them to shrink up, only about 2 to 3 minutes, so I DO NOT recommend walking away from your oven.
It’s also super fun to watch, so why miss all the action?
Don’t freak out if your DIY Shrinky dinks start to curl up. That’s perfectly normal. They’ll uncurl again.
The reason I recommended not making your designs too small is because of this curling.
Tiny designs have more possibility of the sides touching each other when they curl up in the heat. So keep this in mind when drawing.
Once your designs have uncurled and are flat again, they won’t shrink anymore, so you can take it out of the oven.
Be super careful, since they’ll be hot. You’ll want to let the cool for a few minutes before trying to handle them.
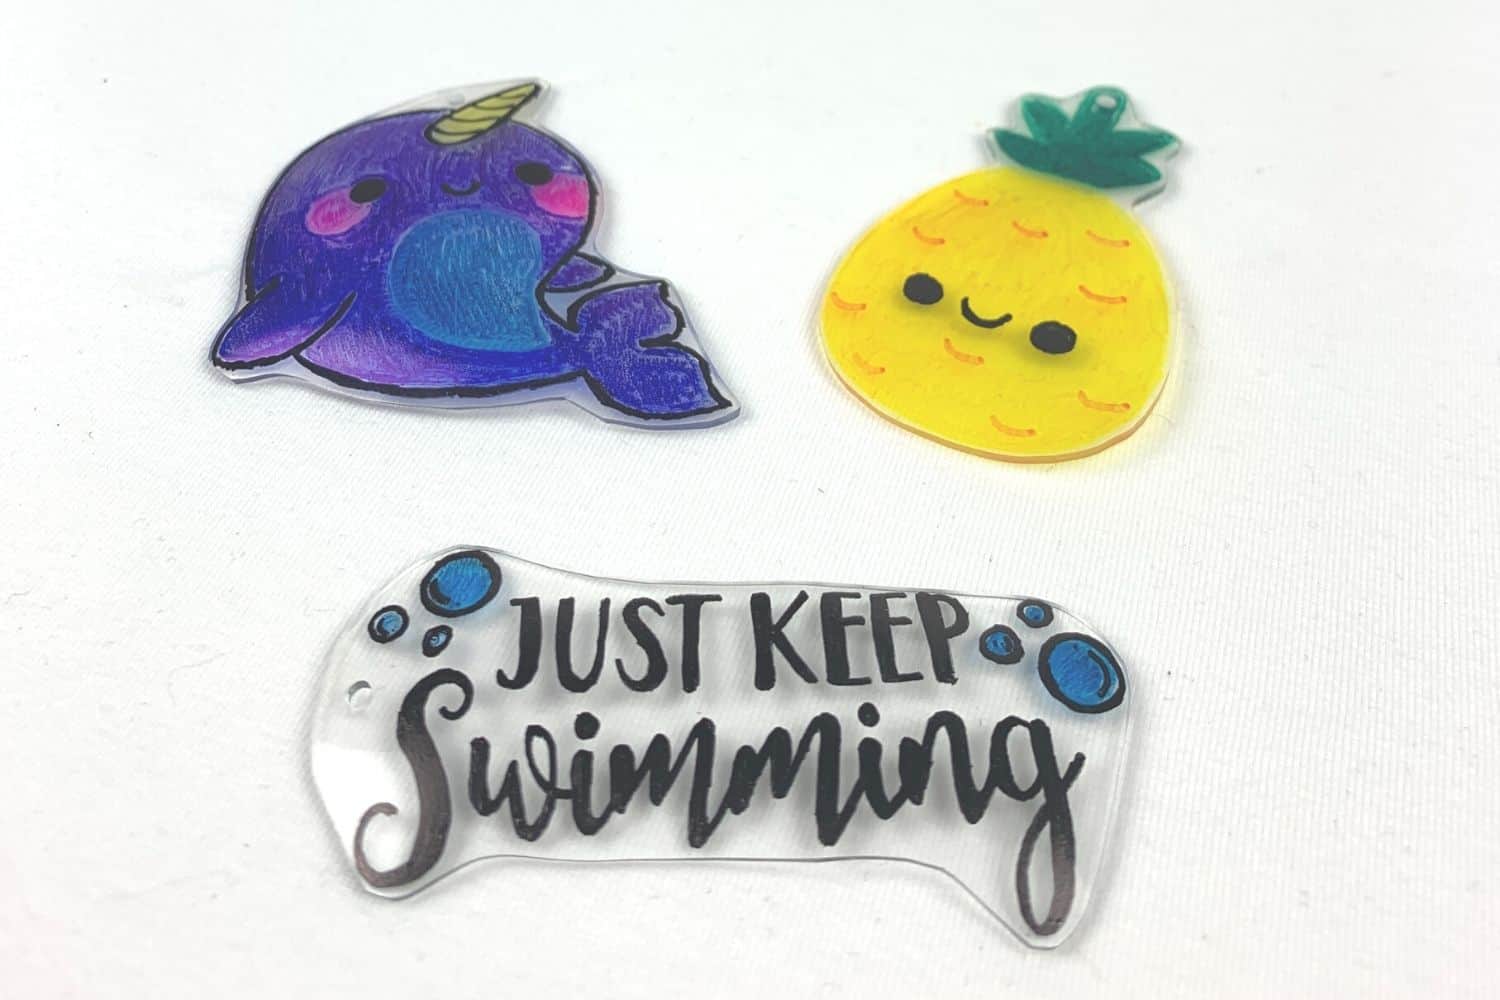
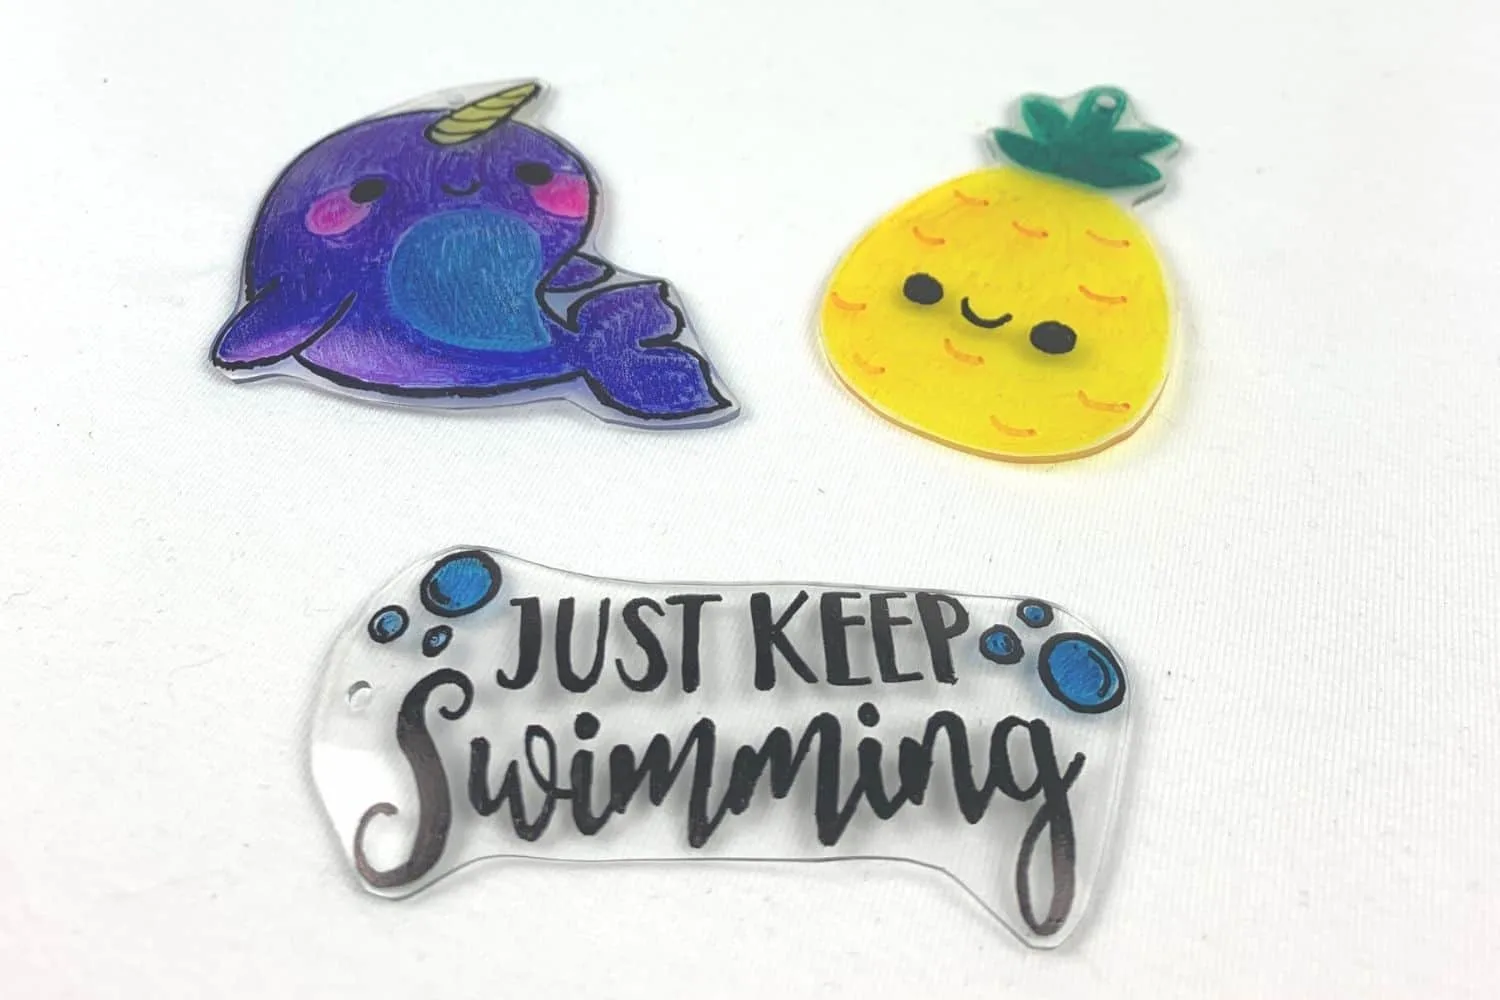
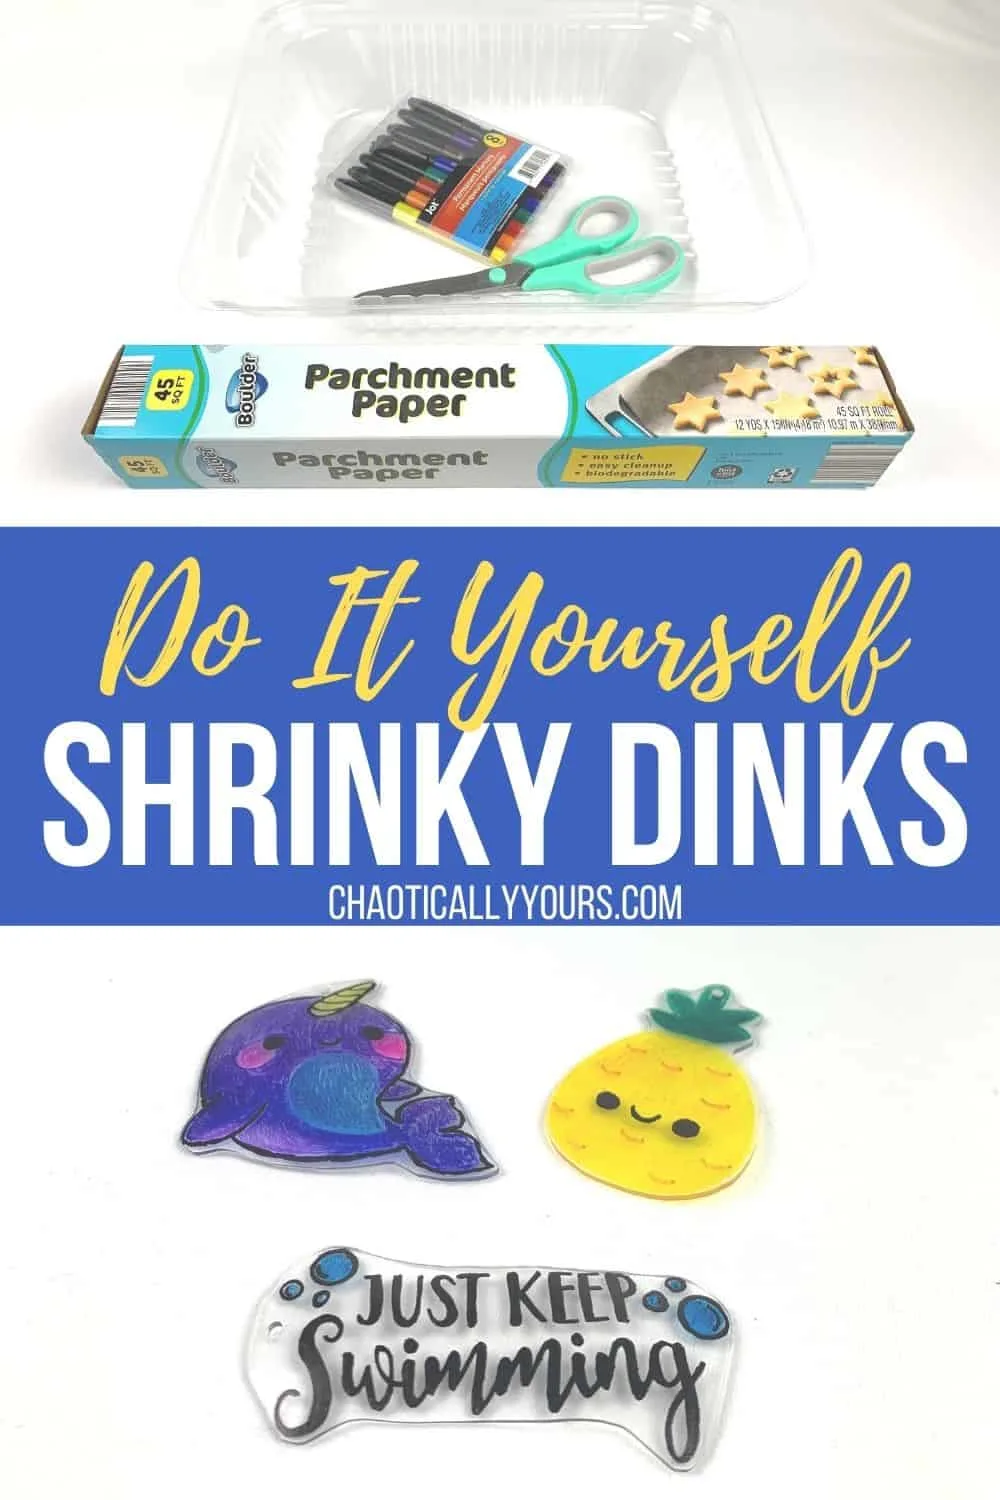
What To Do With Your DIY Shrinky Dinks
Now that you’ve finished making your DIY Shrinky Dinks, there’s tons of ways you can use them!
I’ve seen necklaces, bracelets, earrings, and all sorts of jewelry made from them.
They also make great luggage tags or sun catchers!
Have you made DIY Shrinky Dinks? What did you do with them? I’d love to hear the answers in the comments!
Looking for other fun DIY crafts? Check out the craft project you can play when your done with this DIY Mancala Game Board project!
DIY Shrinky Dinks: Use Recycled Plastic To Make This Retro Craft!


Recycle old plastic containers into these cool DIY Shrinky Dinks!
Materials
- a flat piece of #6 plastic
- permanent markers
- parchment paper
Tools
- scissors
- a sheet pan
- a hole puncher (optional)
Instructions
- Locate a flat piece of #6 plastic. Make sure it is clean and dry.
- Preheat your oven to 350 degrees.
- Using permanent markers, decorate shapes and designs on the plastic.
- Cut out the plastic, with the knowledge that it will shrink down to about 1/3 it's original size.
- If you plan to make a charm, punch a hole in your design before baking.
- Arrange your plastic pieces on a sheet pan with a piece of parchment paper underneath them to prevent sticking.
- Place your baking sheet on the middle rack of your oven.
- Watch your DIY Shrinky Dinks closely. They will curl up and then flatten out again as they shrink. This whole process should take somewhere between 2 and 3 minutes.
- Remove the pan from the oven and let your designs cool.
Notes
Melting plastic may let off fumes. Please make sure you ventilate your area properly when completing this project.
Children should never use the oven unsupervised, so please have a parent complete the oven steps of this project.
Caro
Tuesday 18th of March 2025
When I did this as a kid we would use sandpaper to roughen up the plastic, and then coloured pencils worked like a charm. I can’t wait to try them again as an adult!
Theresa
Tuesday 5th of November 2024
I HAVE ONE I MADE IN THE. 70'S IT IS A SNOWMAN THAT HANGS ON MY CHRISTMAS TREE
Louise Emery
Monday 11th of November 2024
I love this!
Raelynn
Saturday 10th of August 2024
Omg this is so cool 8/10
Amie
Sunday 16th of June 2024
Thank you SO much for sharing this, and thank you for making it easy to follow, and for providing great pictures. I feel like I actually know what I'm doing, lol
Louise Emery
Wednesday 19th of June 2024
Glad it's helpful!
Marcy
Monday 25th of December 2023
Great instructions! I found some printable Christmas ornament templates online, used them to cut out ornaments, decorated them with my 4 year old, and made amazing little ornaments!
Louise Emery
Tuesday 26th of December 2023
That's a great idea!