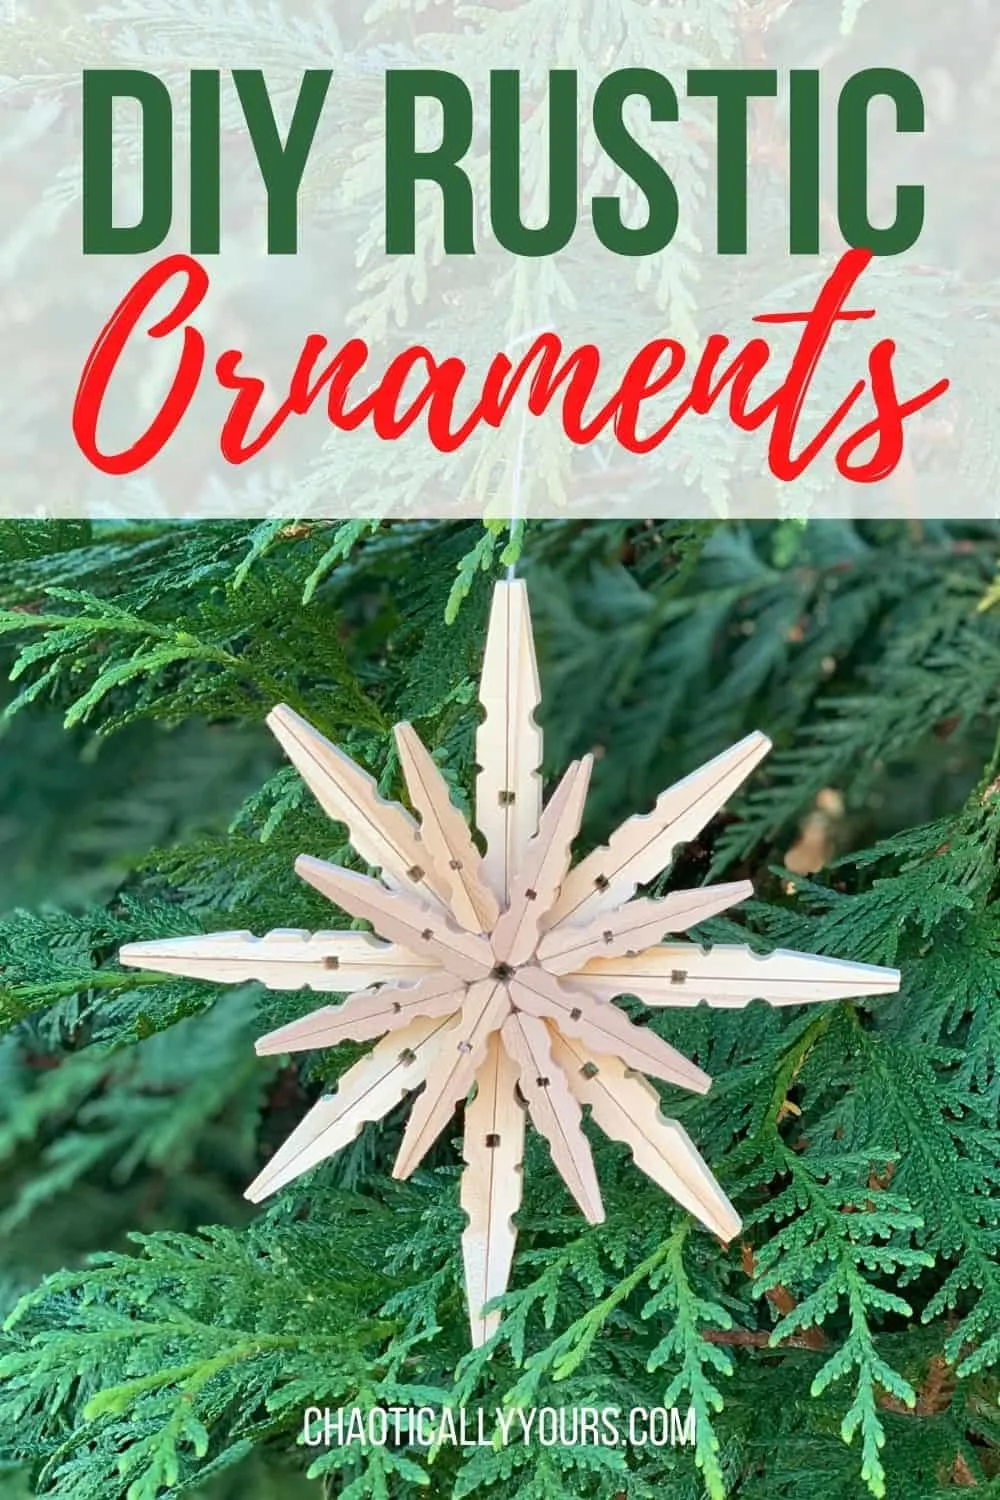
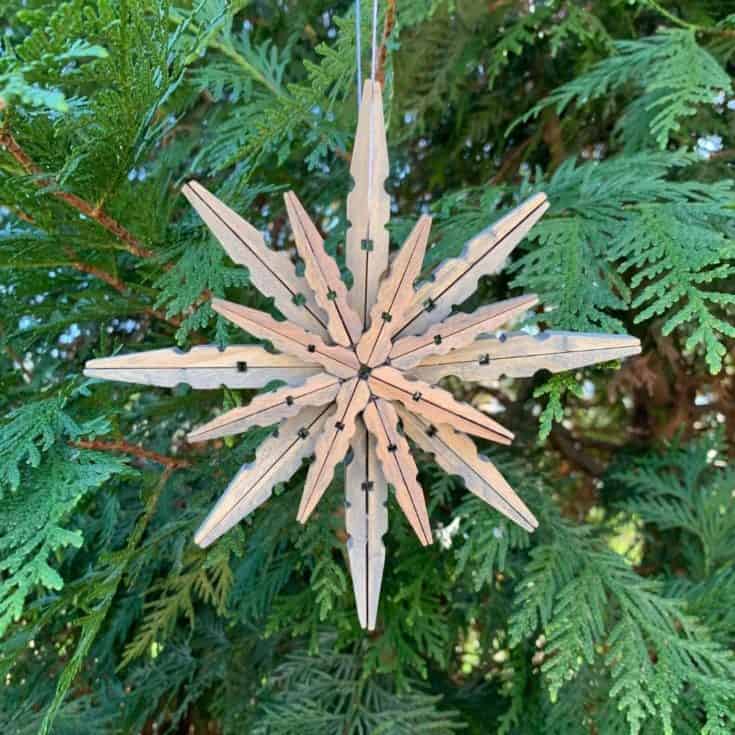
In today’s post, we’re learning how to make rustic ornaments with these clothespin Christmas crafts!
I absolutely LOVE these rustic Christmas ornaments! They have such a farmhouse feel to them!
Whether you’re looking for snowflake ornaments or star decorations, these easy to make clothespin Christmas crafts really are adorable!
They don’t take much to put together, and even if you don’t have a creative bone in your body, you could TOTALLY do this!
And to make it EVEN easier, I’ve put together a video of how to create the ornaments. I’m also adding FREE printable instructions for these rustic ornaments to the bottom of this post, complete with pictures of each step of the process!

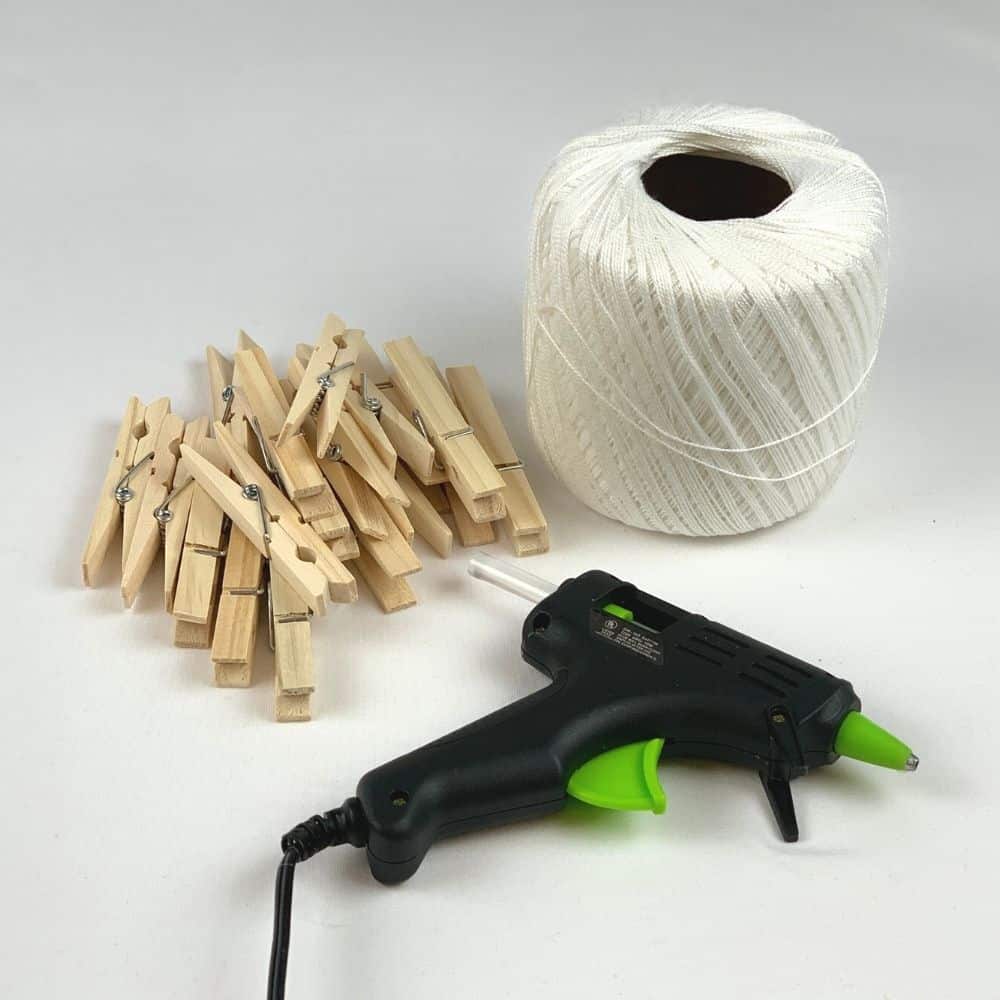
What You’ll Need
You hardly need any supplies to make these ornaments happen!
Just clothespins, hot glue, and some string.
That’s it.
If you want to be a little extra and add some color, you can paint or stain them.
No matter how you decorate these rustic ornaments, they’re sure to be really pretty!
I literally found everything I needed for this craft at my local Dollar Tree!
If you’ve ever read any of my other posts, like my DIY Snow Ski Ornament tutorial or my Giant 3D Snowflake instructions, you’ll know I’m a HUGE fan of Dollar Tree when it comes to crafting.
I always check there first before heading to other craft stores to see if they have what I need. Nine times out of ten, they’ve got it and it’s SUPER cheap!
When I started looking for supplies for this clothespin Christmas craft, I found three different sizes of clothespins in the store!
The two smallest were in the craft section, and the regular size ones were over with the home goods.
All three sizes worked perfectly for this craft!
Rustic Ornaments: To Paint or Not To Paint
One of the things I love about this project is it’s versatility.
Just a little bit of paint or stain changes the look completely.
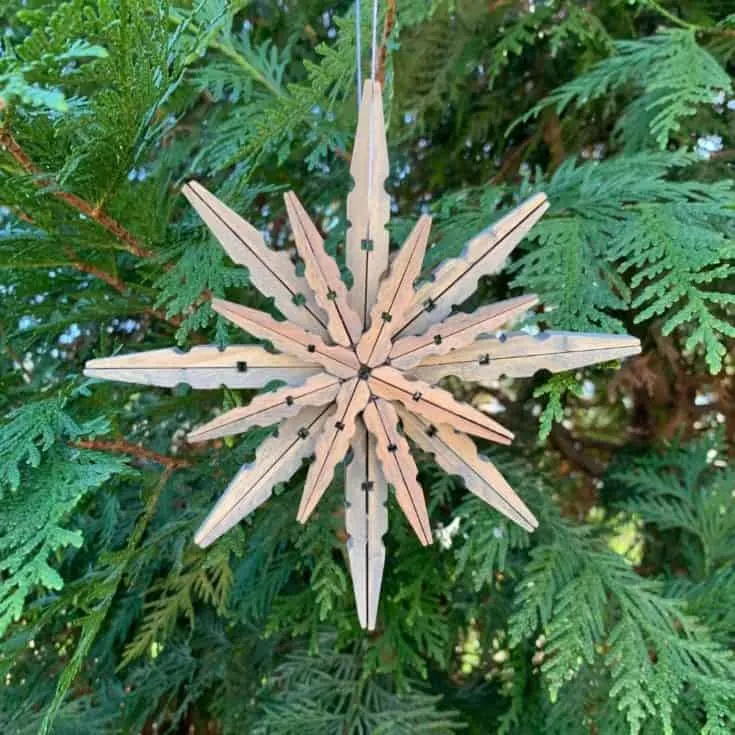
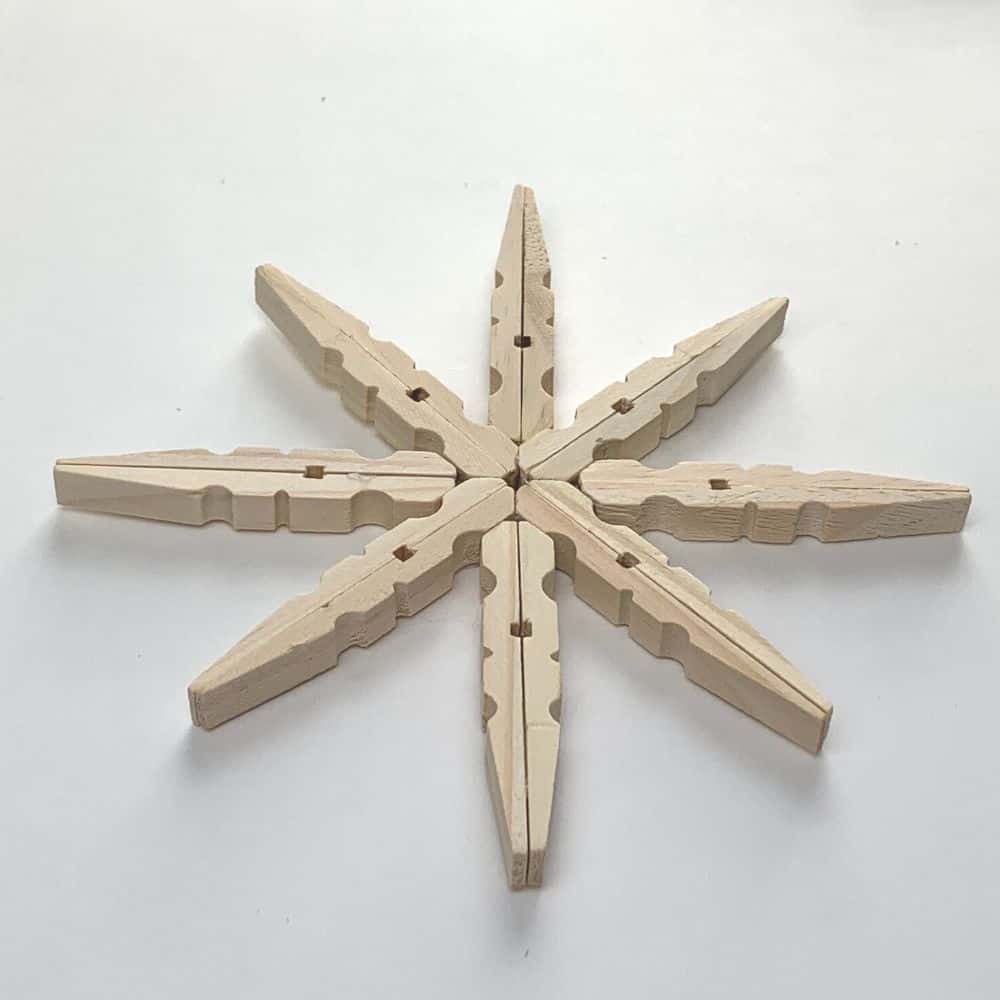
Here’s what the project looks like with unfinished wood, leaving the clothespins completely natural:


I love how natural it looks. The bare wood grain is extremely pretty on it’s own.
For a more farmhouse style ornament, adding another element of color to them is a nice touch.
If you want to go super rustic with these ornaments, you could stain them, like I did here:

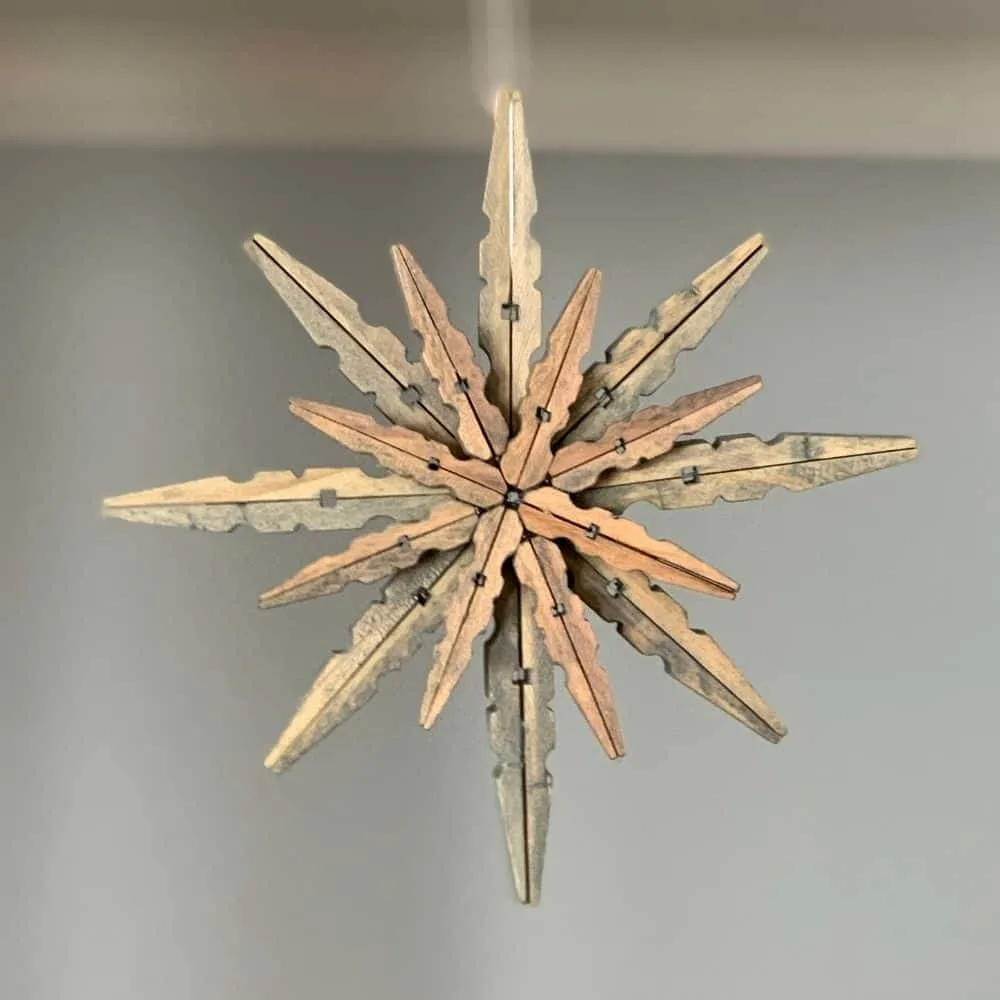
I used a gray Minwax stain on these clothespins before assembling them to get this effect.
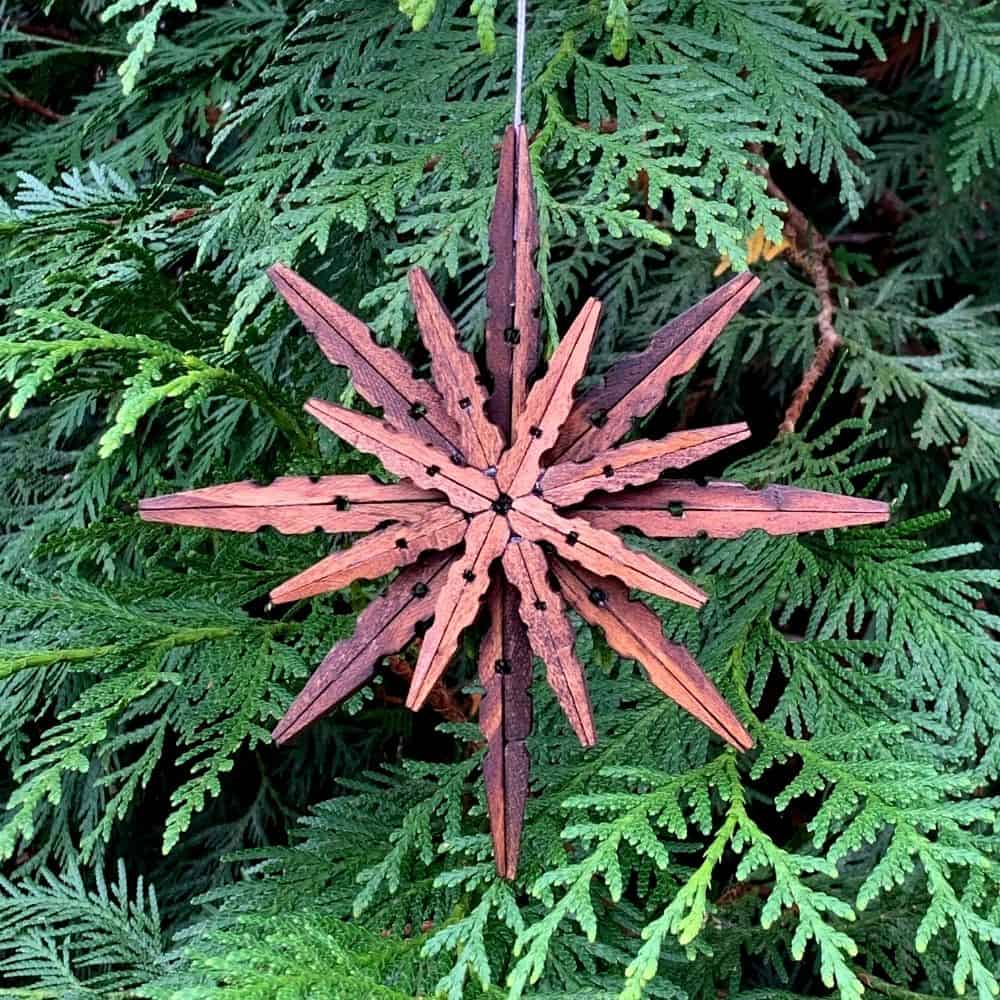
For this next one, I used a darker stain on the wood to create a different kind of rustic ornament effect.
I used Minwax Honey. It came out much darker on these clothespins that I expected, but I still love it!

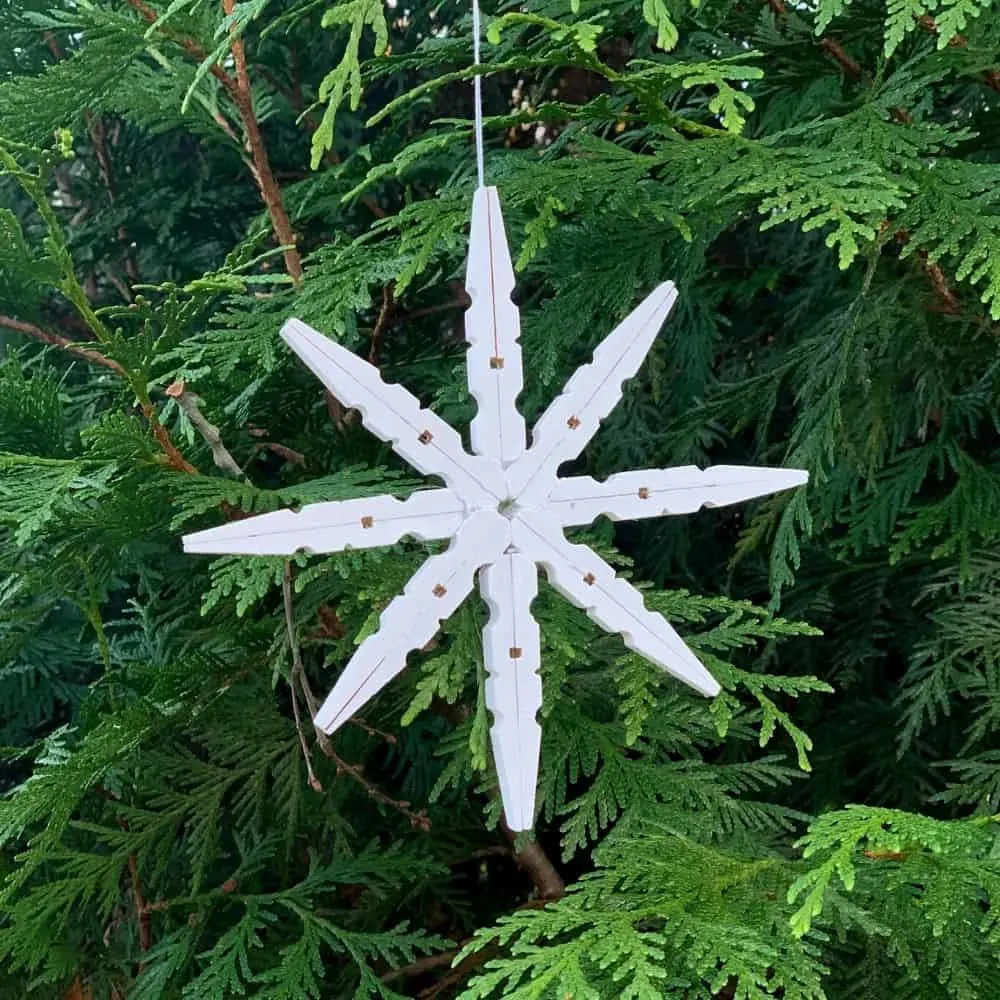
I also went a totally different direction with paint.
I was looking to make the rustic ornaments look more like snowflakes, so I painted the clothespins white before I glued them together.
This is was the end result:

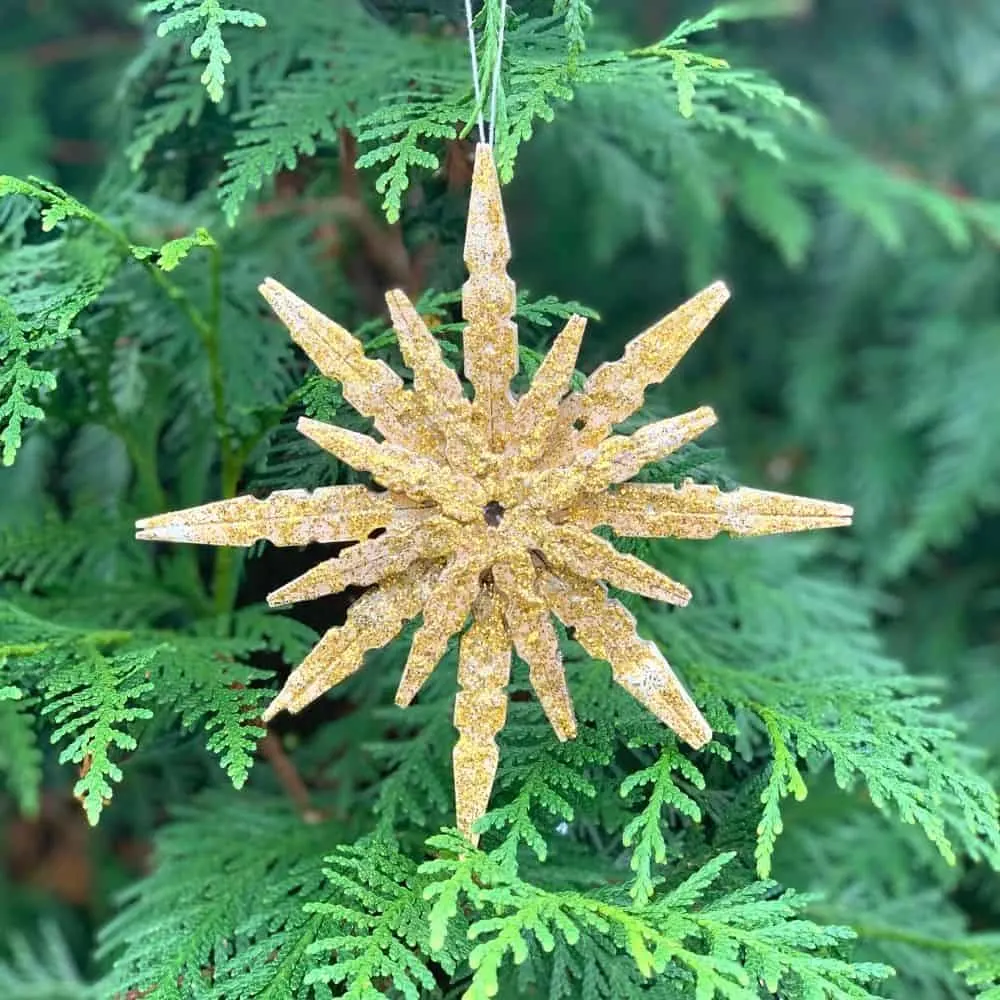
If you want to add some bling to the project, you can add some metallic paint and glitter.
That’s what we did here, and I feel like it gives the project a completely different look.

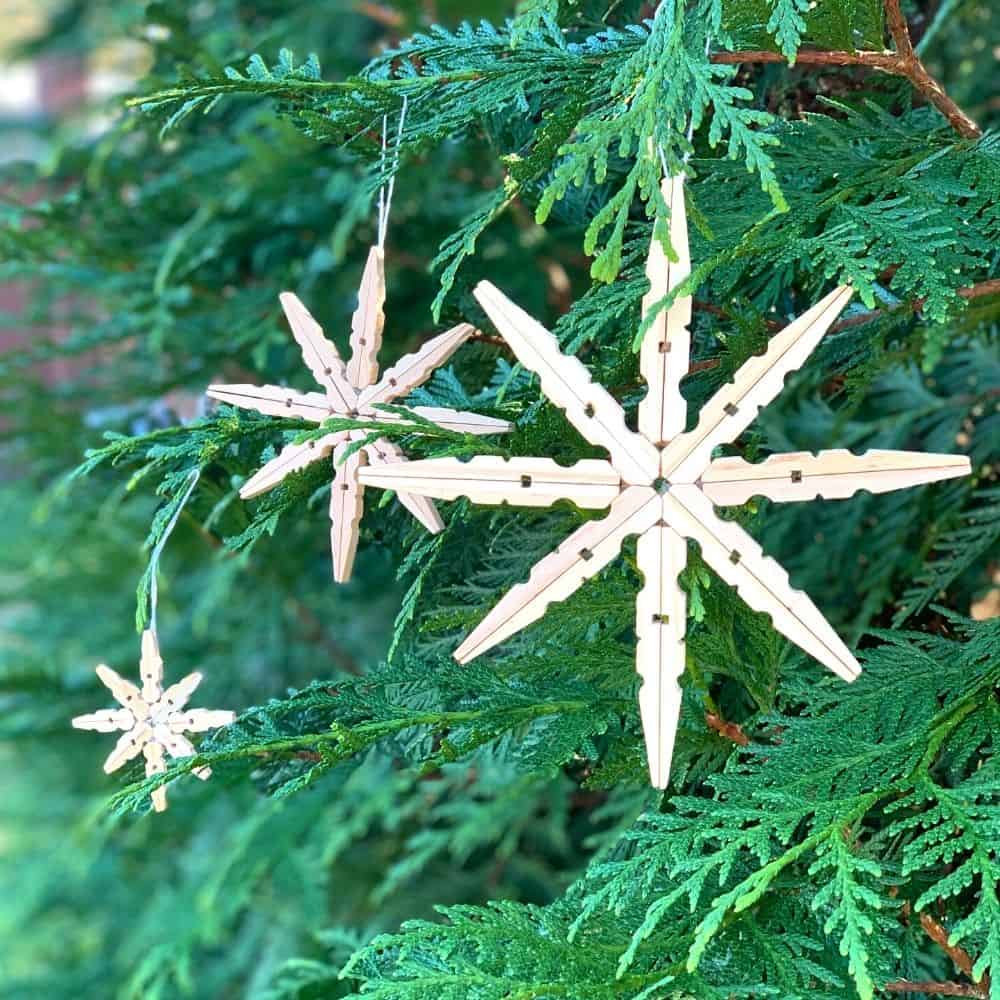
I also love to make size variations.
Like I said earlier, my local Dollar Tree had three different sizes of clothespins for me to choose from to make these rustic ornaments.
I love putting the three sizes together on a tree to create some depth to the decor.

I absolutely love the versatility of this project.
You can really get a completely different look, all depending on how you finish them!
How To Assemble Your Rustic Ornaments
Putting these rustic ornaments together is ridiculously easy!
I’ve outlined the entire process in the printable at the bottom of this post.
But before that, here’s a video of how I made them.
See? Super easy!Rustic Ornaments: Clothespin Christmas Crafts
Make these rustic ornaments with just a few materials you can easily find at your local dollar store!
Materials
- 8 large clothespins
- 8 small clothespins (optional)
- Paint or wood stain (optional)
Tools
- glue gun
Instructions
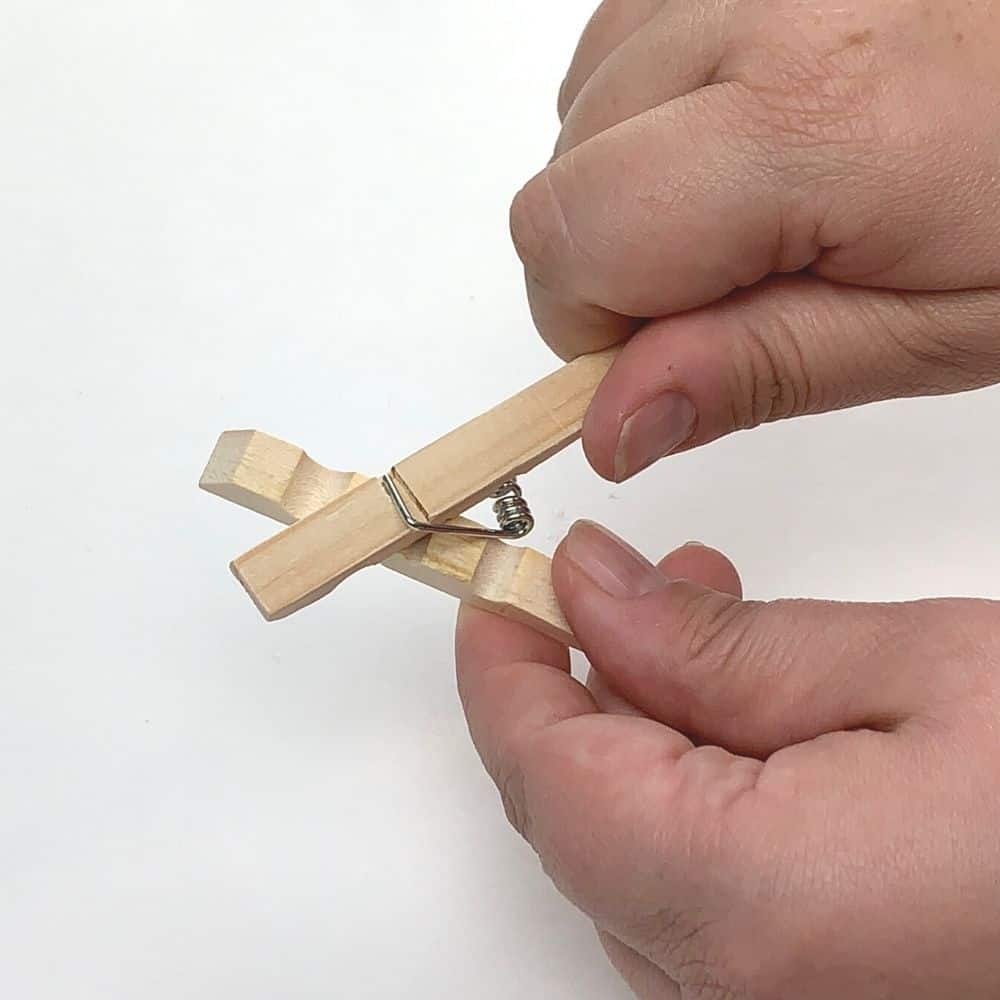
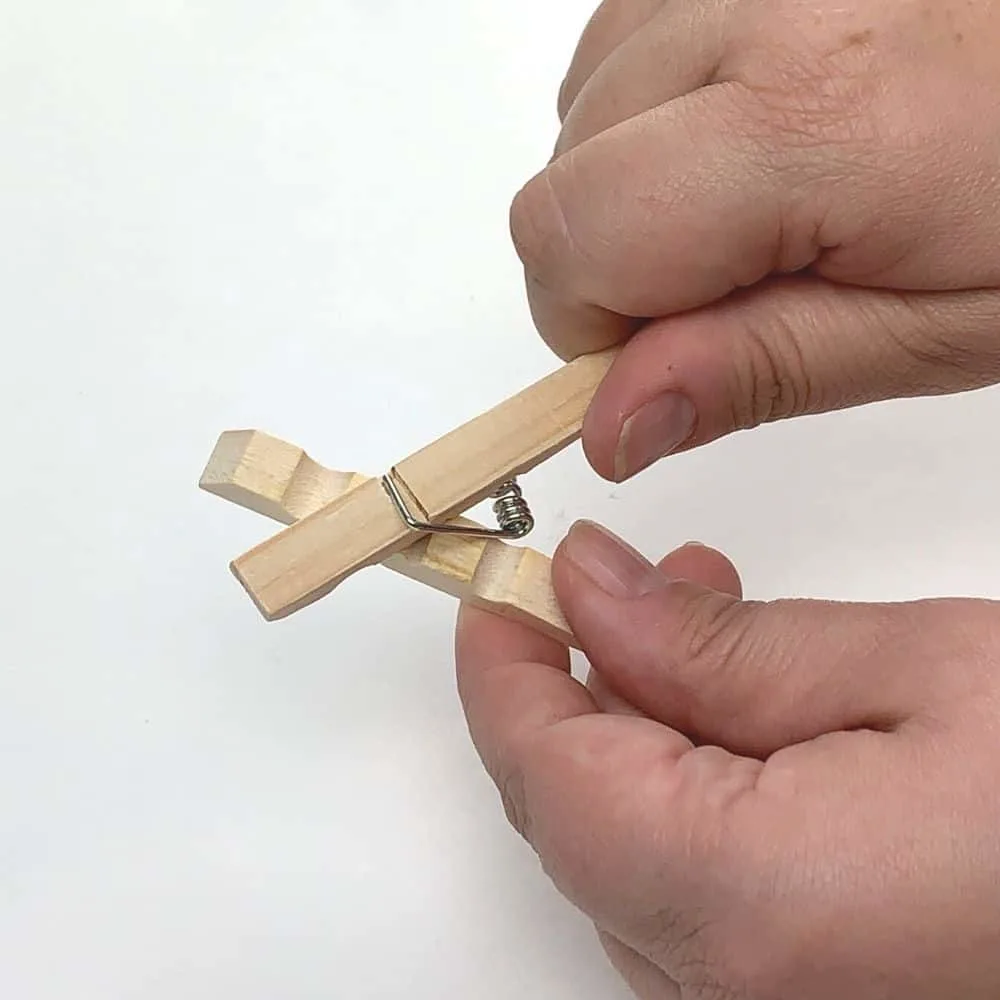
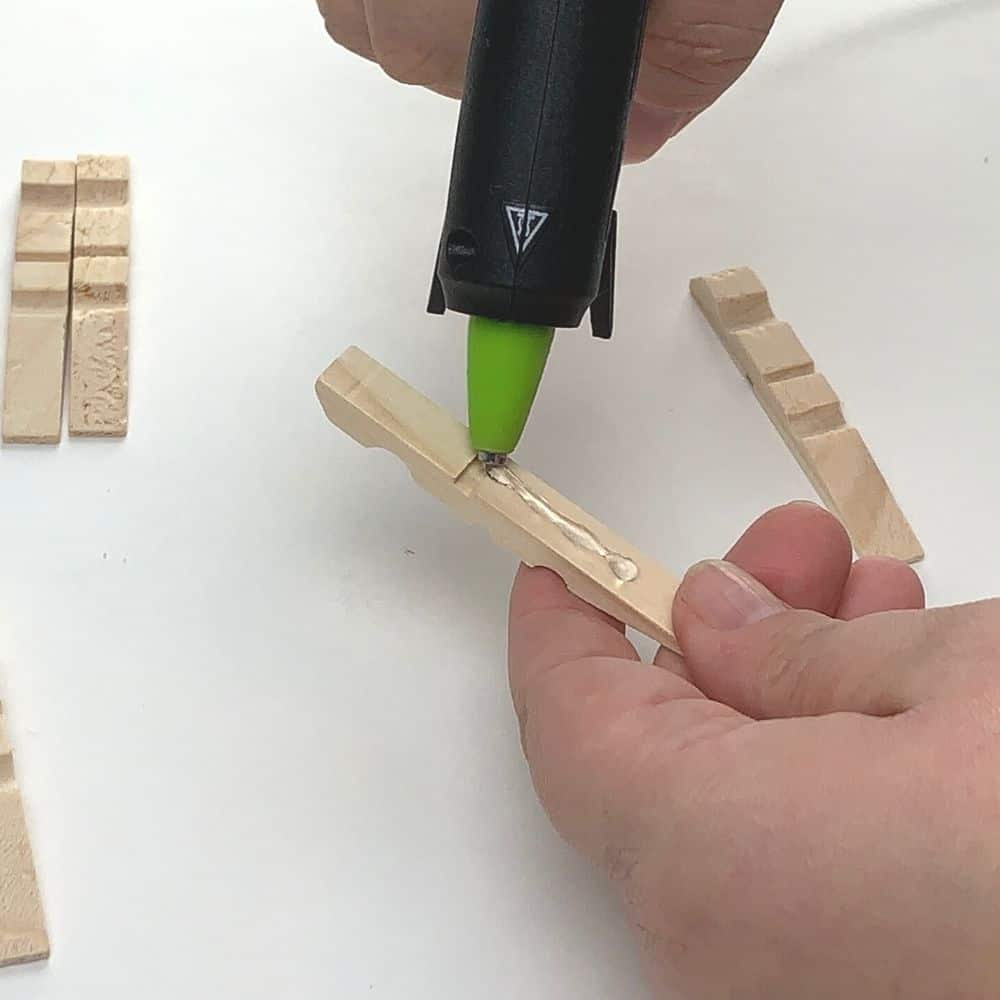
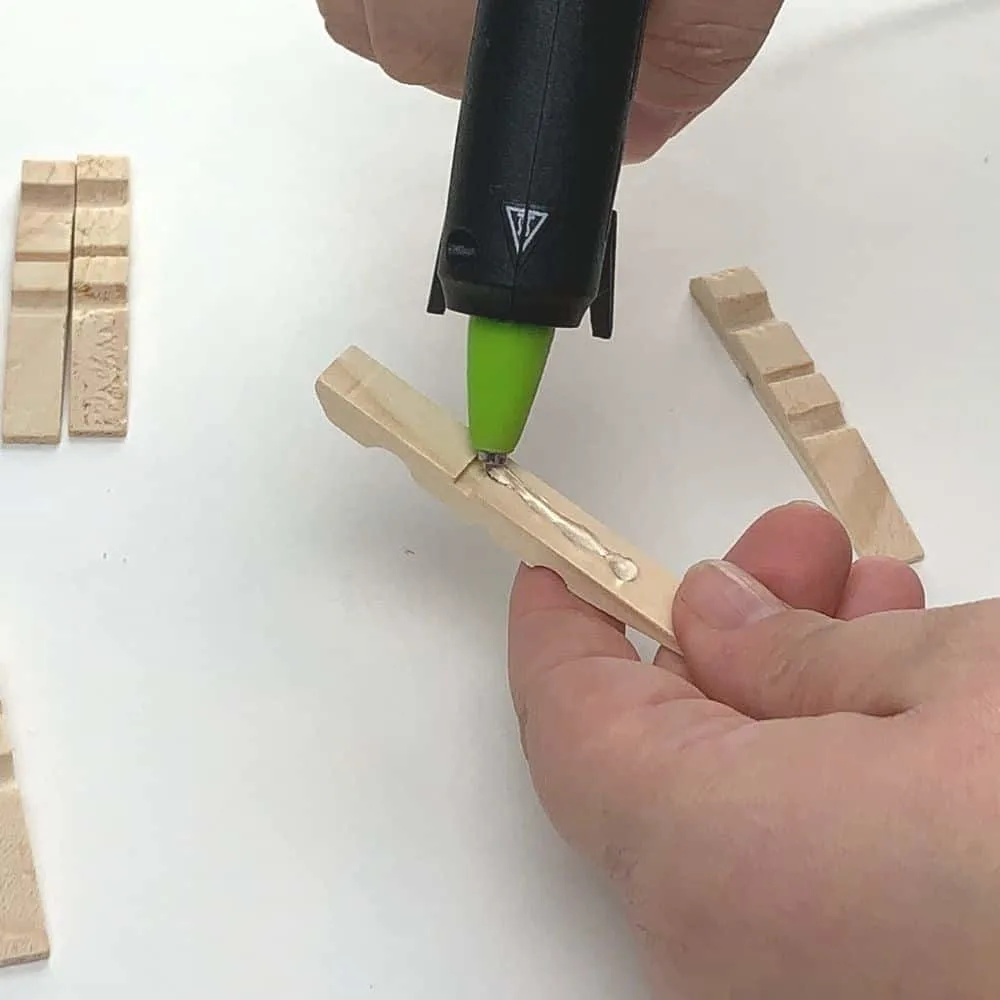
- Take apart all your large clothespins into 16 individual pieces, keeping the wooden parts and discarding the metal parts.
- Paint or stain your pieces, if desired, and let dry.
- Glue the pieces of each clothespin back together, with the flat sides facing each other. You should have 8 pieces again.
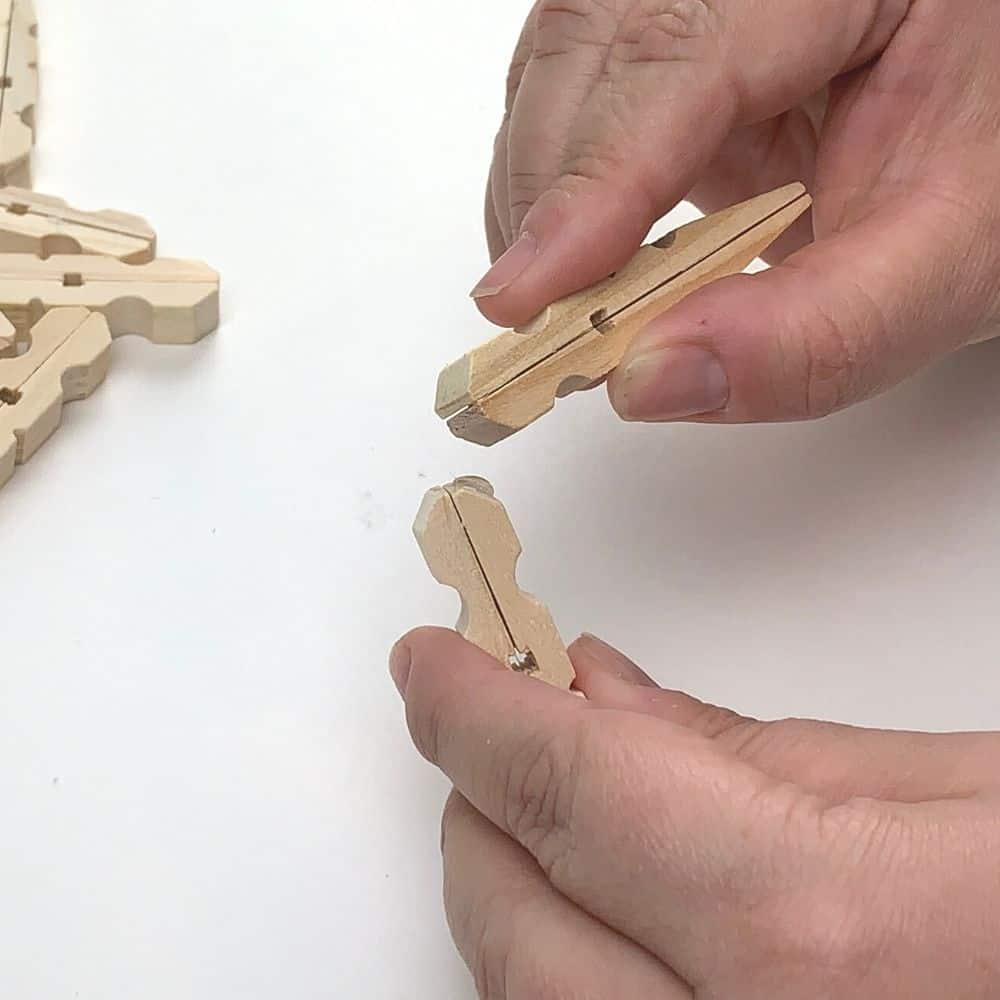
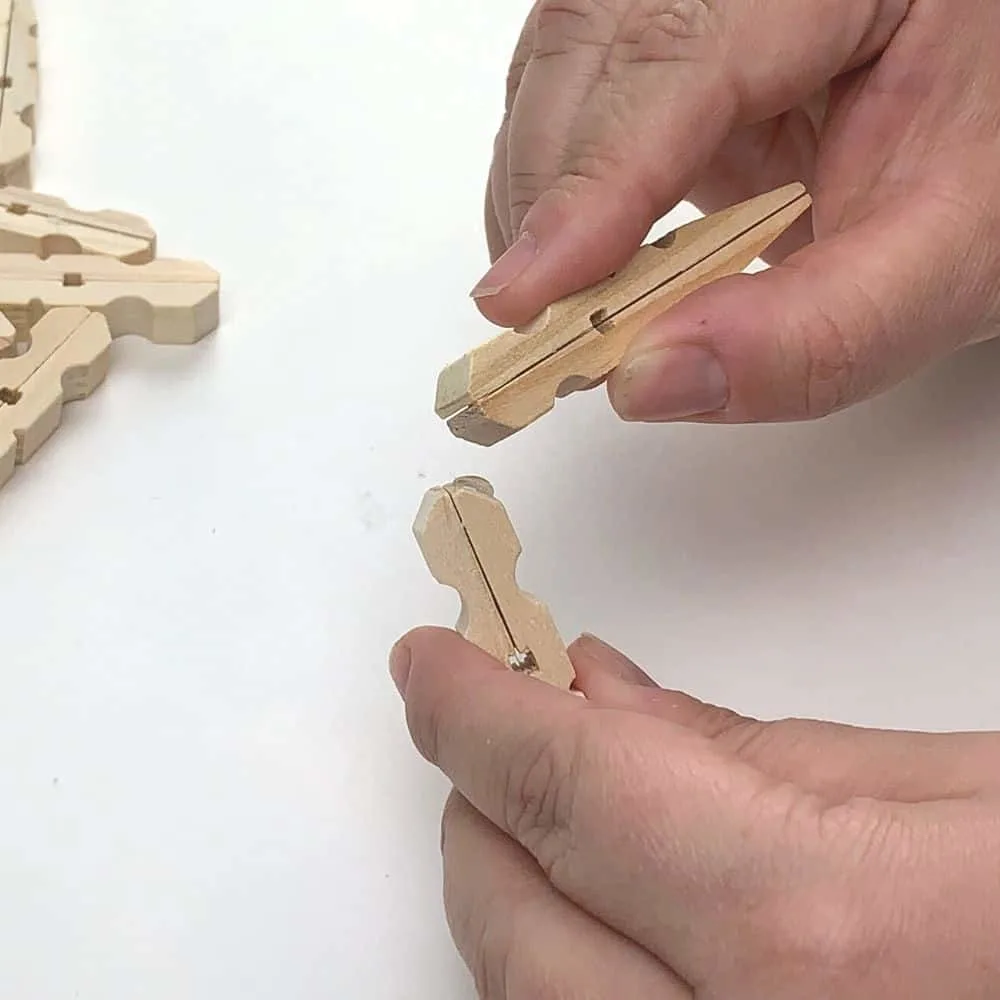
- With the clothespins on their sides, so the seam where you glued them together can be seen, glue the heads together at a right angle. Repeat this until you have 4 clothes pins glued together.
- Now glue another clothespin in the middle of two of the original clothes pins.
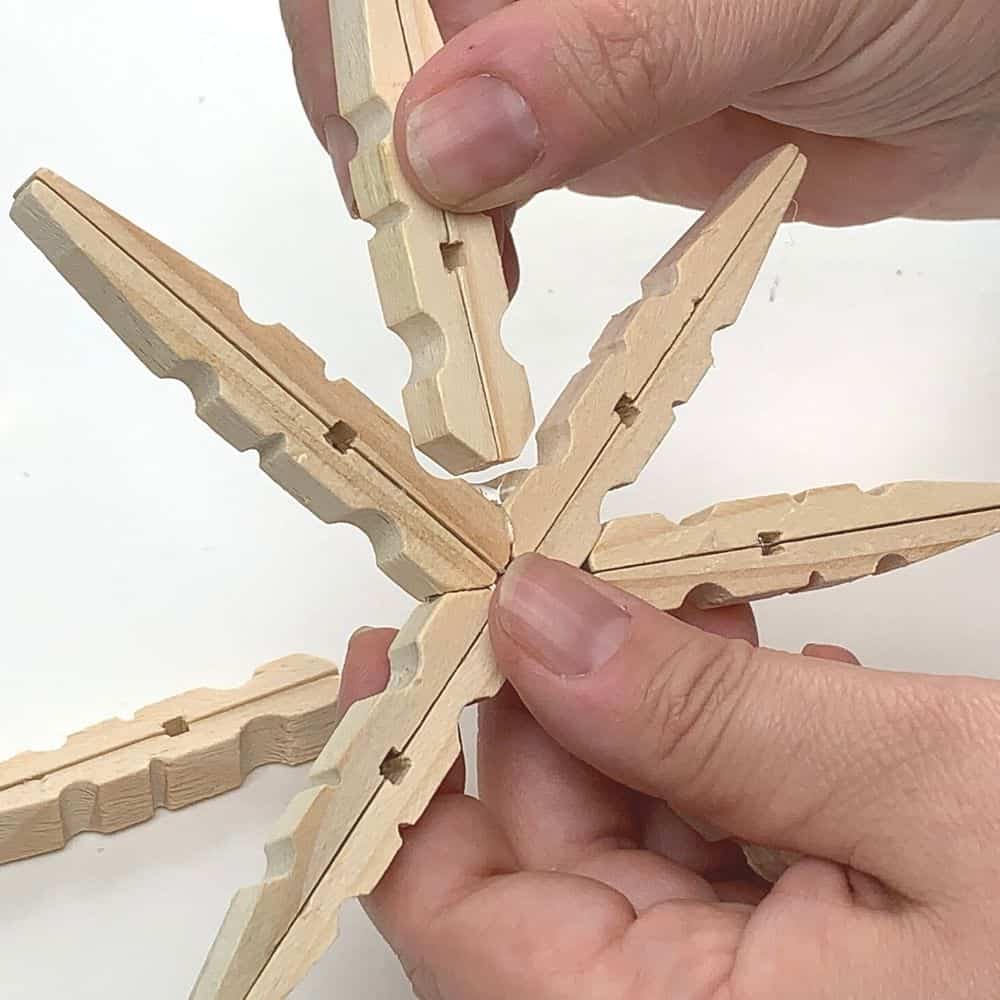
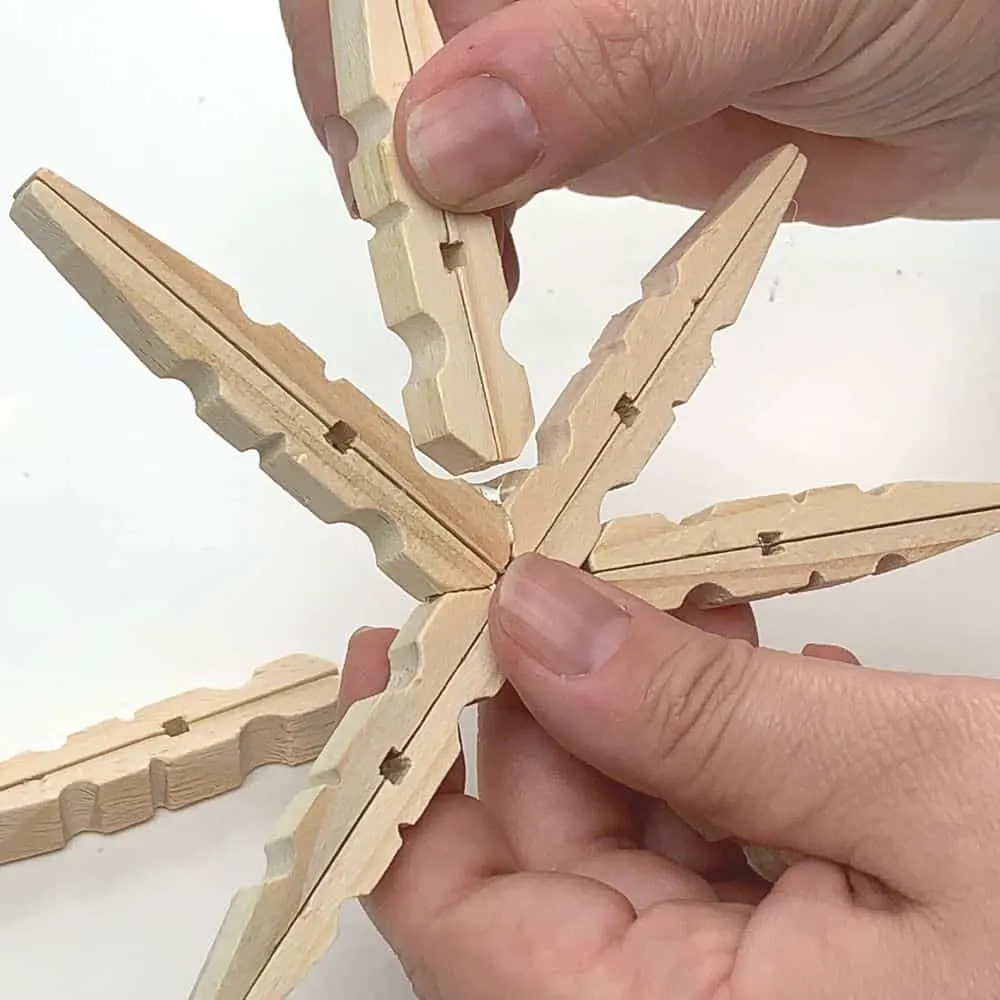
- Repeat this all the way around. Once that is completed you should have your rustic ornaments ready to go.

- For a double star effect, repeat this process with the smaller set of clothespins, and glue the smaller star in the center of the larger one.


- Once you're finished, add a loop of string to the back to create a hanger.
Notes
WARNING! Hot glue guns can cause severe burns and should never be operated by children.
Sharon
Wednesday 15th of November 2023
These came out so sweet. Thanks for the ideas and tutorials.
Louise Emery
Wednesday 15th of November 2023
Yay! So glad they worked out well for you!