When my kid wanted a headless costume, I wasn’t sure what to say or even how to make it.
We are huge fans of Halloween around here! For years, I have handmade costumes for my kids, turning them into whatever they wanted to be by using my thrifting and sewing superpowers.
This year was no exception to the tradition. Sometime in early October, my 10 year old son came to me and said he wanted to be something different for Halloween.
He was tired of the super heros and didn’t want to be too gorey, so we started searching for illusion costumes.
After doing a bit of research, we came across the idea for a headless costume. It was risky and complicated, but we took the project on anyway.
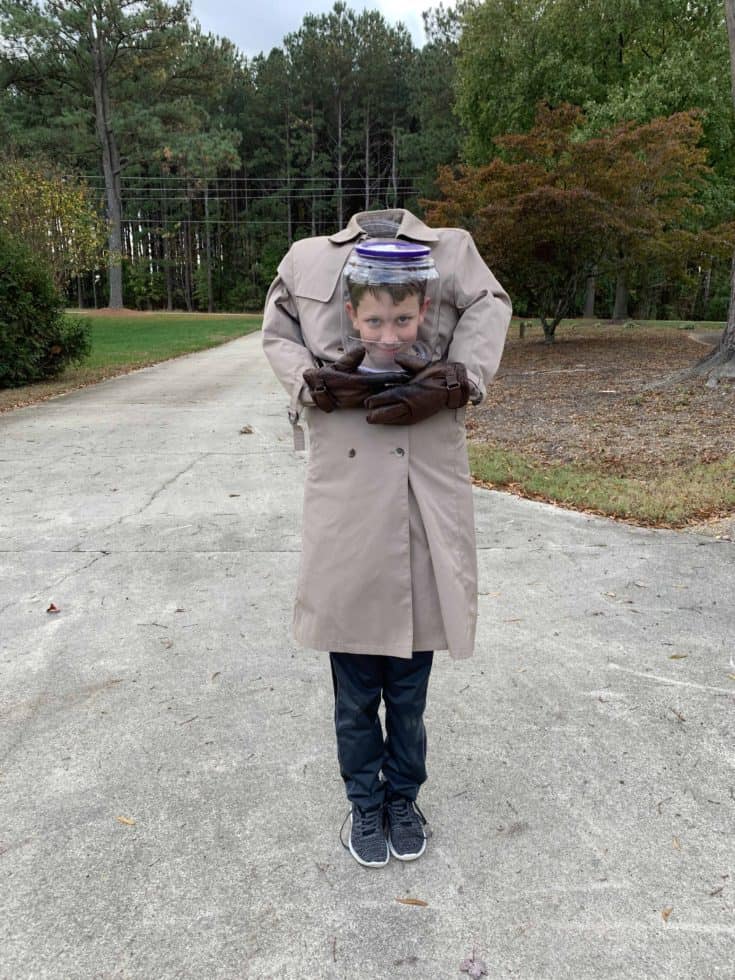
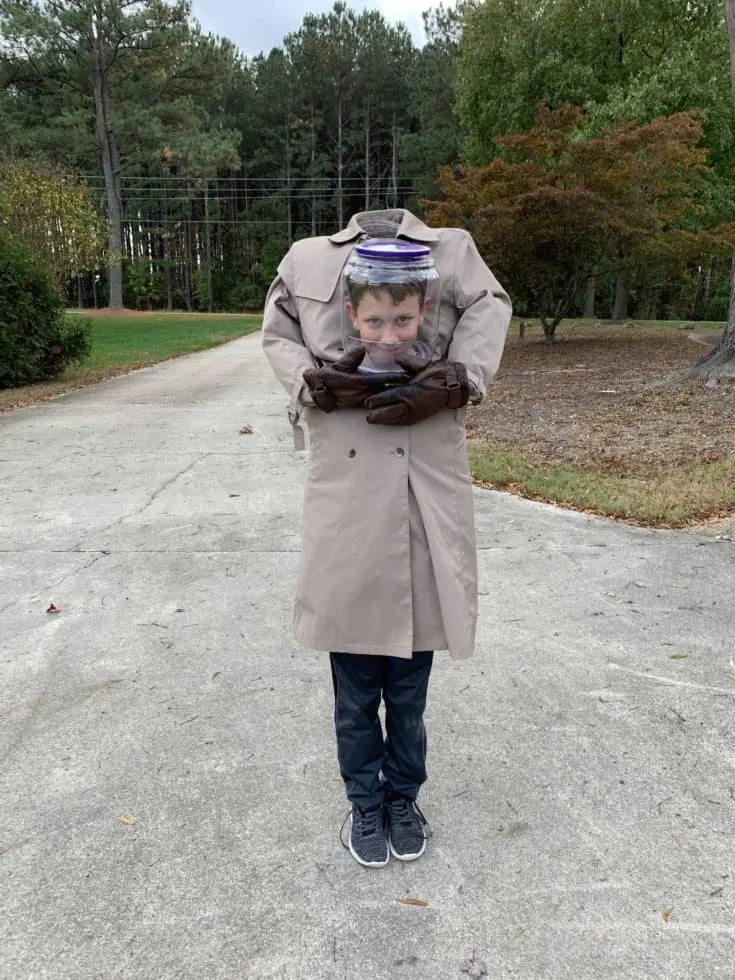
Y’all! The headless halloween costume was a complete and total success! This headless man costume stopped traffic!

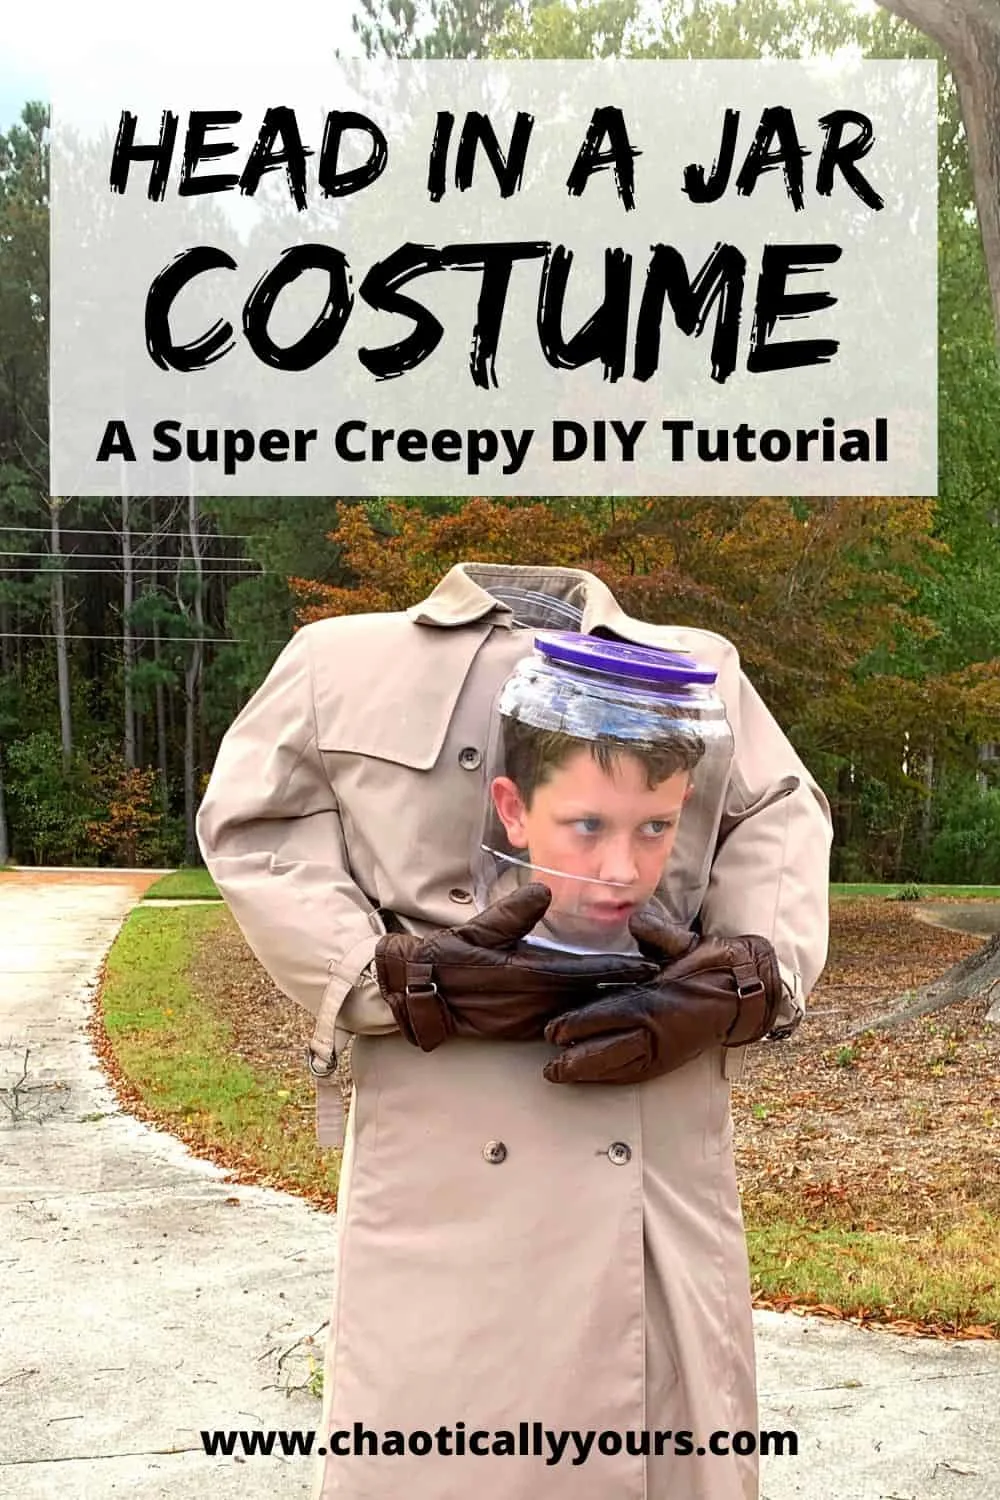
Everywhere we went people were amazed. One guy handing out candy on his front porch was rendered speechless when the head in the jar said, “Trick or Treat!”
I made a video so you could get the FULL effect of how cool this headless costume is in person! It’s really impressive and we had TONS of people asking us how we did it! Seriously, such fun!
You could work this headless costume into so many cool things. With or without the jar, it’s really fun. You could even make the Headless Horseman costume using this method!
We should have entered him into a costume contest or something, but he was more eager to nab that candy door to door! Needless to say, this headless halloween costume was a home run, and I HIGHLY recommend recreating it for yourselves!(Update: We DID enter him in a Halloween costume contest with our local orthodontist and his Headless Costume WON!! He was super excited about his gift card!)
Here’s my tutorial on how we made our own Headless Costume!
Headless Halloween Costume: What You’ll Need
It took us a few days to find everything we needed for this costume. You’ll want to gather up these supplies:
- Adult Size Trench Coat
- Adult Size Gloves
- Old Backpack
- LOTS of Plastic Shopping Bags
- Large Plastic jar (We used a Cheese Puffs Jar. Just make sure it’s big enough to fit your child’s head into)
- Safety pins
- Velcro
- Glue
- Scissors
- Hot glue gun
- Exacto knife, box cutter, or jigsaw
I know it seems like a lot, but we had to get creative with this headless man costume.
How To Put Together Your Headless Costume
Start by gathering your supplies. We found a trench coat and gloves at our local thrift store for just $10. We bought a large jar of cheese puffs for $5 at Walmart.
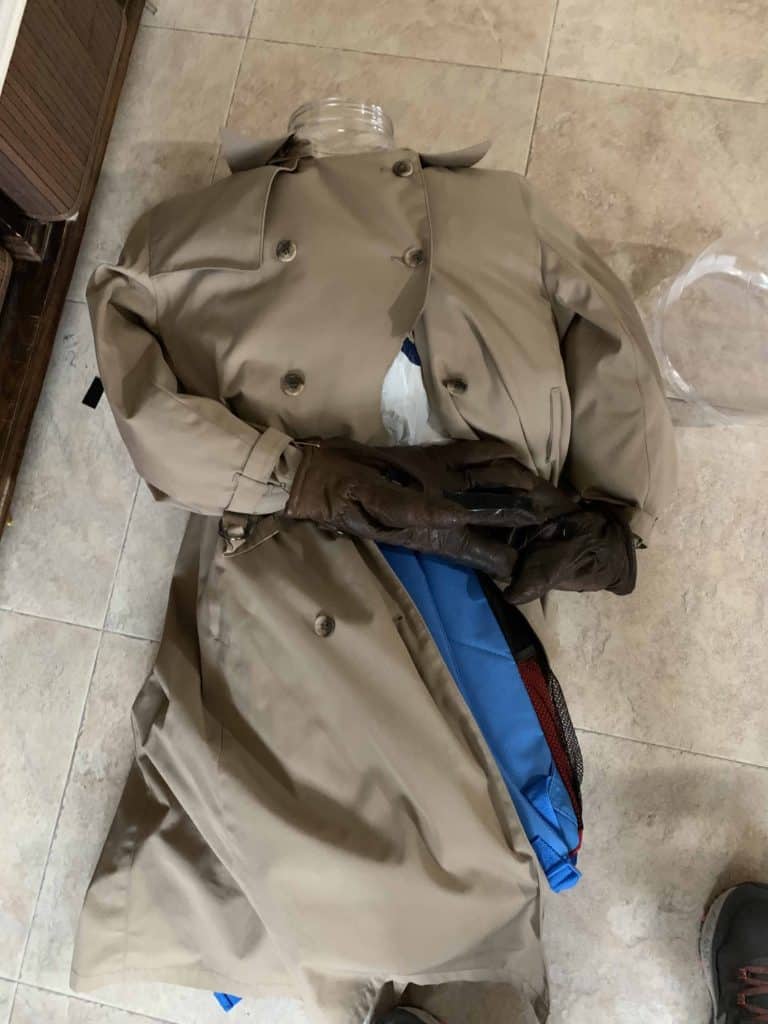
Lay out the coat, open on the floor. Have your child put on the backpack, and tighten it securely.
Have the child lay down on top of the open coat while wearing the backpack, setting it up where there head will pop out of the jacket. Ours was at about the second or third button down, about where the arms would naturally cradle a package.
Have your child slip off the backpack while laying on the floor, leaving it in place. We marked the inside of the coat with a sharpie while he was still in the backpack, so if anything shifted out of place, we could put it back.

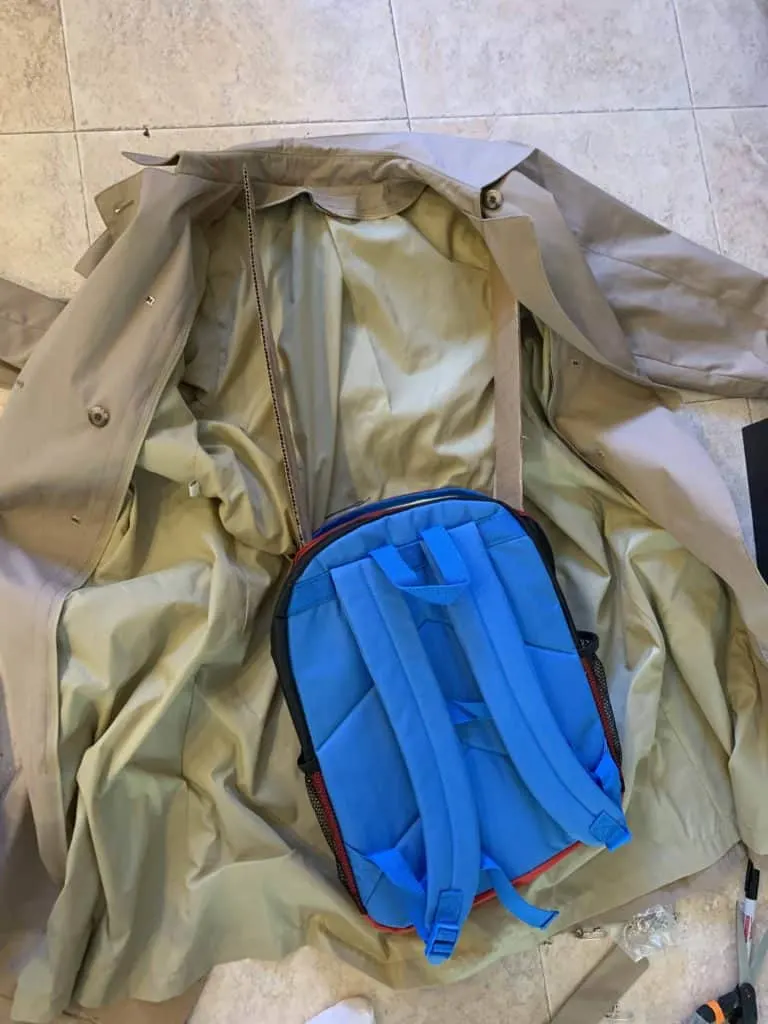
Next you’ll want to safety pin or glue the backpack to the inside of the coat. We safety pinned it, since we didn’t want to ruin the back pack.
Then stuff the backpack with shopping bags, or something else lightweight that will fill up the space. We shoved an old puffer jacket inside ours. It took up a lot of space while still being lightweight.
Take the plastic shopping bags and stuff a bunch of them inside another one, making “pillows” out of them. This makes them easier to handle when putting them in the costume. We made about 6 “pillows” for our headless costume, two large ones for the chest area and 4 smaller ones for the arms.
Stuff the plastic bag “pillows” into the arms of the coat. You’ll probably need more bags than you think you will. Seriously, a headless man costume requires A LOT of stuffing!
Stuff the gloves with the plastic bags as well. We filled up the fingers with paper towels. A headless man costume needs lifelike hands.
Safety pin or glue the gloves to the sleeves of the coat, making sure the thumbs are facing the right directions!
Close up the coat around the pillows and the backpack, checking to make sure it’s stuffed securely.
Open the lower buttons of the coat and have your child slip on the backpack.
Leaving your child’s head sticking out of the coat, fasten all the buttons of the coat, just skipping the one his head is sticking out of.
If you aren’t planning to reuse the coat, you can trim the fabric around where your child’s head sticks out to make it bunch less. Just don’t take too much off or make the cuts while your child is wearing the costume!

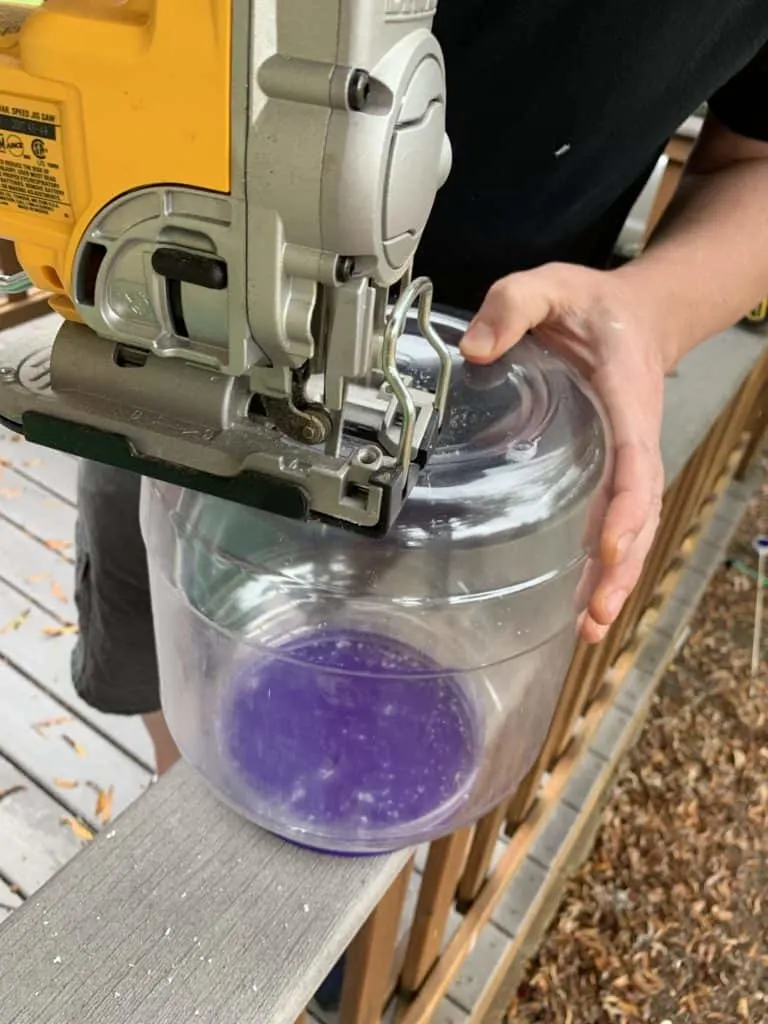
Cut the bottom of the jar off, making sure it can fit over your child’s head. We ended up having to use a jigsaw to make this happen, since our exacto knife just wasn’t doing the job.
BE EXTREMELY CAREFUL CUTTING THE JAR!! This step is where the most risk of injury comes in. No matter what tool you’re using to cut the jar, this step SHOULD NOT be done by children.
Cut a few air holes near the mouth and nose to make wearing the jar more comfortable.
We made the mistake of NOT doing this. My son was adamant that he didn’t need them and he could breathe in his headless costume. What he didn’t take into account was how sweaty he would get.
This step is optional, but makes wearing the costume more comfortable: Add something inconspicuous to cushion the edge of the jar so it will be more comfortable to wear.
We used some small plastic tubing we happened to have around the house. We CAREFULLY (again, adults only doing this step) cut a slit down the tubing and slid it onto the edge of the jar that would be sitting on his neck. We hot glued it in place.

Attach one side of a piece of velcro to the bottom edge of the front of the jar, in as inconspicuous a place as possible. We used white velcro to make it less noticable.
Attach the two gloves together so that they look naturally placed. We used safety pins for this, but you could glue them.
Attach the other side of the velcro to the palm of the glove. We used craft glue for this since hot glue didn’t seem to work on the gloves we had. We also used black velcro here just to make it inconspicuous again. Make sure the hands look naturally attached to the jar.
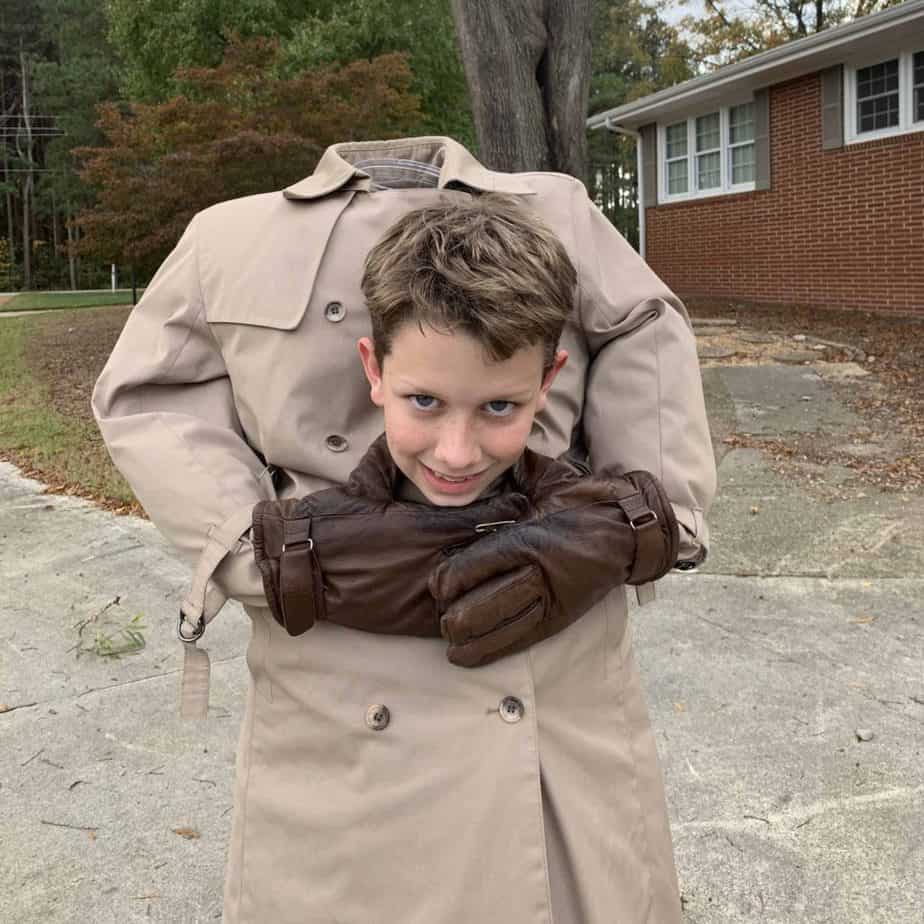
Another optional step: Wearing the jar for the whole evening proved a little stuffy for my son, so we made a solution on the fly to make it look like the hands were just carrying his disembodied head.
I made a chain of safety pins from thumb to thumb on the gloves, giving the appearance that they were wrapped around his neck.

Now wear your headless costume and freak people out!
While this headless costume seems a little complicated to put together, once you understand the concept, it’s not too bad. It’s also not too expensive!
Amaze your friends and astound strangers with this cool Headless Man Costume! Using hot glue guns and power tools can be dangerous! Do not let children use these items. Several steps of this process require using dangerous tools. We do not recommend children do this project themselves. Headless Costume: Full DIY Tutorial
Materials
Tools
Instructions
Notes
Wanna know how to throw the BEST craft night party? Check out my tips and tricks HERE!
Learn how to raise lots of $$$ for your school with the Easiest Fundraiser Ever by clicking HERE!
Luke
Friday 31st of October 2025
Did you walk him did he get a ride?
Luke
Friday 31st of October 2025
How did your son get to school?
Beth Cuevas
Sunday 27th of October 2024
Not sure if site is still up-but we want to do this and the pictures look like there is an another actual jar in the trench coat at the neck?
Louise Emery
Monday 28th of October 2024
Hi! Yes, there was another jar inside. Good catch! While it isn't necessary for construction of the costume, we added it at the last minute, since he wasn't able to hold a bag to collect his candy in. He would just bow forward, and the candy was placed in that top jar. It made for some more funny moments throughout the night.
Cassidy
Wednesday 18th of October 2023
I love it !!! Do you think this costume would be adaptable for adults ?
Shelia Prather
Saturday 7th of October 2023
This head in a jar costume is awesome! Wild & Crazy....but adorable. 😂😂😂