DIY lip gloss: It’s the newest project in our house that’s been keeping my teenager happy lately.
Surprisingly enough, I’m enjoying making it too!
After a little trial and error, we’ve worked up a super easy DIY lip gloss recipe that allows you to make custom shades, that also smell and taste fantastic!
The recipe uses all safe, non-toxic ingredients, that you most likely already have around your house. It’s also SUPER EASY, and doesn’t require any heat or cooking skills.
It can make a little bit of a mess, so I wouldn’t recommend letting kids do this unsupervised!

Gather Your Materials
The first thing you’ll want to do for this project is gather up your ingredients and supplies.
I was actually able to find literally everything I needed at my local Dollar Tree store.
Y’all! Dollar Tree has stepped up their game! They have the cutest craft section now, plus they carry things like coconut oil!!
Since every item there costs $1.25, and this project really only needs three items, it’s super affordable!
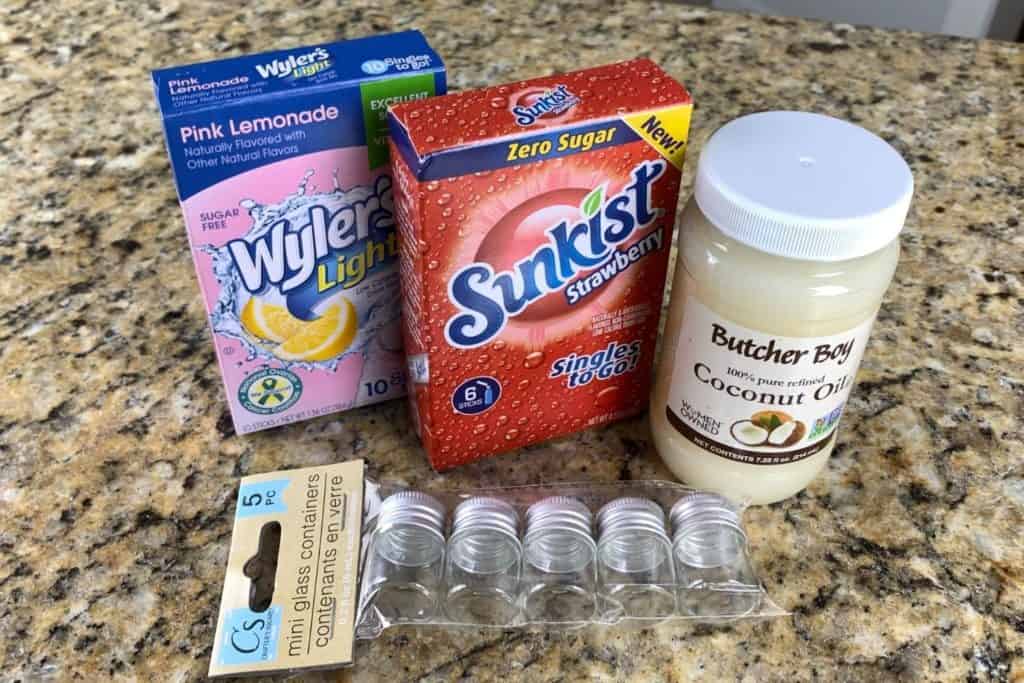

So here’s what you’ll need:
- Coconut Oil
- Single Serve Drink Mix in your desired color and flavor
- Small Containers
Literally, that’s it. That’s all you need to buy!
We decided to be big spenders and get an extra flavor of drink mix to use, but even then, this project will definitely not break the bank!
DIY Lip Gloss: Prep Your Containers
You’ll want to begin this project by thoroughly washing your containers.
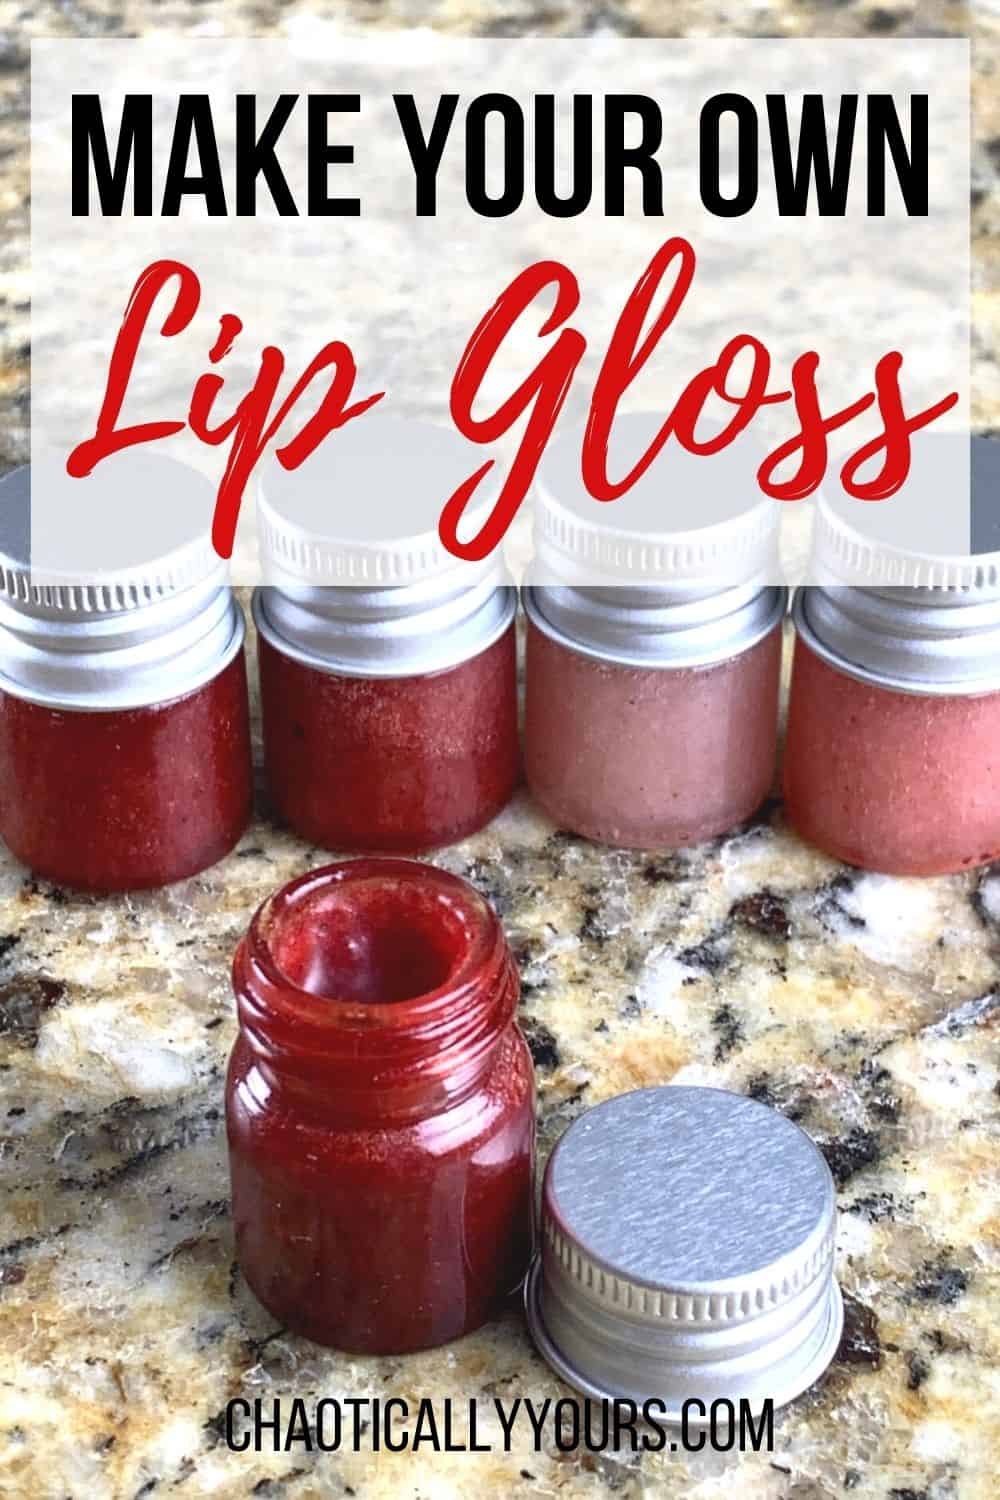
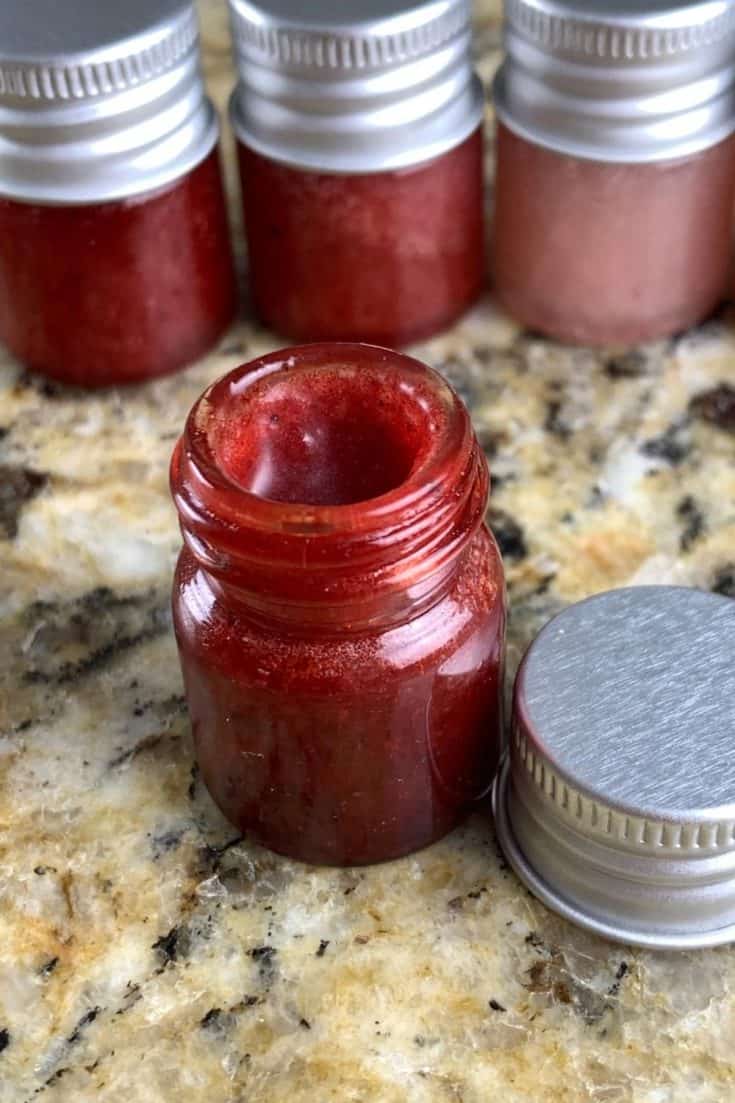
We loved these tiny bottles from the Dollar Tree. They hold just enough DIY lip gloss in each one, and they’re totally reusable.
We just washed them with some dish soap in warm water, then dried them thoroughly before getting started on the actual process of creating our DIY lip gloss.
DIY Lip Gloss: Creating The Color
Here’s where things get fun!
Select what flavor and color of drink mix you’d like to start with. In the past while making this project, I’ve used Strawberry for a bright red color, Fruit Punch for a little purple undertone, and Pink Lemonade for a pretty light shade.
Just pick your favorite!
Start by pouring one packed of the single serve drink mix out into a small container.
You’ll want to add just a tiny bit of warm tap water to the drink mix. Then stir it thoroughly, creating a smooth paste or very thick liquid.
It’s important not to add too much water, since water and coconut oil don’t mix together well, and can separate if you add too much.
DIY Lip Gloss: Mixing The Gloss
Next, in a separate container, spoon out a tablespoon or so of the coconut oil. You only need to use enough to fill your container.
If you want to make several containers of the same color, be sure you spoon out enough to fill them all.
Now add just a little bit of the color paste you created out of the drink mix in the last step.
Add just a little at a time, stirring thoroughly between each addition, until you get your desired color. Be sure and work out any clumps of the color paste that might be in the mixture.
Some people recommend heating the coconut oil, but I found this to be unnecessary, as long as you stir it thoroughly.
It’s really fun to play with the shades. You can mix flavors and colors together for different undertones and colors.
We even created some with a pineapple flavor drink mix that didn’t really have color, but sure tasted and felt good on your lips!
DIY Lip Gloss: Packaging Your Product
After you’ve got the desired color all mixed up, you’ll want to package it.
The tiny bottles we found at the Dollar Tree were perfect for holding just the right amount of the DIY lip gloss. We simply spooned the desired amount into the container, tapping it down between each spoonful to get out any bubbles.


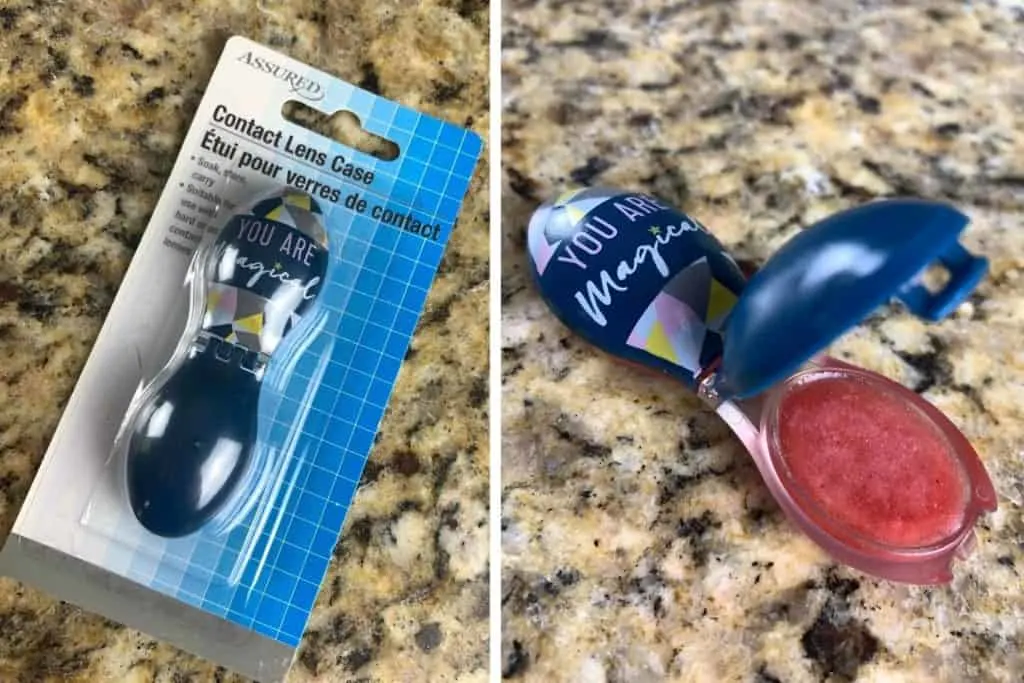
If you can’t find tiny bottles or little jars for this project, I’ve also used contact lense cases! They’re readily available at the Dollar Tree, and other retailers, and they hold just the perfect amount of DIY lip gloss on each side.
I loved these adorable ones I found at my local store. They had all sorts of cute designs and were absolutely perfect for this project.

Things You Should Know About This Project
All the items we used in this project are non-toxic, but I wouldn’t recommend eating the final product. (Sounds weird, but hey, I’ve just gotta say it!)
The drink mix WILL STAIN clothing and your skin, so be extra careful when mixing it up.
The final lip gloss can act somewhat like a lip stain if you’ve made a super dark color, so just be aware when you’re wearing it that it *might NOT* wipe off so easily.
We love making these little pots of DIY lip gloss! We hope you have the same fun making them!
What’s your favorite flavor to use for this project? Tell me in the comments!
Did you know you could dye your hair with Kool-Aid?? Find out how in my post all about Kool Aid Hair Dye!
Looking for more craft ideas for teenagers? Check out this great list of ideas in my Great Crafts For Teens post!
DIY Lip Gloss

Make your own colors and flavors of lip gloss with this DIY recipe!
Materials
- Coconut Oil
- Single Service Drink Mix
- Containers
- Water
Tools
- Bowls
- Spoons
Instructions
- Wash containers thoroughly.
- Mix drink packet contents with small amount of warm water in a small bowl.
- Spoon out desired amount of coconut oil into a separate bowl.
- Mix desired amount of color mixture with coconut oil.
- Stir thoroughly.
- Transfer mixture to a container.
Notes
Drink mix can stain clothing and skin. Use with caution.
Thursday 10th of August 2023
thank you