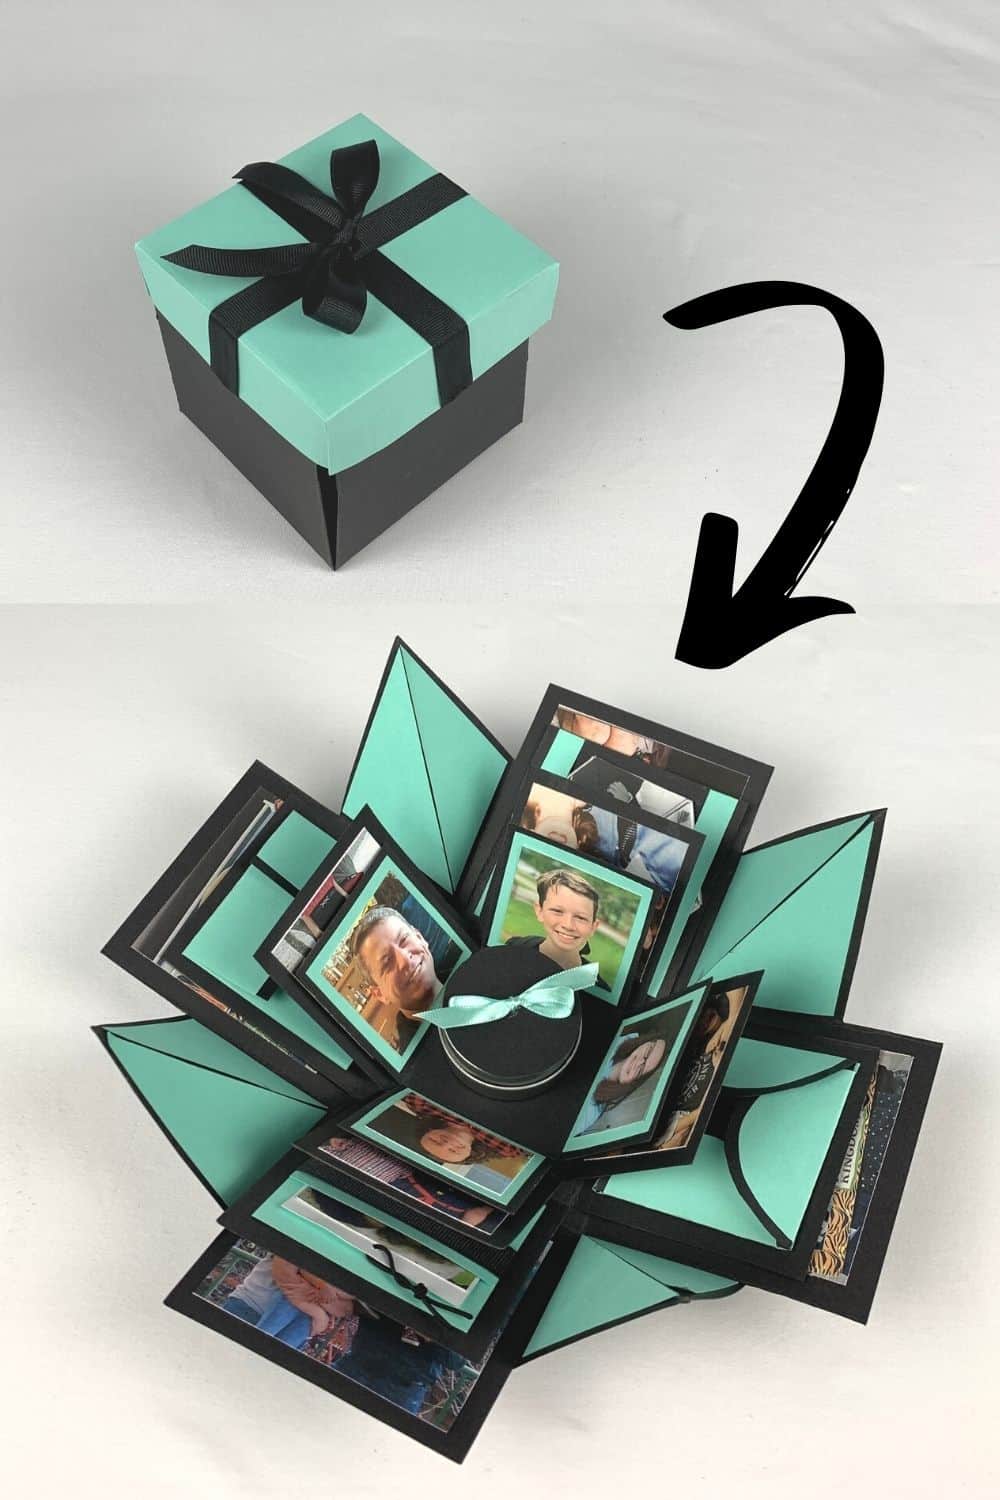
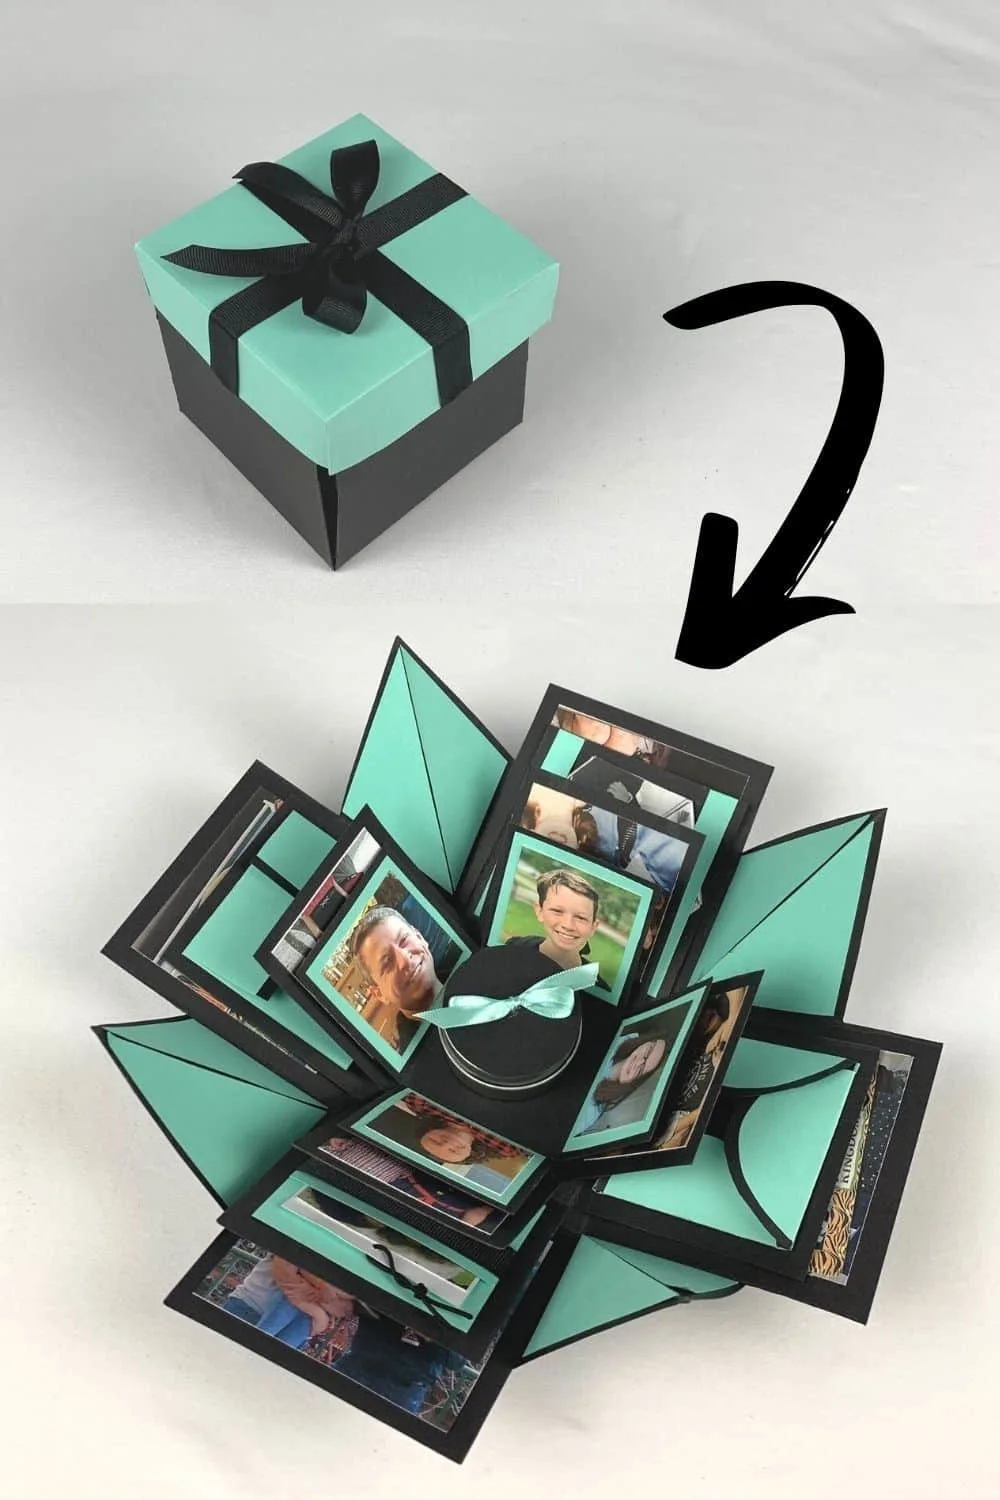
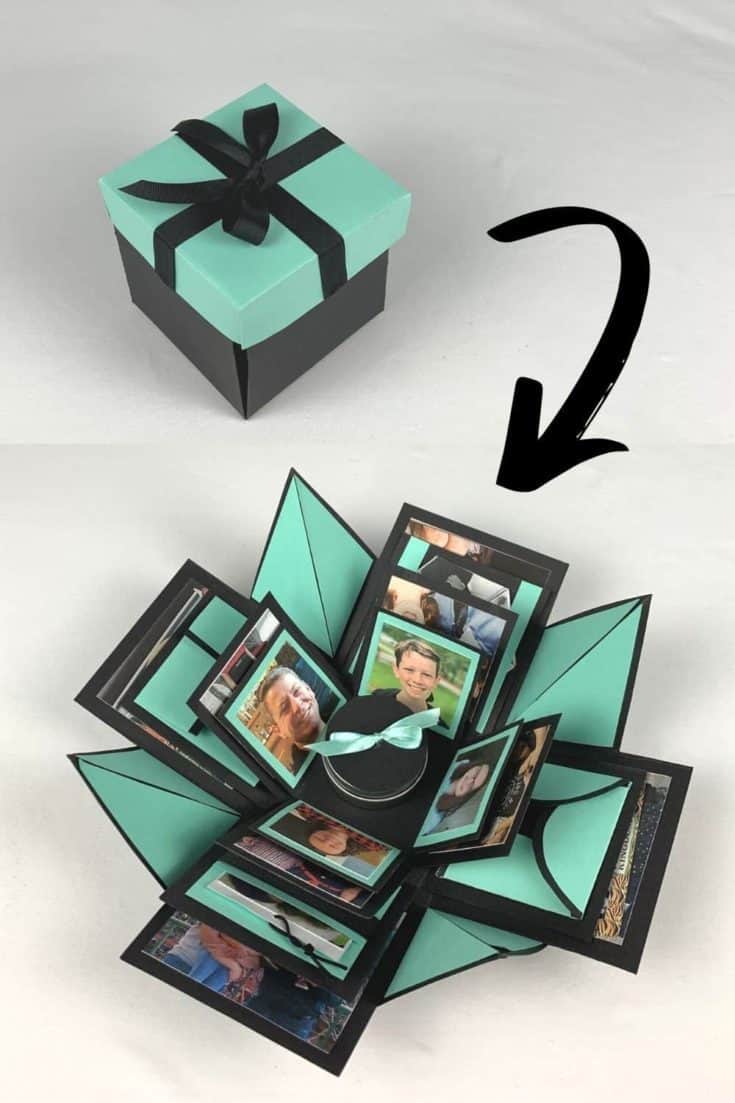
In today’s post, I’ll teach you how to make an explosion box: a unique personalized gift that bursts open with photos and memories as soon as you open it!
I’m always looking for fun and unique gift ideas, especially for family members. I always feel like I’m struggling to find the perfect gift for the “person who has everything.”
That’s why when I came across the idea for a DIY explosion box (also known as an explode box or an exploding memory box) , I got super excited. The simple concept of an exploding box full of memories would be the perfect gift for so many people on my list!
Links in this post may be affiliate links, which means I may earn a commission if you make a purchase from any of them, at no additional cost to you. You can find out more information by reading my full disclaimer.
What Is An Explosion Box?
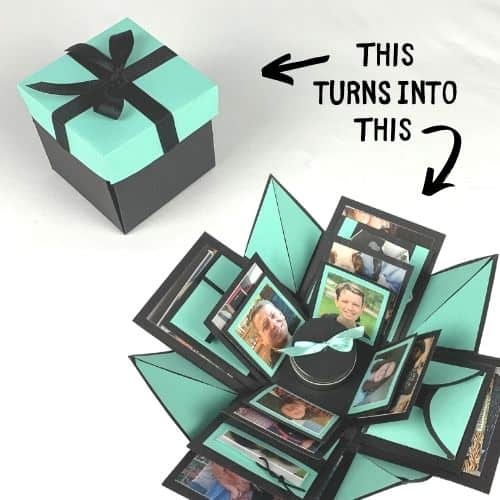
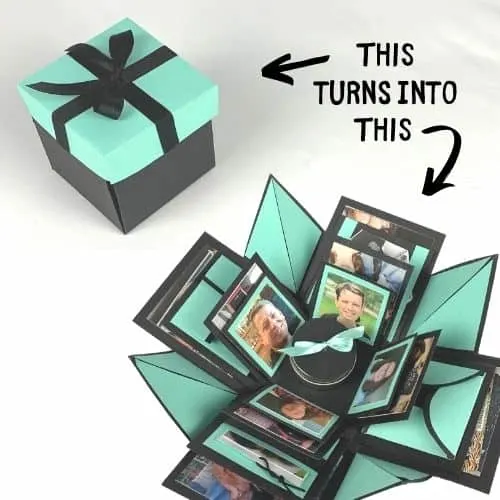
An explosion box is an origami box that pops open and “explodes” as soon as the recipient takes the top off, revealing pictures, messages, and even gifts inside. It’s a bigger version of our Explosion Cards project.
There are SO many ways you can use this DIY exploding box. Birthdays, anniversaries, graduations, prom-posals and even engagements could be celebrated with an explosion box.
The personalization aspect of the project is what makes it so versatile! I’ve even seen people make fandom explosion boxes for things like Harry Potter or Star Wars. The possibilities really are endless with this one.
Made from some pretty basic supplies and some simple origami techniques, explosion boxes are surprisingly easy to put together. I’m happy to spill all the details about how to make an explosion box.
Explosion Box Supplies

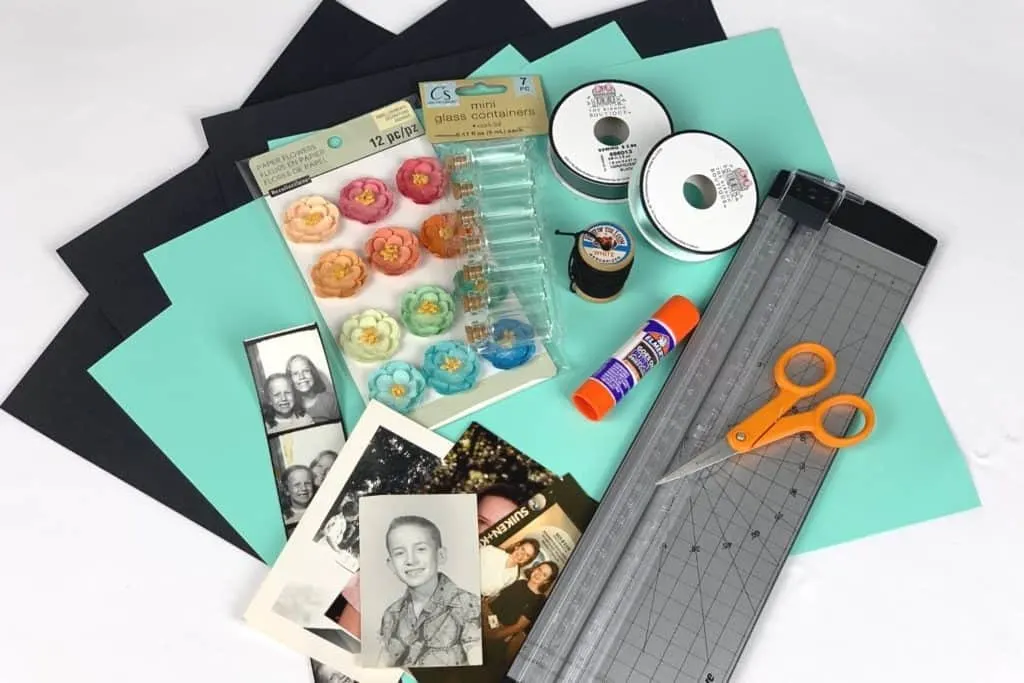
To make an exploding box you’ll need a few basic things:
- Several sheet of 12 x 12 cardstock (I used 4 for the box itself and 1 for the lid)
- Complimentary scrapbook paper
- Scissors
- A glue stick
- Pictures
- Decorations (I used ribbons and tin boxes, but you could use paper flowers, small bottles, whatever you like)
- A paper cutter (optional – it just made the big cuts easier)
- A scoring tool (optional – this makes the folding go a little smoother)
I was able to find all the supplies I needed at my local craft store, but they’re also available on Amazon as well.
If you’ve ever been a scrapbooker, this project is a great way to use up some of those older supplies you still have lying around.
Folding Your Box
You’ll want to start your explosion box by folding a piece of 12 x 12 cardstock into a box.
In order to do this, you need to fold flaps at 4 inches in on each side of the card stock, making 9 smaller 4×4 inch squares on the page. The video below should give you a good idea of how to accomplish this.
I used my rotary blade cutting mat from my sewing supplies to help me measure accurately. If you have one, I highly recommend using it for this project.
In the video, I just used a ruler and my fingers to fold the box, but a scoring tool would come in very handy here. I actually found one at my local dollar store after I finished this project.
After you have your cardstock folded into 9 squares, you need to create the corners. To do this, simply bring the folded edge of each corner together, pinching the excess cardstock into a triangle on the inside of the box. Again, see the video below.
After you have your corners folded, you can trim them to give the box a better effect. For this project I made star tips by drawing a line from the tip of the angular fold to the center of the adjoining fold of one of the smaller squares.
I then trimmed along the line and the edge of the box to create a point effect.
I’ve also seen explosion boxes where people made hearts out of the corners as well. This is a super cute effect that is easily achieved as well.
Explosion Box Layers
After you have the first layer of your explosion box complete, you’ll want to cut and fold additional layers for the inside. Each layer should be smaller that the last, to give that exploding box effect to the project.
I made a four layer box, cutting each layer 1.5 inches smaller than the last. You could use smaller increments if you’d like to include more layers. It’s completely up to you.
You just want to make sure you fold each layer into the 9 square pattern like the outside layer, just adjusting your measurements appropriately.
For the sake of explanation, let’s pretend you’re making a four layer explosion box just like I did.
For my box, here’s how I set up the layers:
- Outside of the box: 12 inch x 12 inch – folds every 4 inches
- Layer #2: 10.5 inch x 10.5 inch – folds every 3.5 inches
- Layer #3: 9 inch x 9 inch – folds every 3 inches
- Layer #4: 7.5 inch x 7.5 inch – folds every 2.5 inches
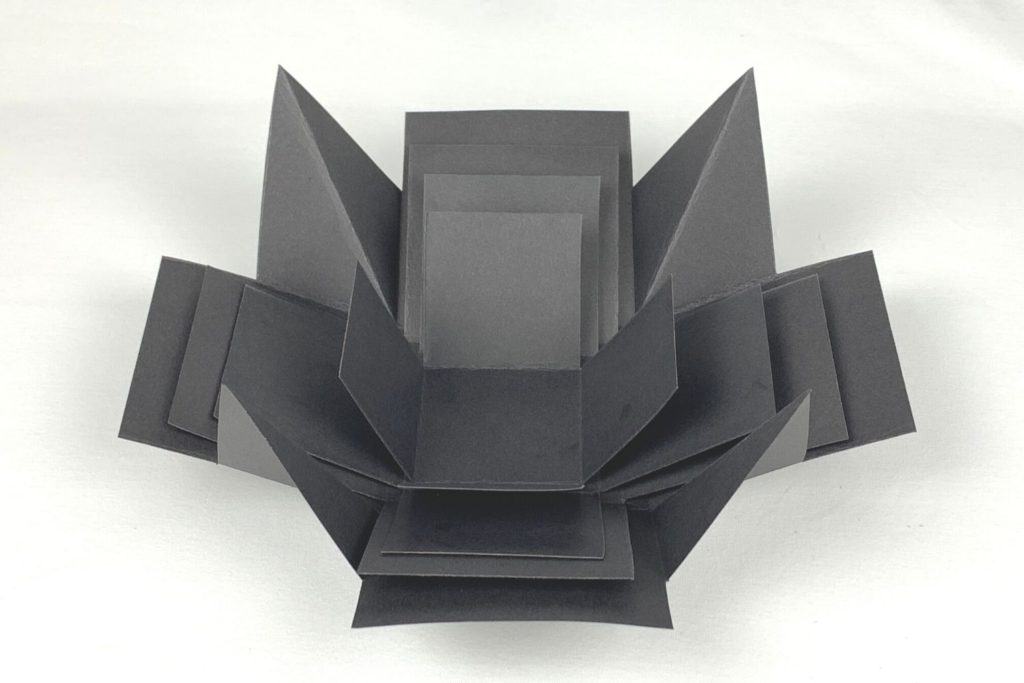
After you’ve folded all your layers, you’ll want to cut the corner boxes out of your three inside layers, giving you a plus shape.
When you have all your layers cut, place them on top of each other, gluing the centers together as you go. You’re finished explode box should look like this:

Now that it’s all assembled, you can get to the fun part! You’ll be decorating your explosion box!
You’ll want to gather pictures and memorabilia to place inside your box. I didn’t want to use original prints for my photobox, so I scanned and printed some digital photos I had on my computer onto some card stock.
This way I could cut them to the exact sizes I needed without ruining the only copy I had of some photos.
After trimming them to the appropriate size, I glued them inside the box flaps.
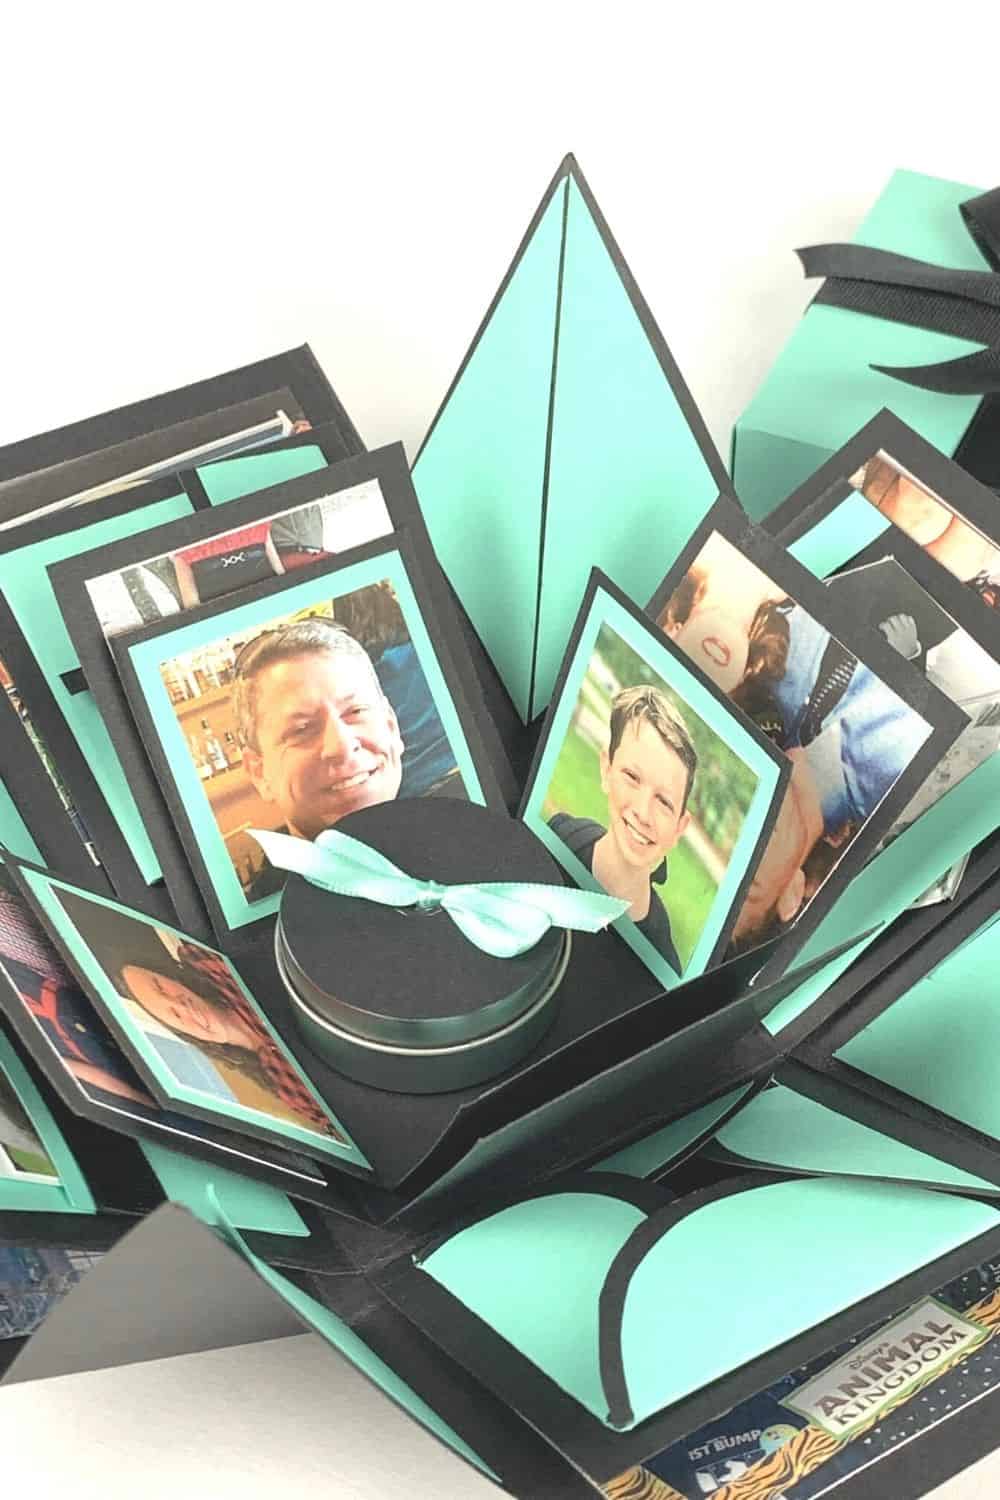
I used a complimentary color card stock and ribbons to do most of the other my decorating. Instead of elaborate prints or tons of color, I chose to use origami methods on four of the flaps in my explosion box diy project.
I used this basic overlapping fold technique twice in the box, once with curved edges and once with square ones. This basically works by just folding the pieces over each other like you would to loosely close a box.

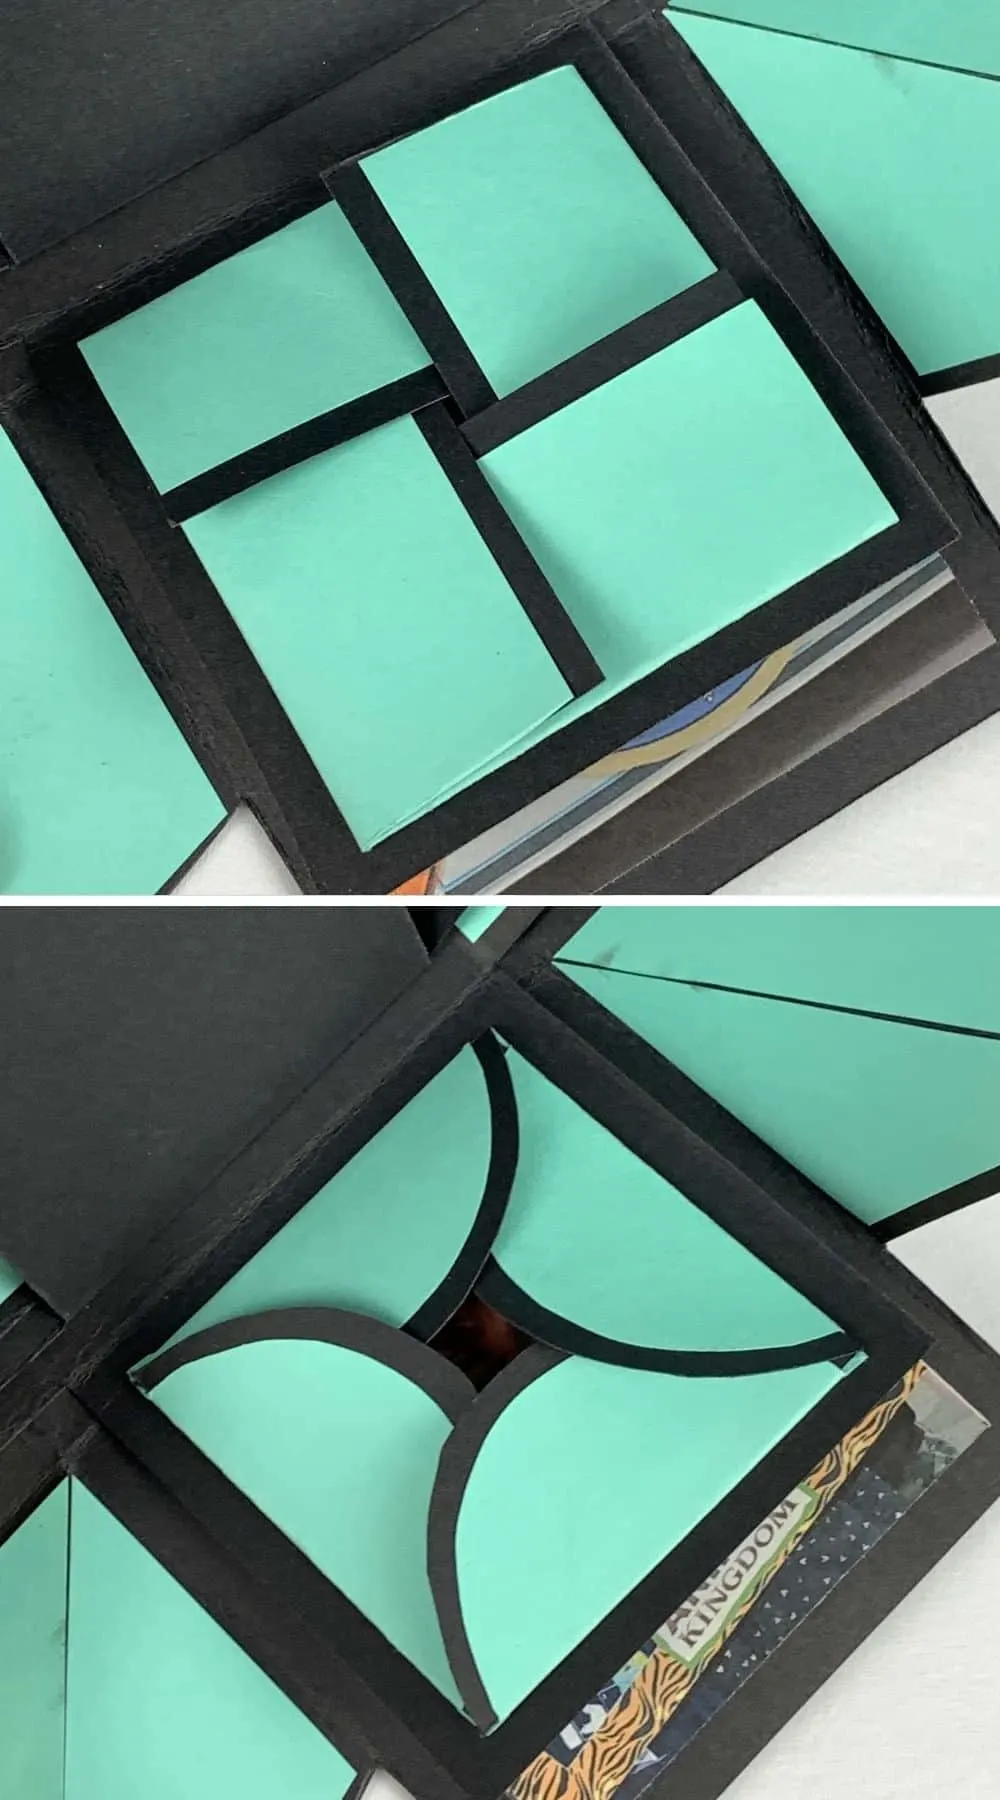
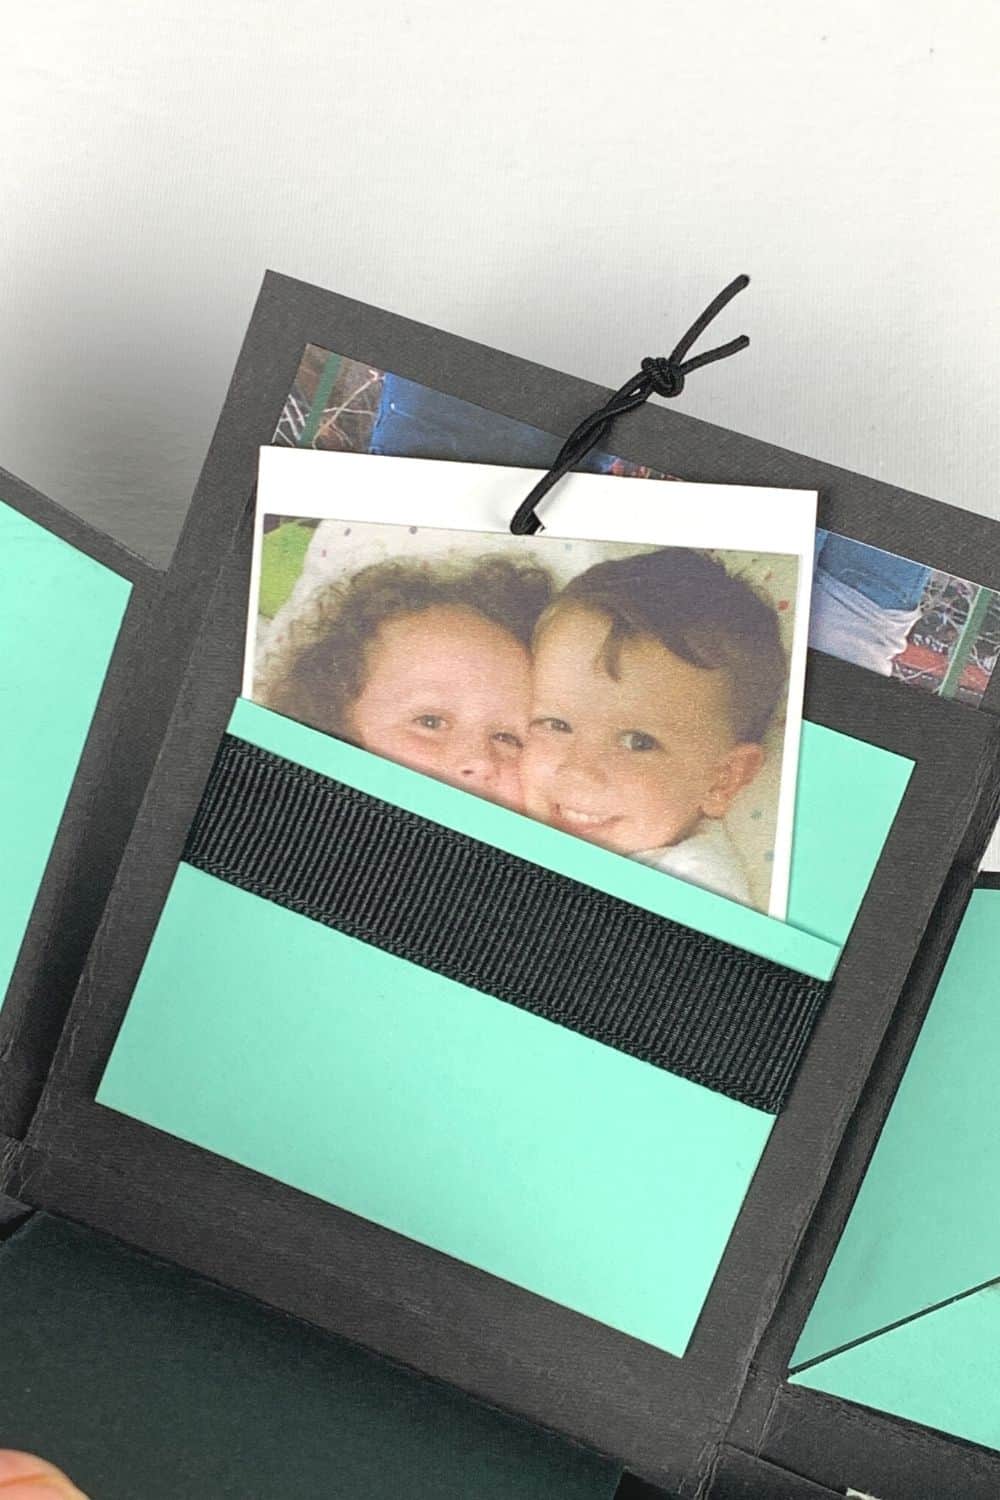
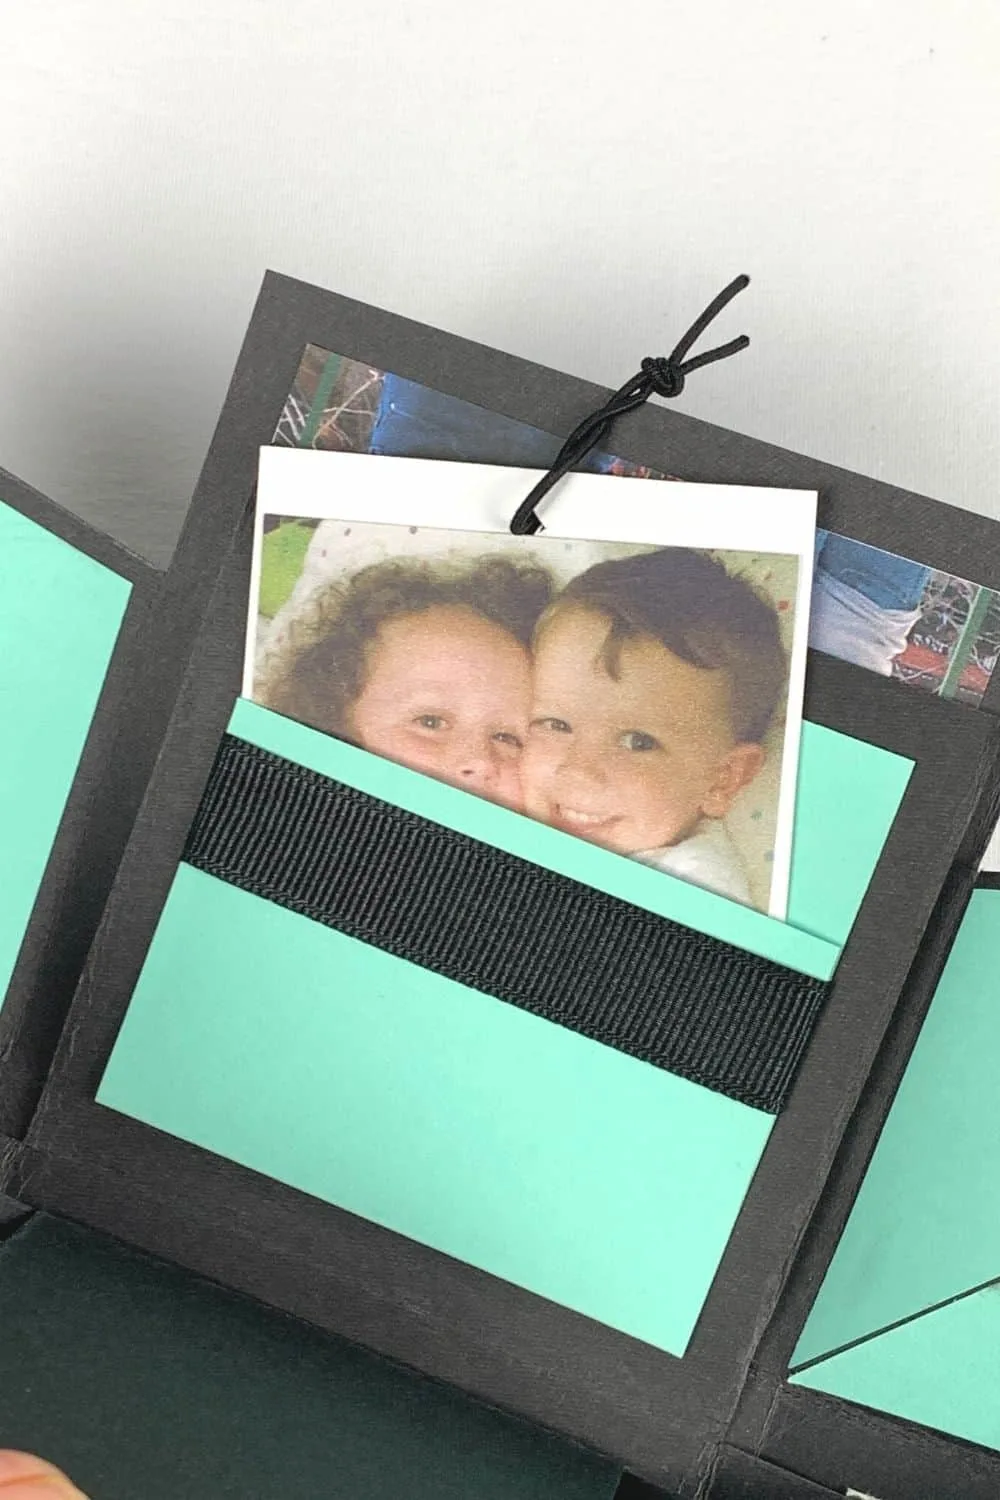
I also did a little pull out pocket that I really love. I folded a piece of cardstock to create the pocket and glued the sides together. Then I decorated it with a little piece of ribbon.
I attached the picture to another piece of car stock and put a pull cord on it with a small piece of thin black elastic cording.
It turned out so cute!
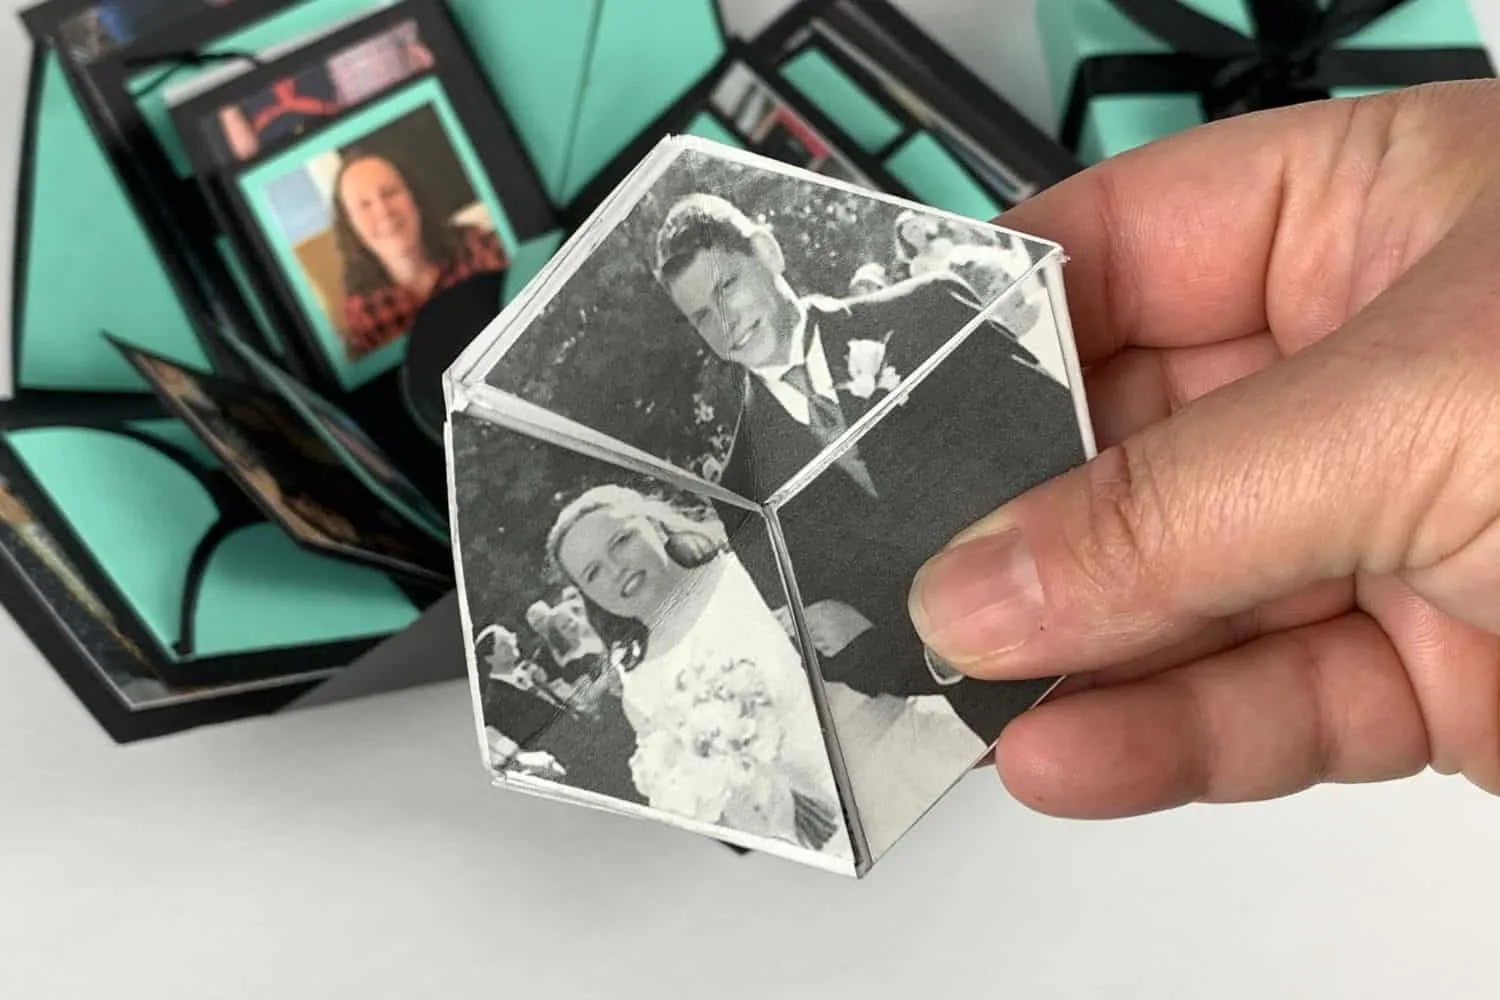
Hexaflexagons
The last origami technique I used in my DIY explosion box was the most complicated.
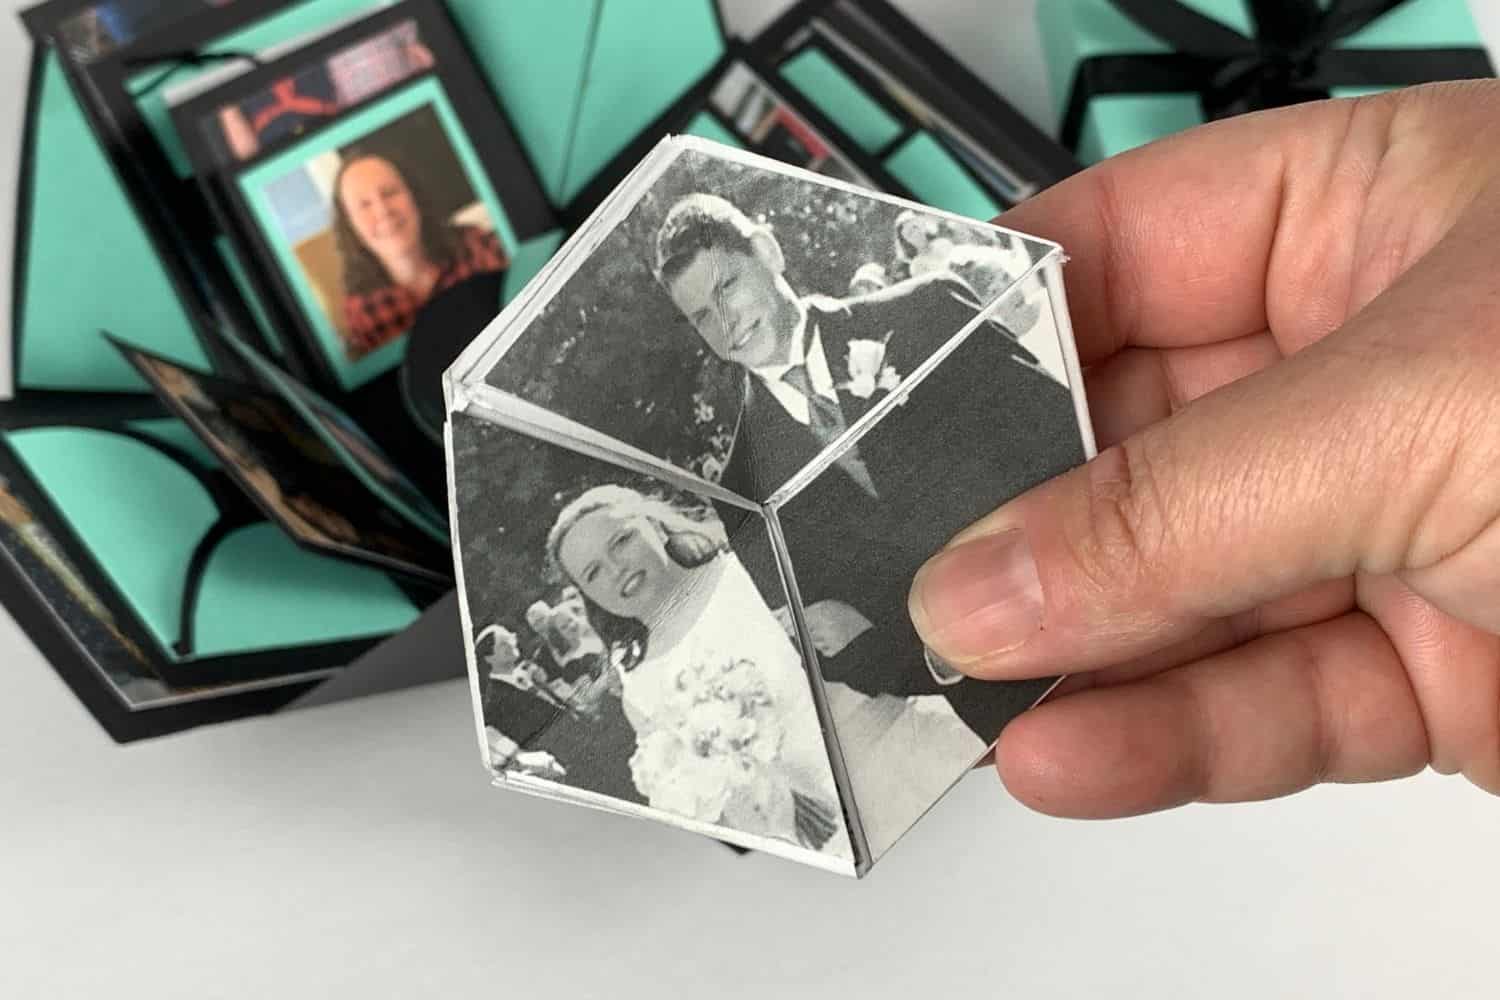
I used a geometric origami shape called a Hexaflexagon to make an infinity loop of pictures. You can see it demonstrated in the video at the top of the page, but it turned out really cool!
First I made a hexaflexagon out of copy paper. I have an entire tutorial about how to make a Hexaflexagon. They’re really cool, versatile origami infinity loops.
Once I had my hexaflexagon made, I cut three pictures to fit inside of the shape. I then cut the pictures each into three diamond shape parts and glued them to the loops inside the hexaflexagon.
It took a little trimming and finagling to make sure it came out right, but the end result was totally worth it. Seriously, watch the demo video to see how cool it is!!
I then cut two small strips of card stock and glued them to the sides of the appropriate flap, creating little straps inside the explosion box.
I just slipped the hexaflexagon underneath those straps so it would be held in place and easily removed when you want to look at it.
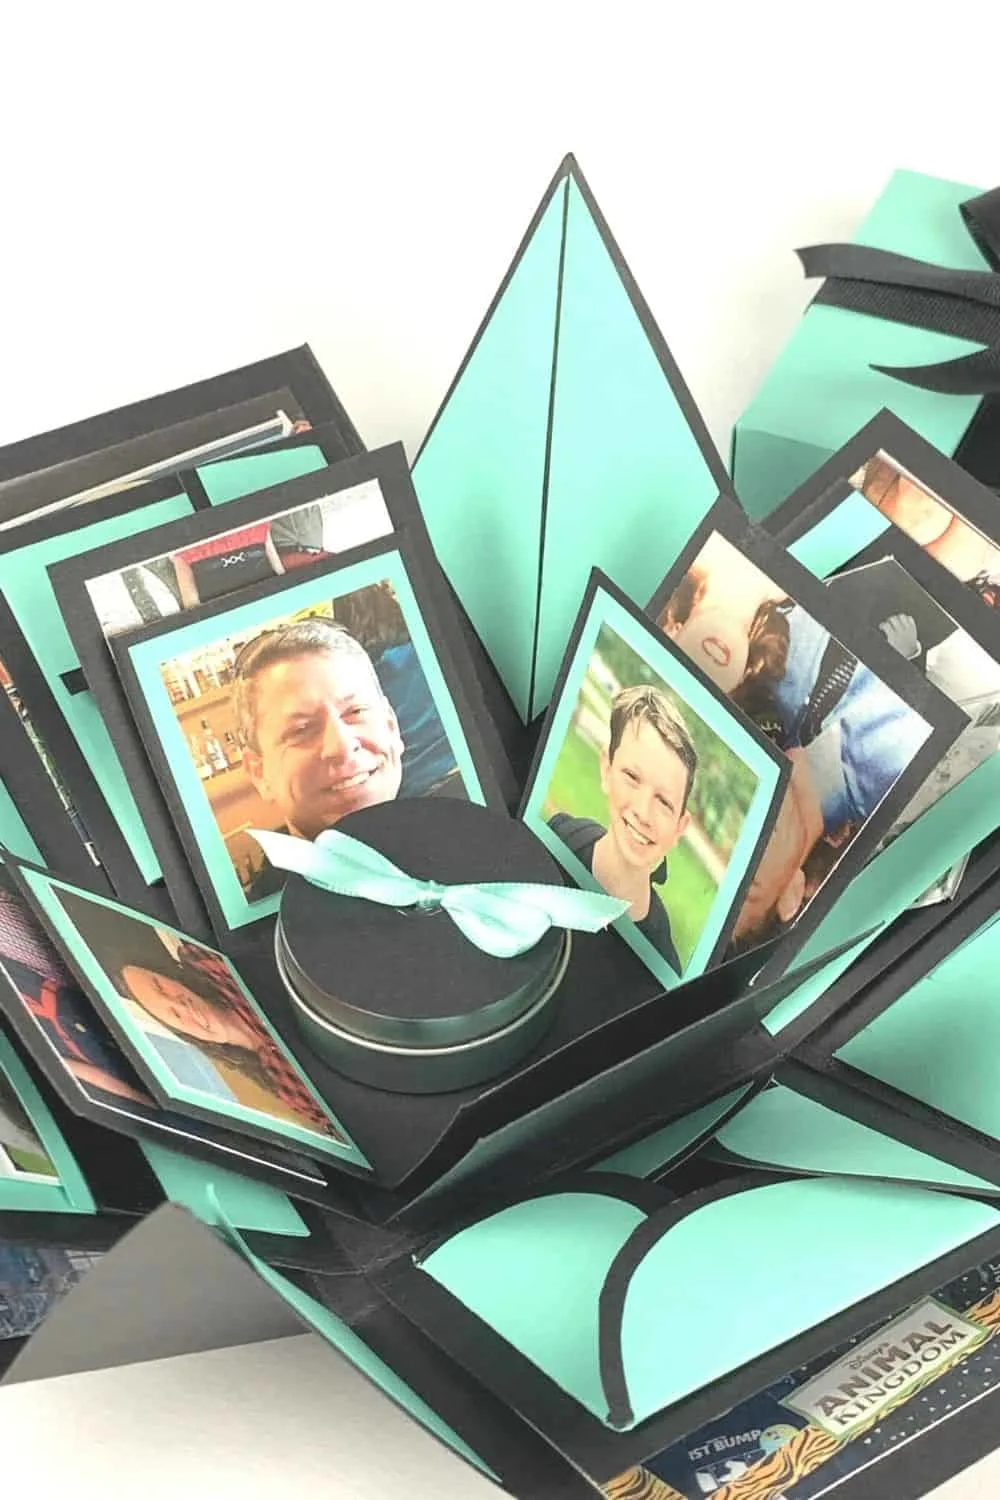
After I’d decorated all the panels of my explosion box, I placed a small tin from the dollar store decorated with a little bow right in the middle to be used for a small gift. I’ve also used tiny bottles and other cool items in the center, but this time I wanted to keep it simple.
Making The Top
The final step for your explosion box is to make the top. This part can be a little tricky because your measurements need to be exact.
For my top, I cut a 7 inch x 7 inch square and then fold it 1 & 3/8ths (one and three eighths) of an inch in on each side.
Lucky for you, I made a printable for you to use! You can just print it directly on to an 8.5 x 11 inch piece of card stock and fold accordingly.
You can download the printable by clicking the link below:
For the sides, just use the same folding technique as the bigger box, just glue the folds to the side instead of trimming them.
I decorated the top of my explode box with some ribbon and a nice simple bow.
And now you have your finished explosion box! Don’t you love it!!!??? I would love to see your versions! Share them on my facebook page!
Here’s a FREE, condensed, printable version of this tutorial!
Explosion Box DIY Instructions

Make this one of a kind DIY Explosion box using just a few simple materials.
Materials
- Several sheet of 12 x 12 cardstock
- Complimentary scrapbook paper
- Pictures
- Decorations (I used ribbons and tin boxes, but you could use paper flowers, small bottles, whatever you like)
Tools
- Scissors
- A glue stick
- A paper cutter (optional)
- A scoring tool (optional)
Instructions
- Fold one piece of 12x12 inch cardstock in 4 inch increments, creating nine 4 x 4 inch squares.
- Bring the edges of the folded corners together to create a triangle. Do this on each corner.
- Trim triangles to desired shapes (hearts, start points, etc.)
- Make several smaller versions of this shape with the ratio of 3:1 measurements (i.e. 12 x12 inch paper with nine 4x4 inch boxes, 9x9 inch paper with nine 3x3 inch boxes, etc.)
- For each smaller box, cut off the corner squares, creating a plus shape.
- Nest each layer inside each other, gluing together between layers.
- Decorate as desired.
- Make top from the printable on the original post (https://chaoticallyyours.com/explosion-box/)
- Fold top according to instructions and glue side folds to the inside.
- Decorate top.
- Pull up the sides of the box and place the lid on top.
How To Make An Explosion Box
Abigail Davis
Wednesday 11th of September 2024
What were the sizes for the pictures you added to each layer?
Louise Emery
Wednesday 11th of September 2024
I wanted a 1/4 inch border around each picture, so I made them square, about a half inch smaller on each side than the flap of the I was placing it on. So for the outside, they were 3.5x3.5. For Layer 2, they were 3x3. For Layer 3 they were 2.5x2.5 and for Layer 4 they were 2x2. Hope that helps.
Amie
Sunday 11th of February 2024
Hi, I just found this article when searching for how to make a box like this, and it is so helpful! I just have a question - what is the weight of the paper you used? Thank you so much, I love this idea!
Louise Emery
Friday 16th of February 2024
Honestly, I don't know. It was standard paper and cardstock that you can find at any store.
Katie
Friday 7th of April 2023
What size were the photo prints you used for the hexaflexagon.
Louise Emery
Monday 10th of April 2023
I measured the space when I was finished making the Hexaflexagon. I can't recall the exact size.
Karen
Monday 20th of February 2023
Amazing can't wait to.make some. Very excited!
Maria
Sunday 27th of November 2022
Hello! Thank you so much for this tutorial. I just confused with the lid part. On the instructions you are making a 7x7 sheet with a fold at 1 3/8ths. However, on your printable its measuing to be 6 3/8ths and the folds at 1 inch. Both measurments are off. Just wanted to let you know, I just had to make an adjustment.
Louise Emery
Monday 28th of November 2022
Thank you! I'll look into it. Sometimes a printable may not print at 100% from your home computer. I'll double check the size.